
Sprinter Build - Roof Rack Lights
Roof lights are a nice to have not a must have for a van. I think many people can get away without having these which saves on cost and certainly simplifies the build. Since most of our camping requires some off-road, and often times we are rolling into the area at night, we felt it would be beneficial to have more driving lights.
We had the foresight to add some electrical wires up through the roof when the interior was torn apart. We added one wire set up front for a light bar, one wire set near the back for area lights, and one wire set for solar panel hookups. In hindsight we wish we had installed a wire port near the back that would allow us to easily run more wires up to the roof for future needs. There is a natural place to do this near the rear doors where you can run wires up the door jams to access a pass through you can install.
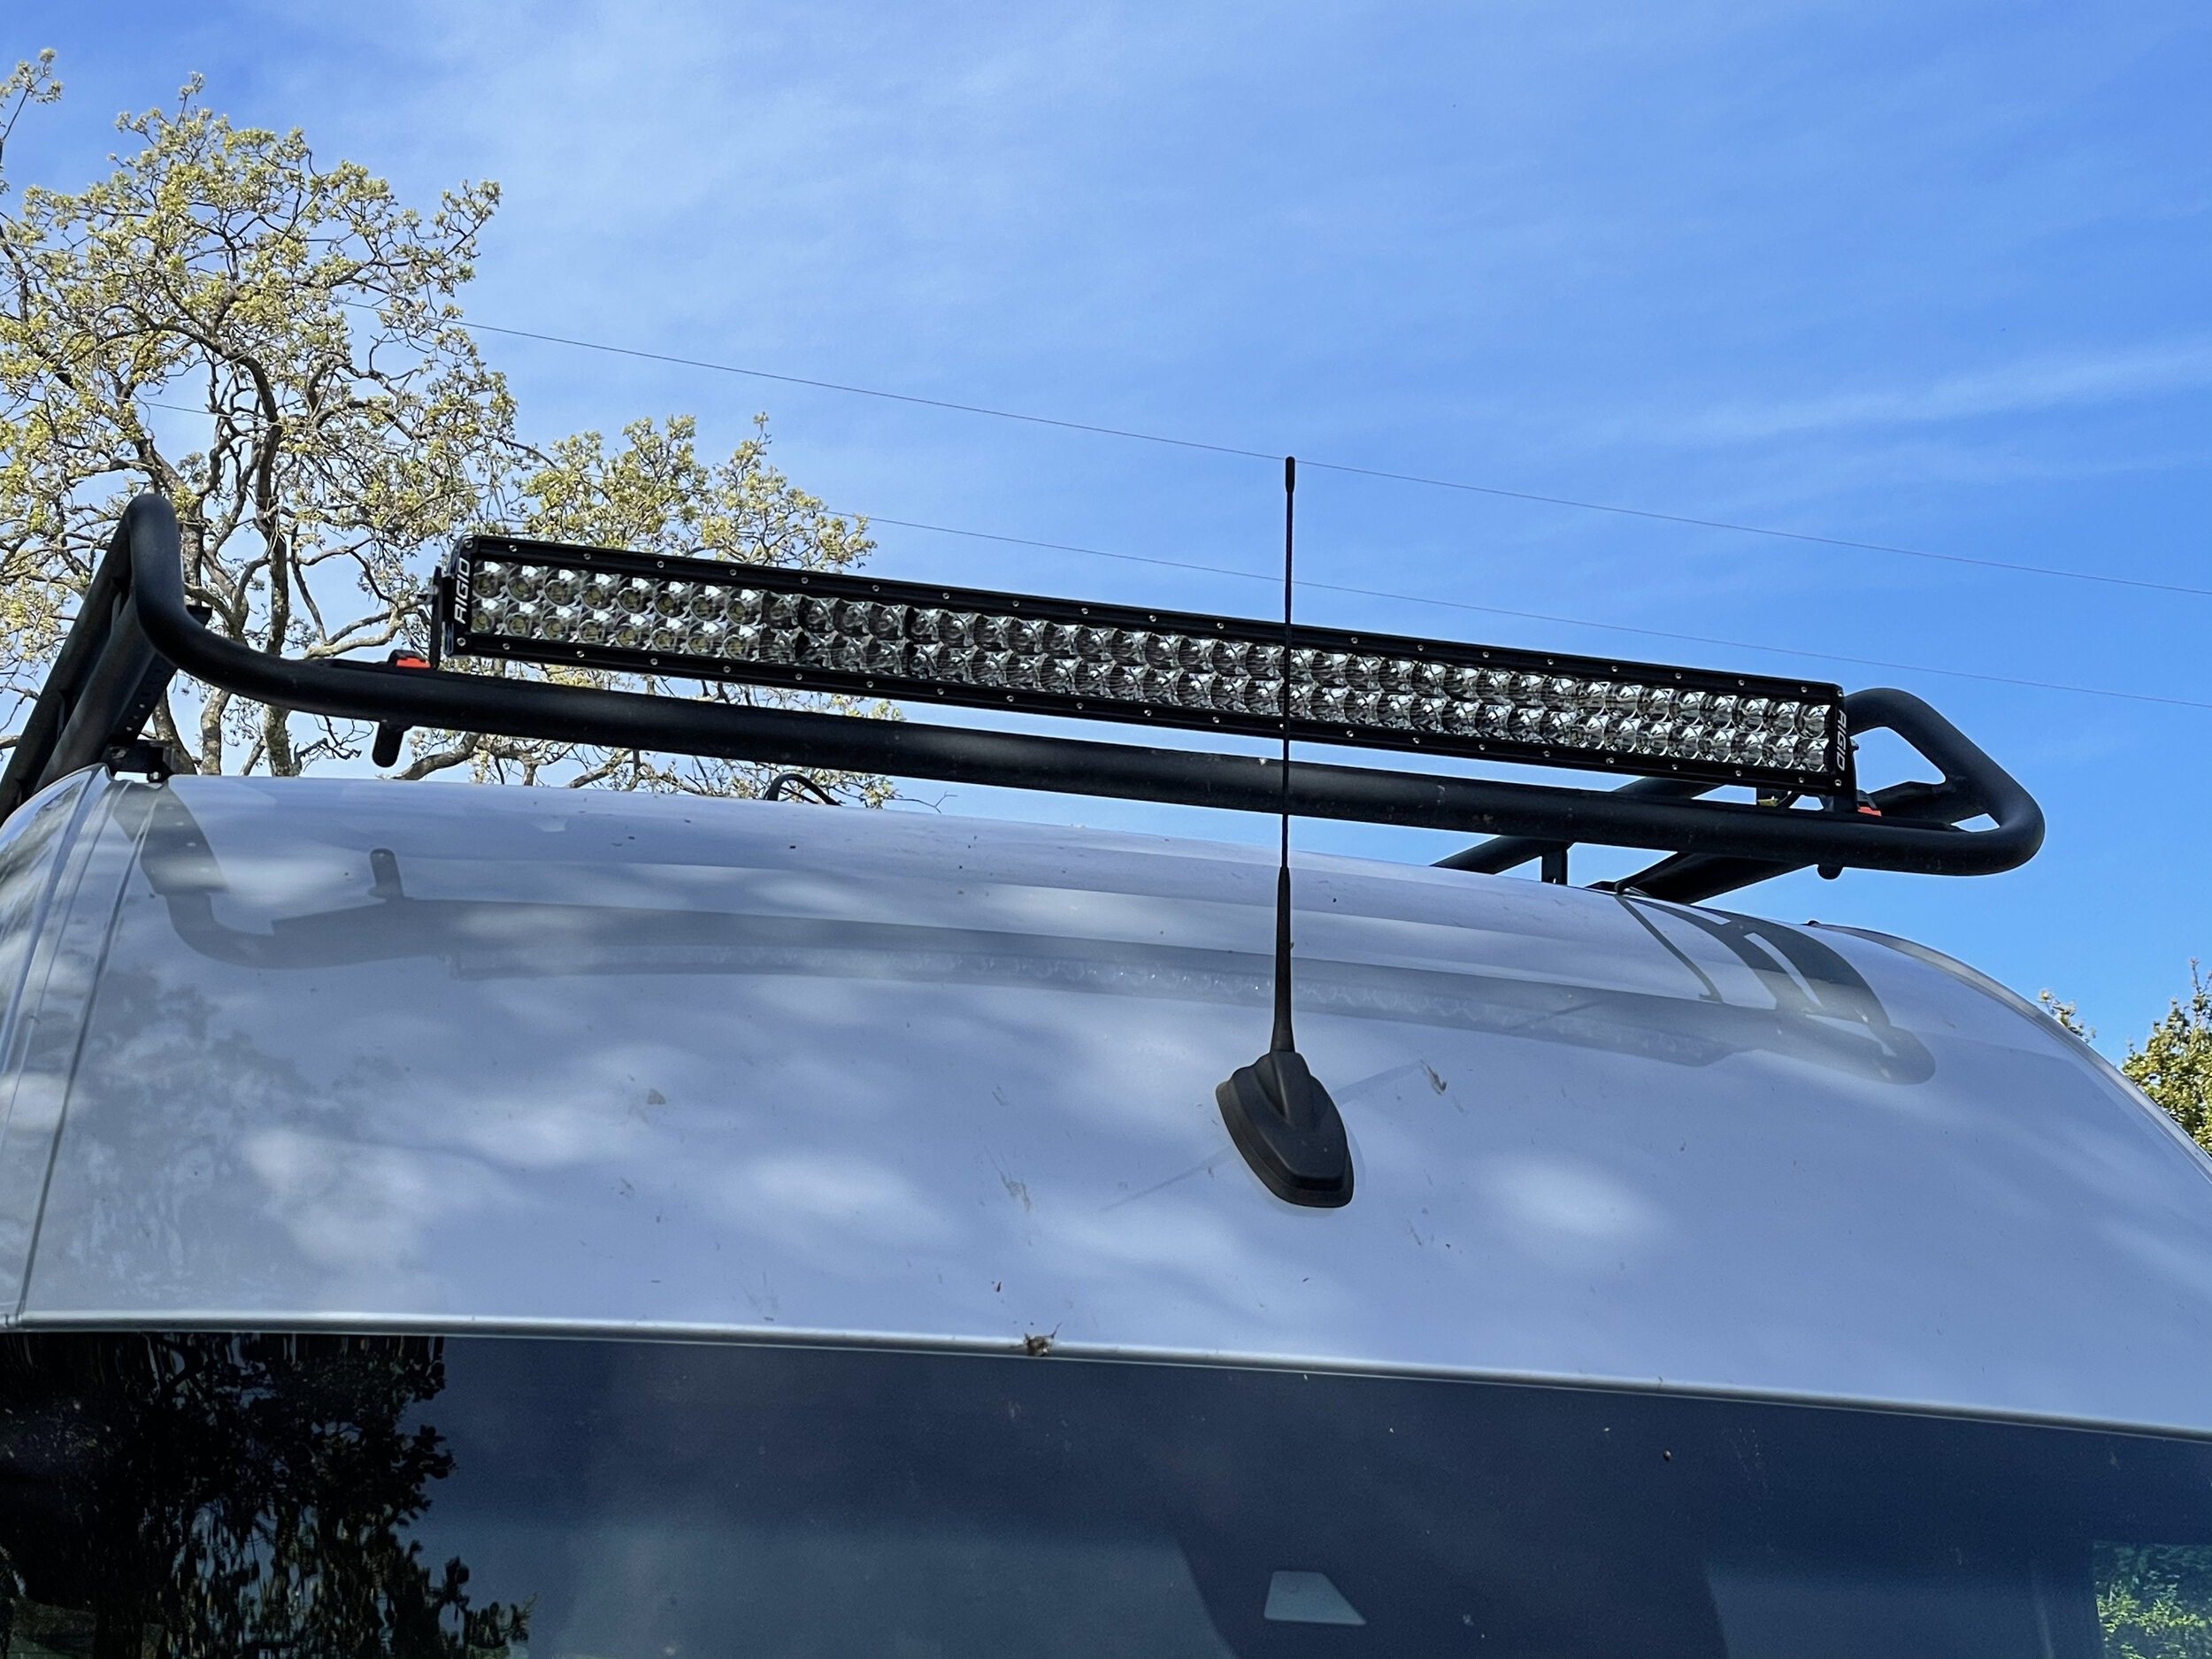
So with the wiring in place (one set up front and one set in the rear) we installed a light bar in the front and a series of light pods as area lights. There are a ton of options out there ranging from cheap Amazon LED lights from no name companies to extremely expensive lights from companies like Baja Design. We decided to go with a well known name that builds high quality LED lights with a modest amp draw. We also needed to find lights that had a clean look and would easily mount to our roof rack. That led us to Rigid Industries.
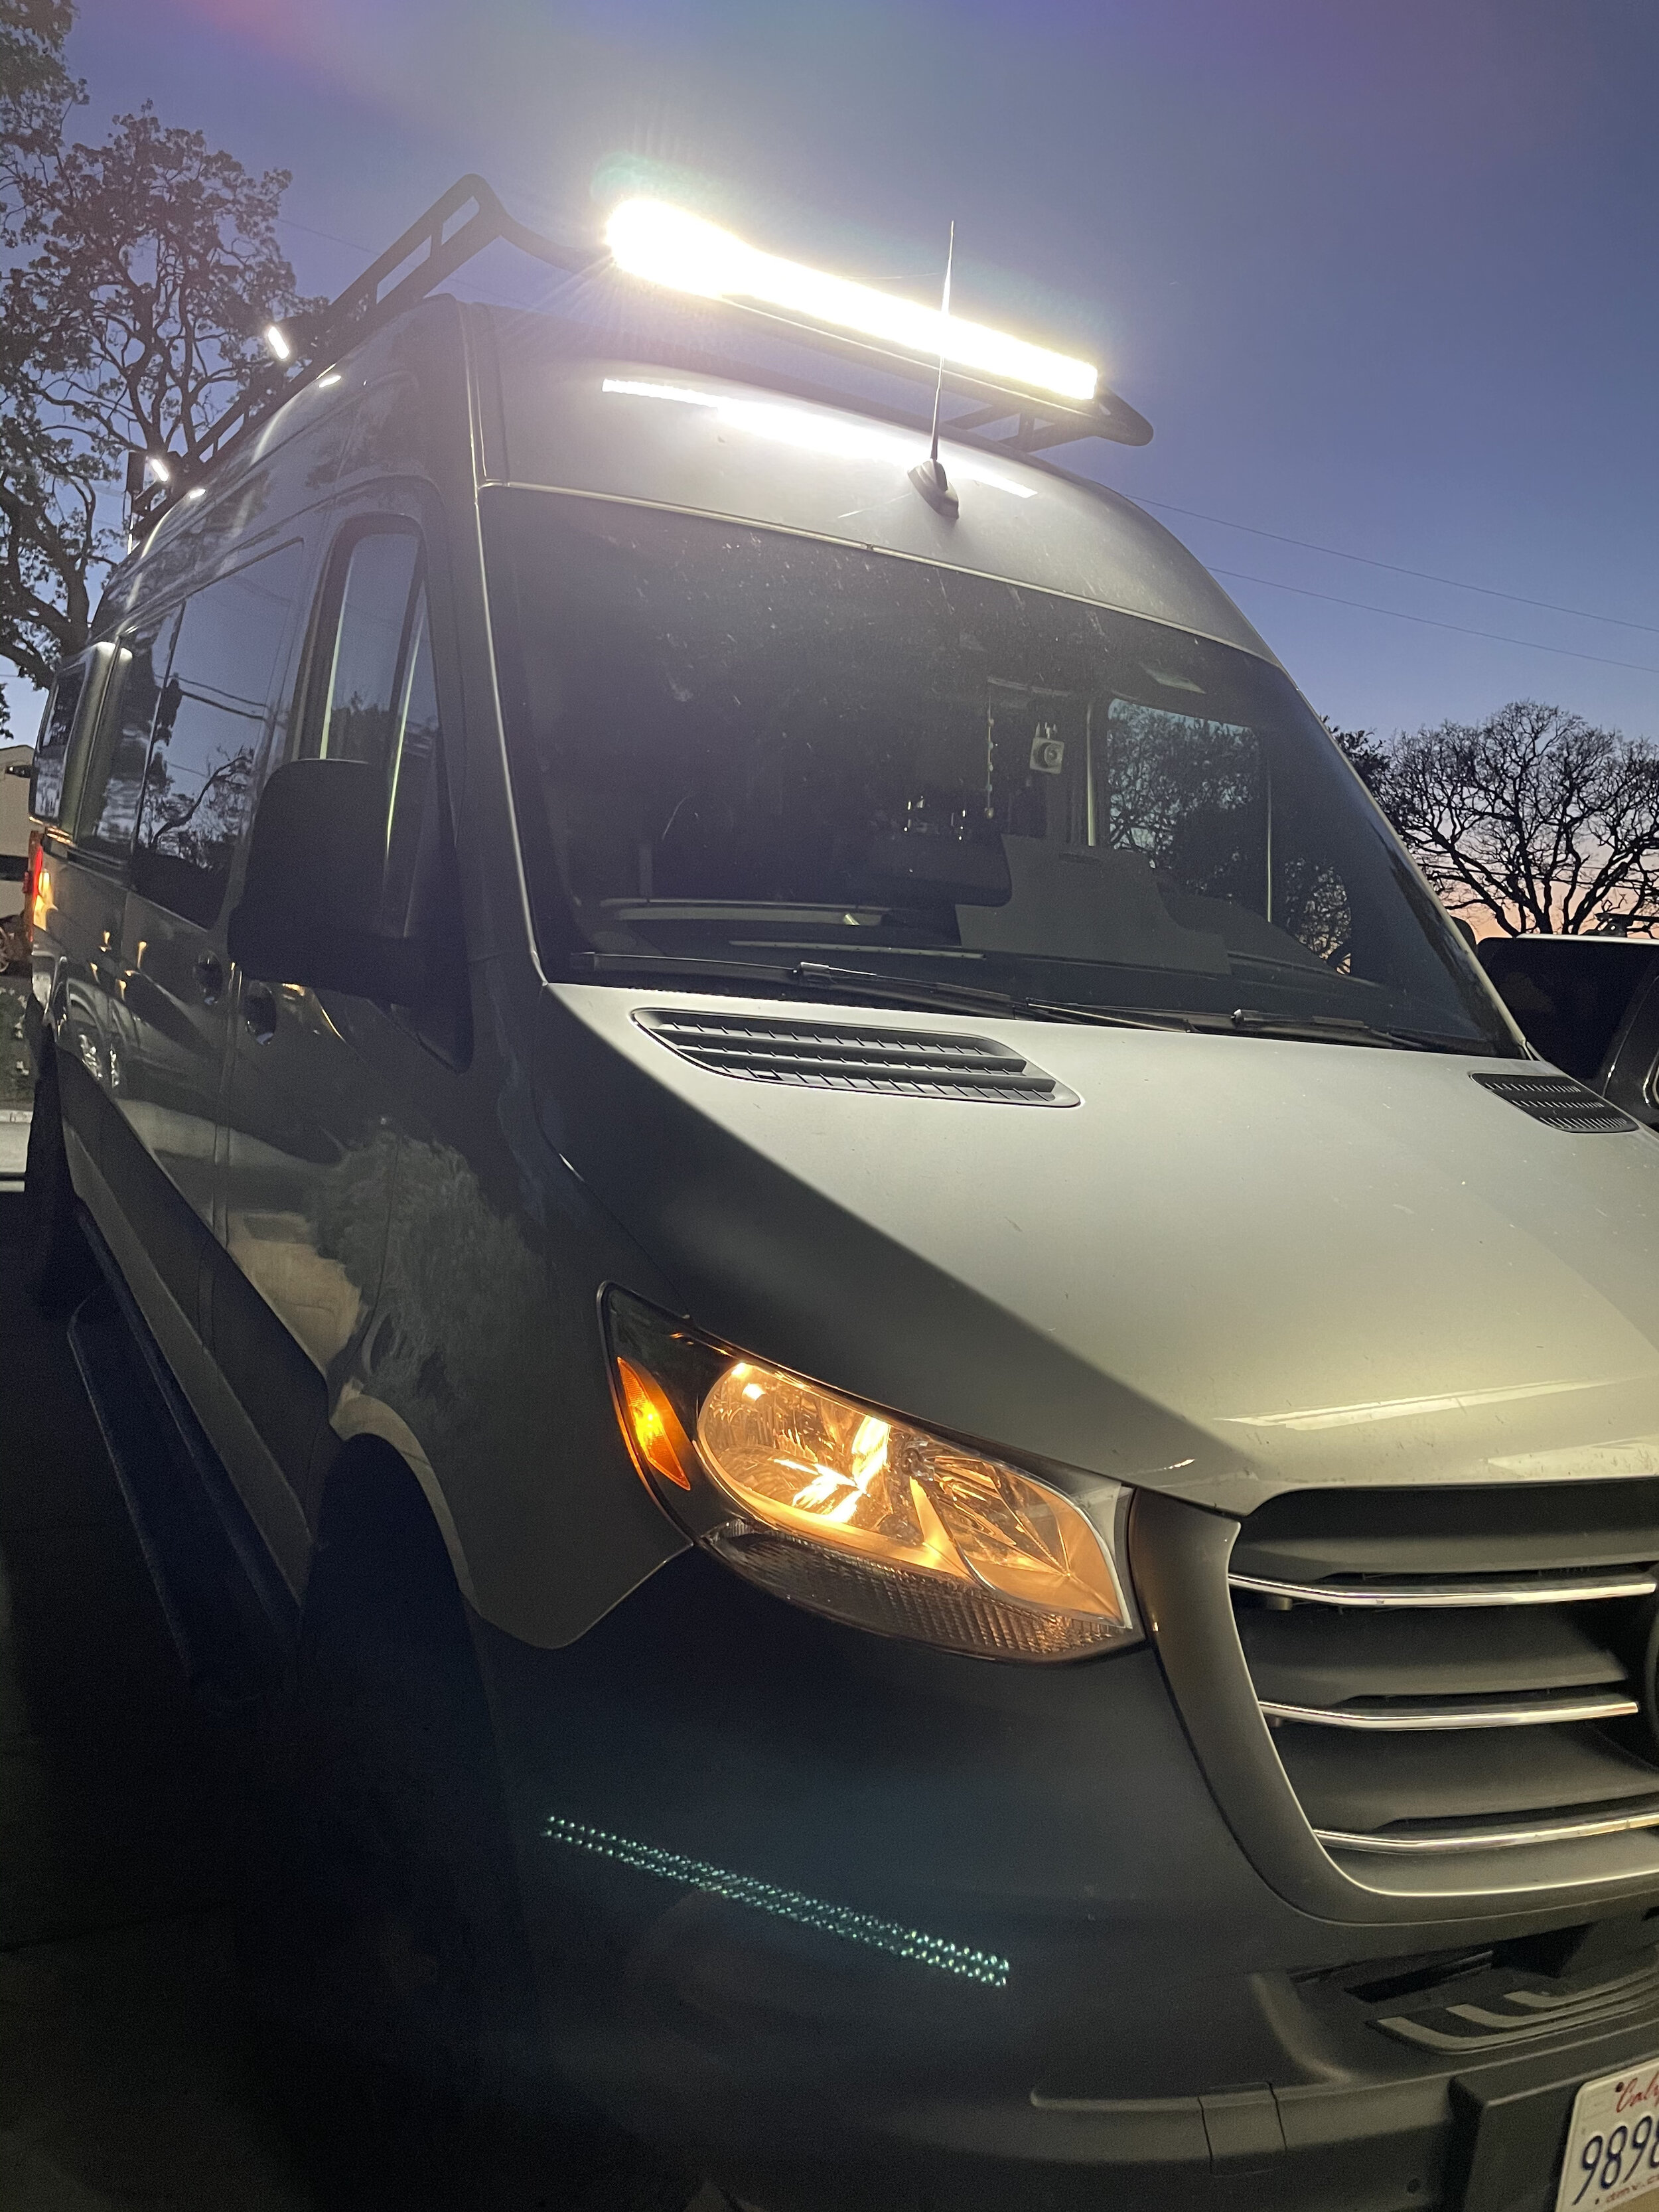
For the light bar we went with Rigid’s E-Series Pro, 40”, dual LED row, spot/flood combo. My only complaint on the fit is that I have about 4” on each side of empty space, but the next size up from Rigid is 50” which likely would not have fit. This issue is caused by the roof rack we picked. I think most Sprinter roof racks would fit a 50” light bars, just not mine. This light bar configuration has the following specs: 21 amp draw, 299 watts, max voltage 36, 35680 raw lumens. So it is crazy bright but has a low draw. Most light bars have an amp draw of over 30 which is fine but as you will see this was something I wanted to avoid due to the switch setup I picked (see below).
For the light pods we picked the Rigid D-Series Pro diffused flood. These are 3”x3” cubes that offer a diffused wide area of light which is a good option for area lights. Area lights are meant to light up the sides and rear of the van when navigating dirt roads at night or setting up camp in the dark. Given the size of the van we bought 6 pods (2 on each side and 2 in the back). These pods have the following specs: 2.14 amp draw each, 30 watts each, max voltage 36, 3168 raw lumens each (total amp draw = 12.84).
Now comes the hard part, wiring them up. While wiring lights is not hard conceptually it takes a lot of time and often requires pulling apart many panels of the vehicle. This is especially true if you are installing the light switches on the dash. For this reason we decided to get a Trigger wireless controller. This is a central light controller that you connect to the battery and then all the lights wire back to the Trigger. The Trigger has RF and Bluetooth built-in so you can control the lights with your smartphone using an app or you can mount an RF switch panel that will wirelessly allow you to control the lights. We bought the 4 switch Trigger which works for our needs but in hindsight I wish we had bought the 6 switch version. Not only does the 6 switch version offer you 2 more switches but it has some nice features that don’t come with the 4 switch version. Keep in mind the Trigger can be used to control more than lights. You can wire up an air compressor, winch, or just about anything. The Trigger has solid state relays built-in and it has a dedicated fuse for each switch. This is why I wanted low amp draw lights. With the Trigger 4 you get two switches each with a 30 amp fuse and two switches each with a 10 amp fuse. If you keep each circuit within spec for the Trigger you can ditch the fuses and relays that came with the lights and simply wire directly to the Trigger. If your circuit requires more amp draw than what the Trigger offers you can install a relay between the Trigger and the light but that requires more wiring. So my goal was to keep each circuit within the fuse rating of the Trigger. Mission accomplished.
I wired the Trigger to the van battery so that I would not risk drawing down the house battery system. I mounted the Trigger under the driver seat so I could easily access the ignition control wire and the van’s battery compartment (which is in the floor panel of the driver). While I had everything torn apart I installed a van battery power distribution block (positive and negative) in the van battery compartment so that in the future I could easily wire other devices. In hindsight I should have also installed a power distribution block in the engine bay to make it easy to wire a winch and grille lights in the future. So I will do that in the coming months as prep for those mods.
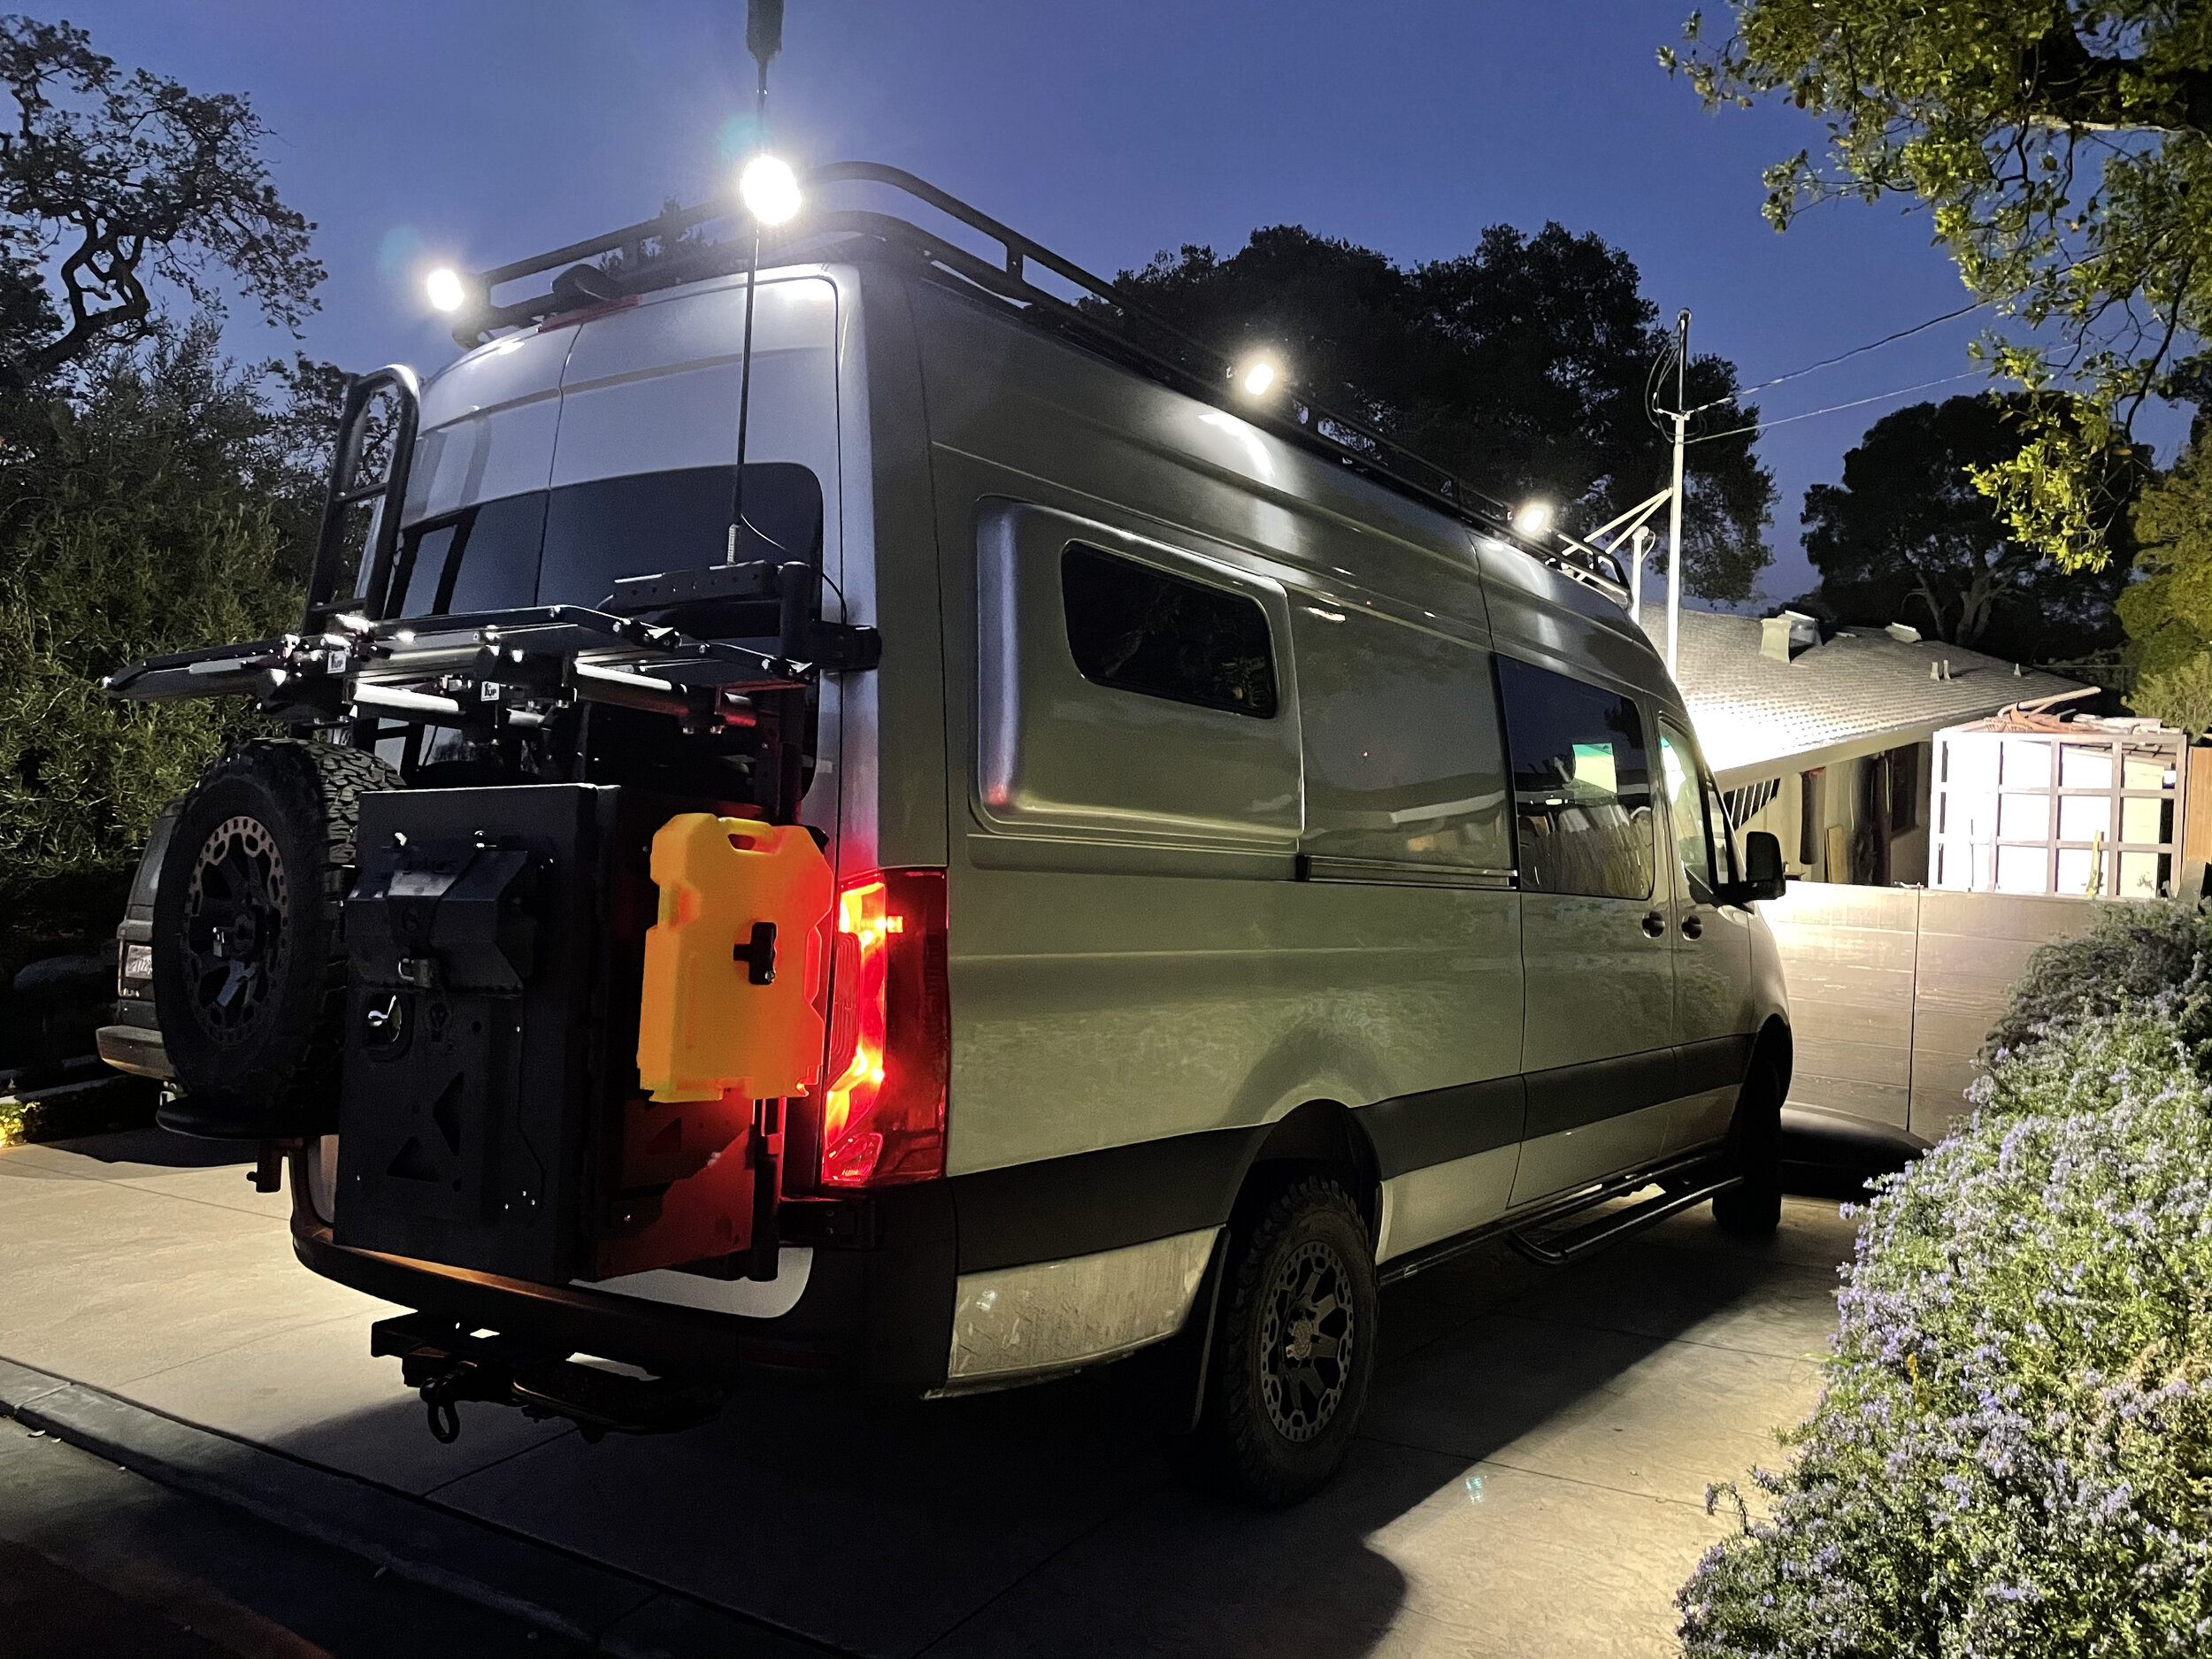
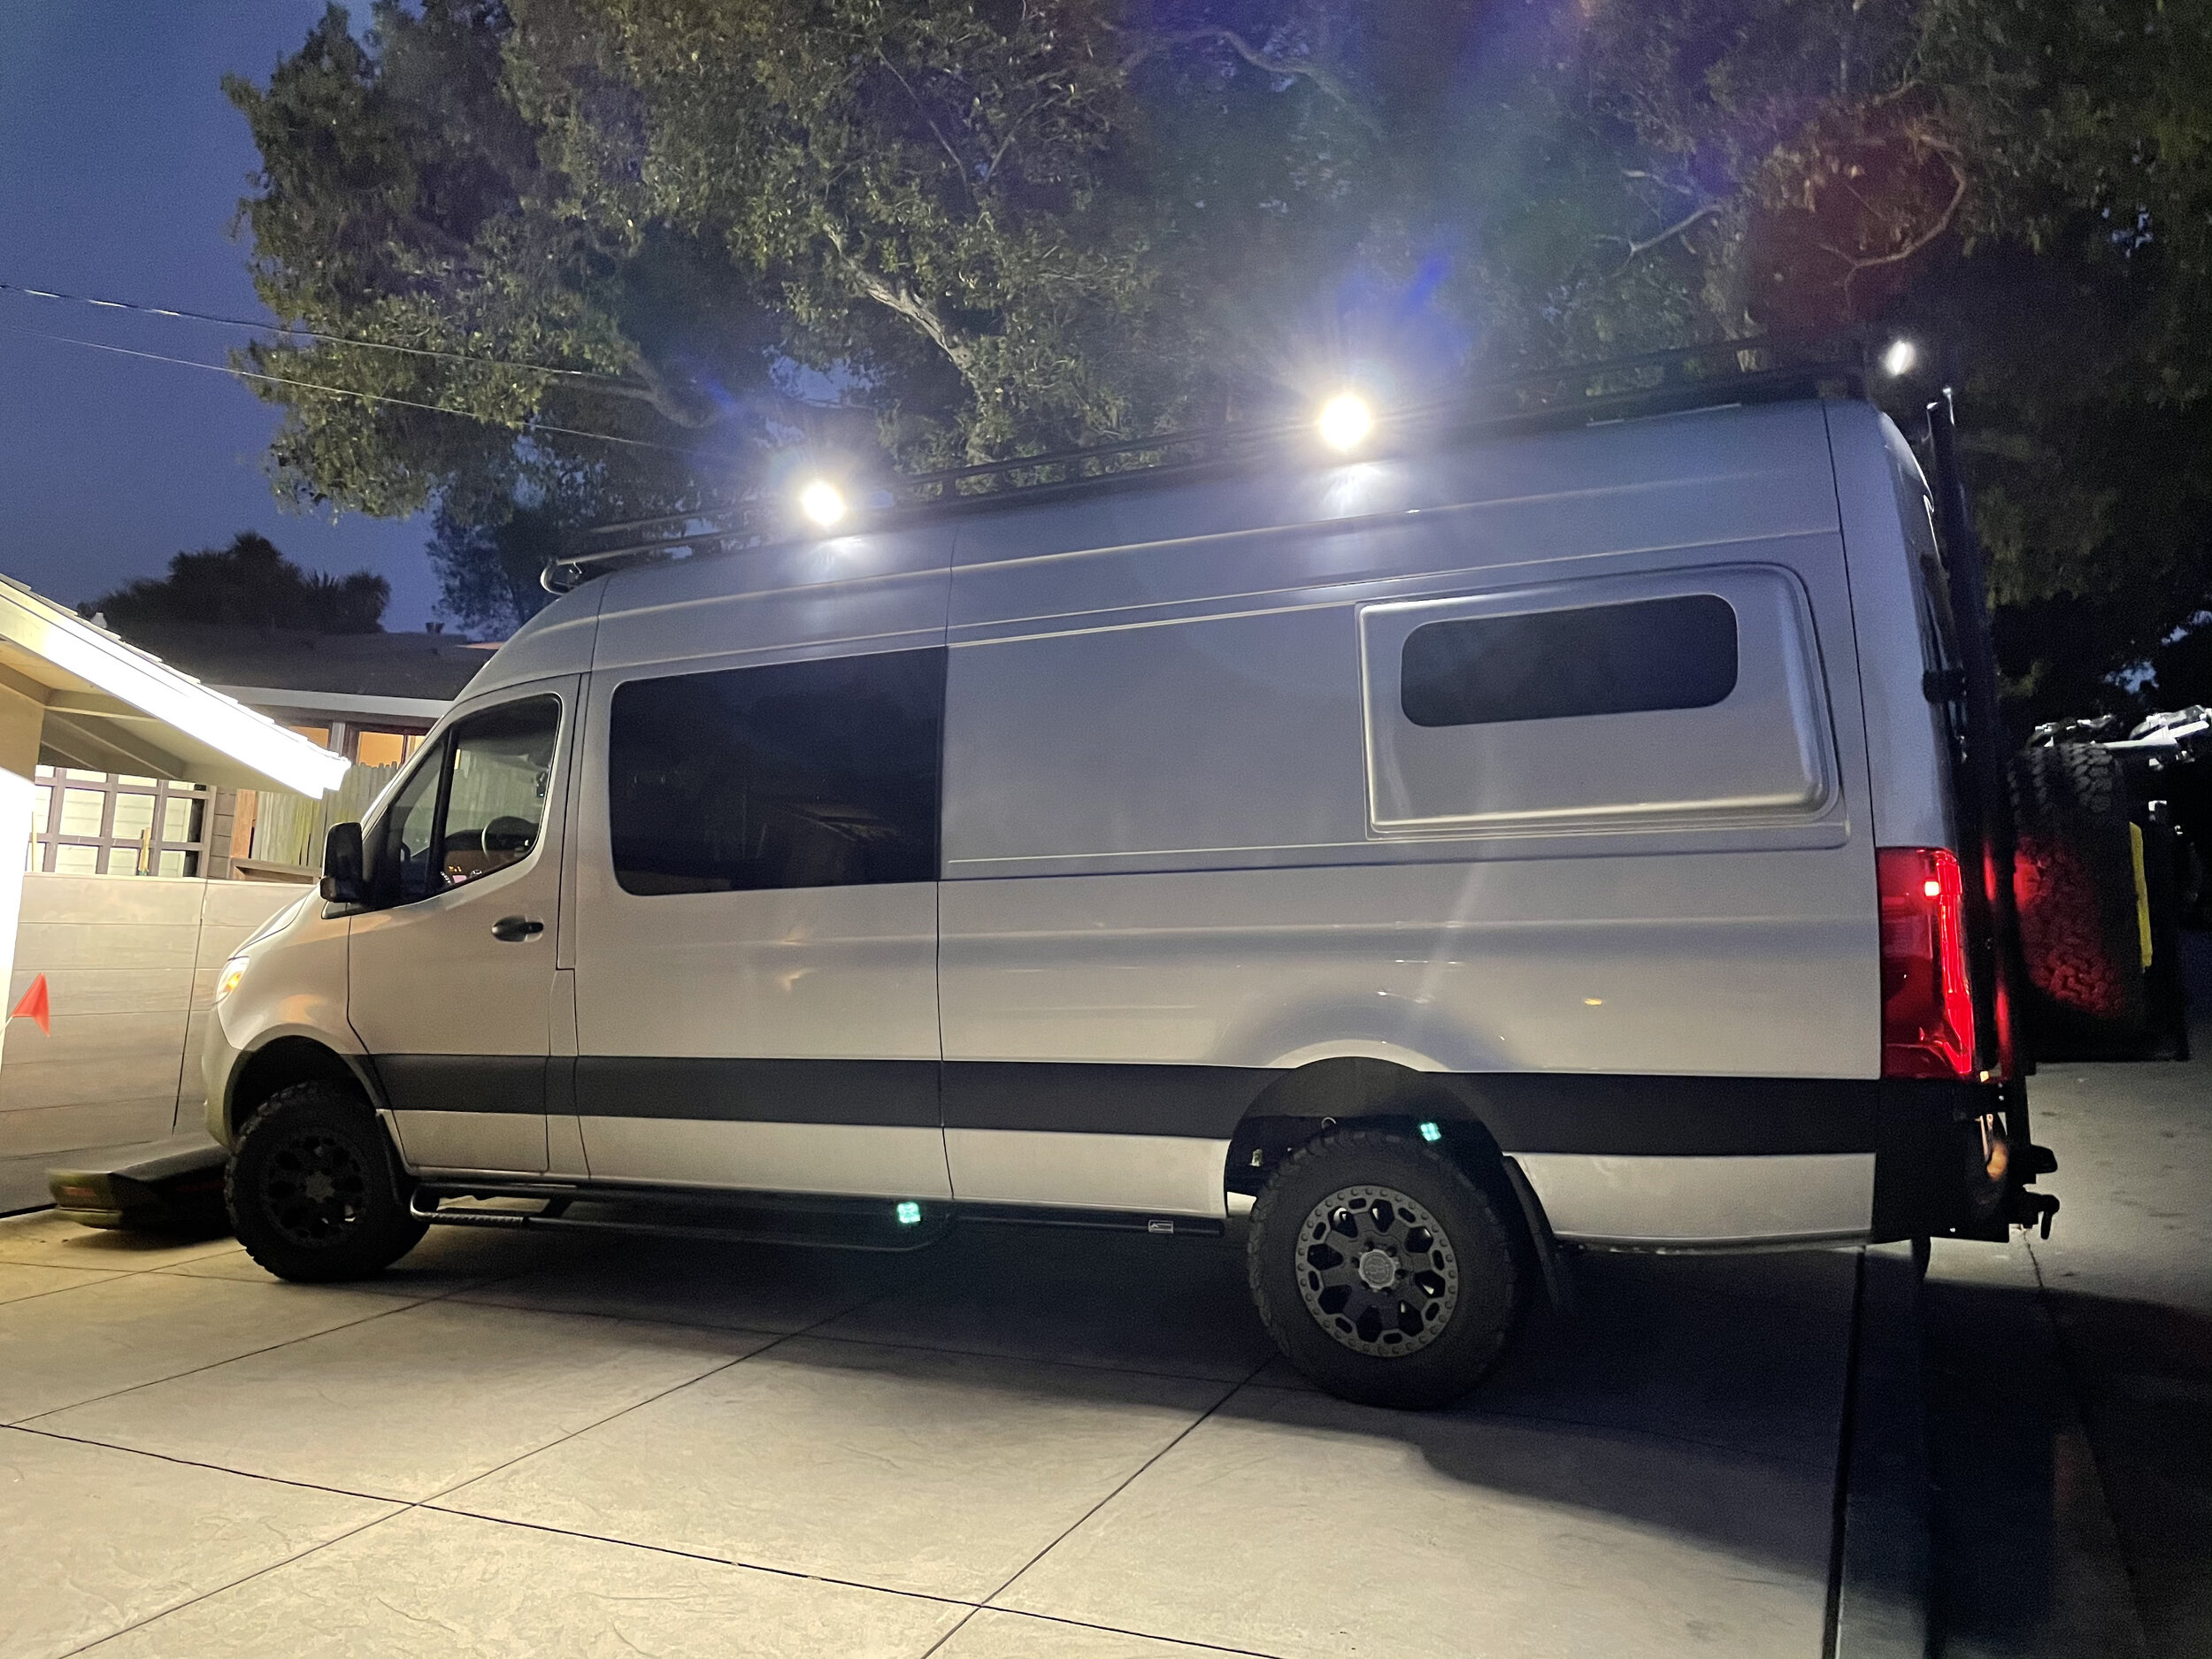
I am very happy with the results. The light bar is extremely bright but the Trigger allows me to dim it down as needed. The light bar gives off a wide light range due to the flood lenses but also some good distance with the spot lenses. The pod lights offer a good amount of soft diffused light all around the van making setting up camp or navigating dirt roads a snap. And if that wasn’t enough I still plan on installing two Baja Design LP9 amber driving lights on the grille (more on that later).