GT4 build Winston Crawford 12/19/24 GT4 build Winston Crawford 12/19/24 GT4 Build - Front Axle Lift Kit Read More GT4 build Winston Crawford 12/18/24 GT4 build Winston Crawford 12/18/24 GT4 Build - Street Wheels and Tires Read More GT4 build Winston Crawford 12/22/23 GT4 build Winston Crawford 12/22/23 GT4 Build - LWBS Mods Read More GT4 build Winston Crawford 12/16/23 GT4 build Winston Crawford 12/16/23 GT4 Build - Phone and Catalyst Mount Read More GT4 build Winston Crawford 11/11/23 GT4 build Winston Crawford 11/11/23 GT4 Build - Track Ready Brakes Read More GT4 build Winston Crawford 10/8/23 GT4 build Winston Crawford 10/8/23 GT4 Build - Garmin Catalyst Read More GT4 build Winston Crawford 10/8/23 GT4 build Winston Crawford 10/8/23 GT4 Build - Tow straps Read More GT4 build Winston Crawford 7/23/23 GT4 build Winston Crawford 7/23/23 GT4 Build - Suspension Upgrades Read More GT4 build Winston Crawford 5/21/23 GT4 build Winston Crawford 5/21/23 GT4 Build - Racing harness Read More GT4 build Winston Crawford 5/21/23 GT4 build Winston Crawford 5/21/23 GT4 Build - Fire extinguisher Read More GT4 build Winston Crawford 5/21/23 GT4 build Winston Crawford 5/21/23 GT4 Build - Electrical hookup Read More GT4 build Winston Crawford 4/2/23 GT4 build Winston Crawford 4/2/23 GT4 Build - Half Cage Read More GT4 build Winston Crawford 4/2/23 GT4 build Winston Crawford 4/2/23 GT4 Build - Track Wheels and Tires Read More GT4 build Winston Crawford 3/4/23 GT4 build Winston Crawford 3/4/23 GT4 Build - Cleaning Past Sins Read More GT4 build Winston Crawford 3/4/23 GT4 build Winston Crawford 3/4/23 GT4 Build - PPF Read More
GT4 build Winston Crawford 12/19/24 GT4 build Winston Crawford 12/19/24 GT4 Build - Front Axle Lift Kit Read More
GT4 build Winston Crawford 12/18/24 GT4 build Winston Crawford 12/18/24 GT4 Build - Street Wheels and Tires Read More
GT4 build Winston Crawford 12/22/23 GT4 build Winston Crawford 12/22/23 GT4 Build - LWBS Mods Read More
GT4 build Winston Crawford 12/16/23 GT4 build Winston Crawford 12/16/23 GT4 Build - Phone and Catalyst Mount Read More
GT4 build Winston Crawford 11/11/23 GT4 build Winston Crawford 11/11/23 GT4 Build - Track Ready Brakes Read More
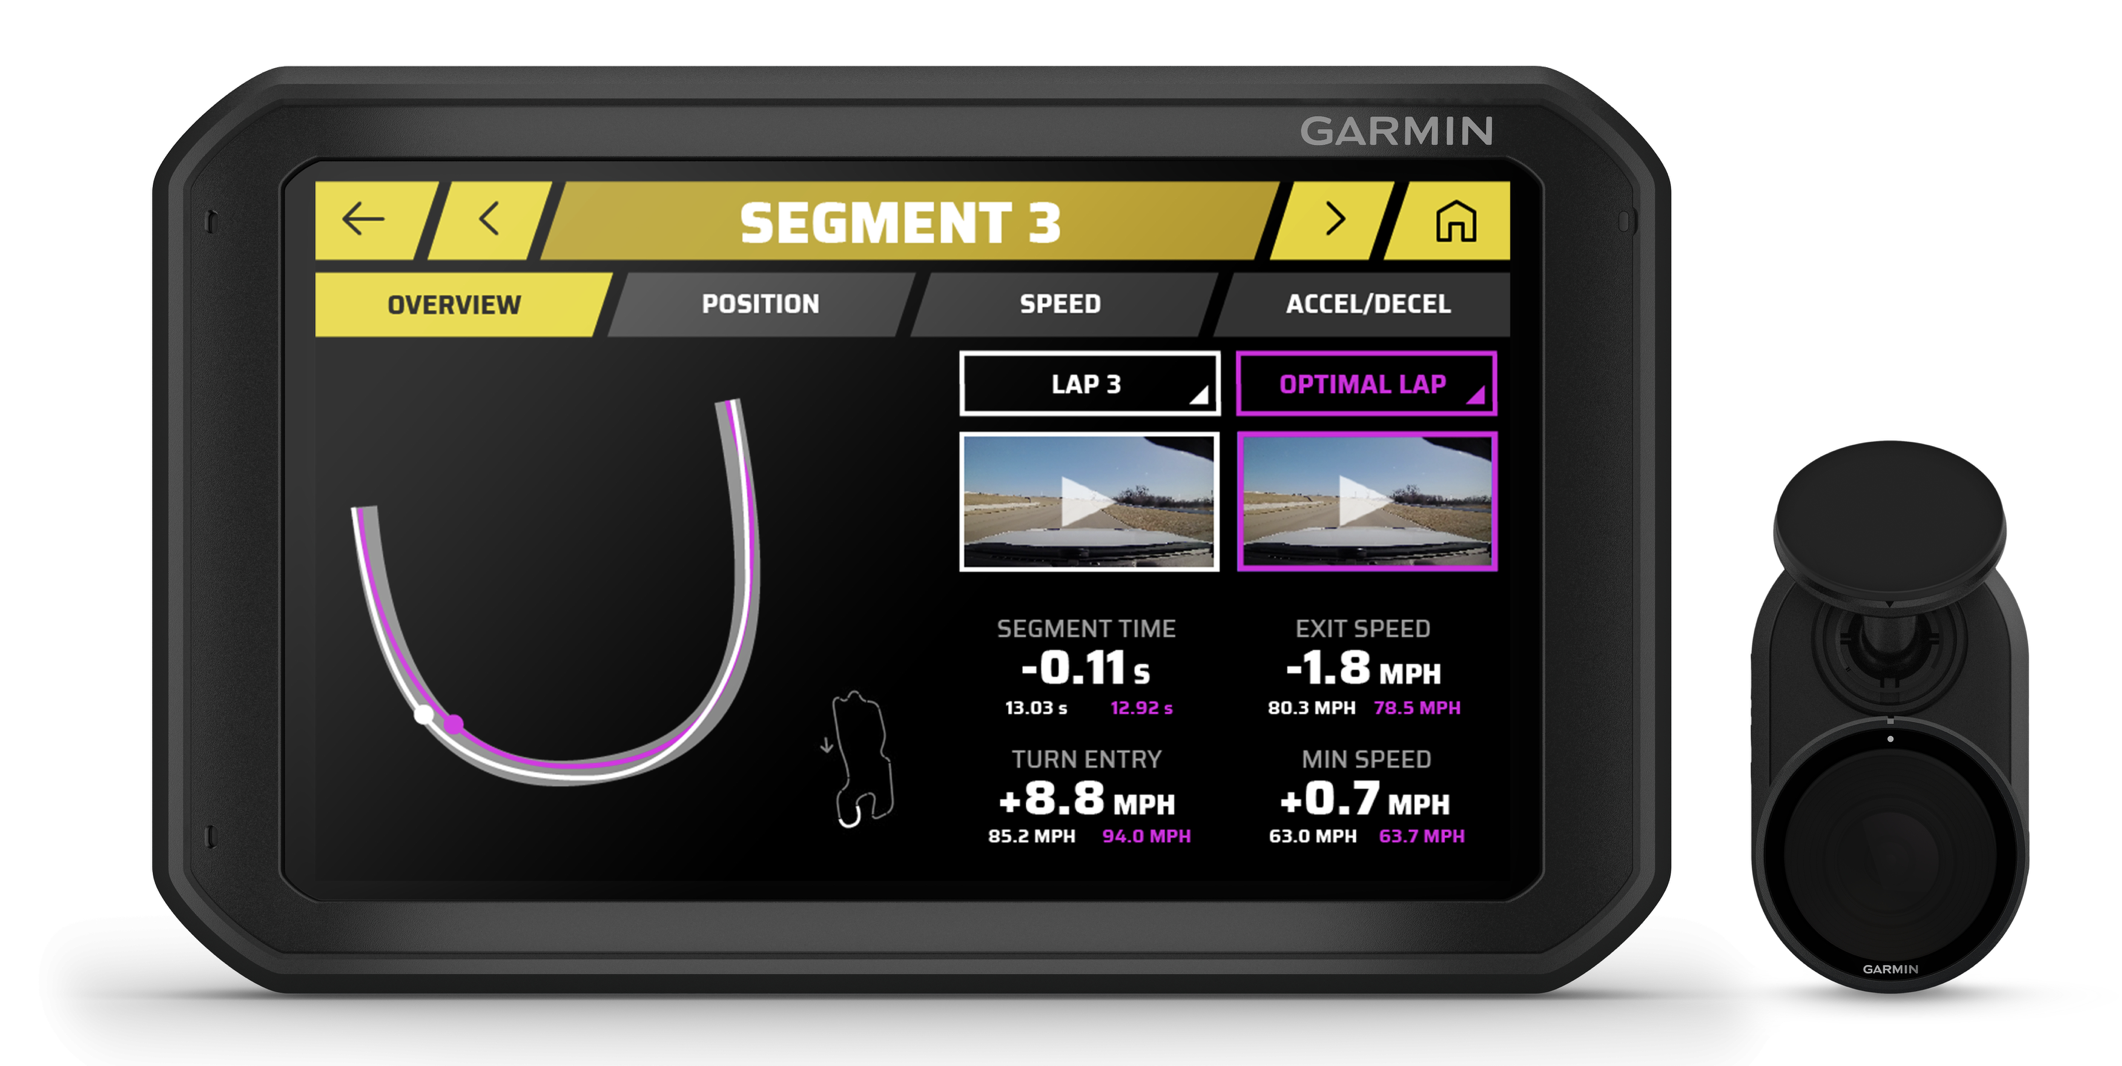
GT4 build Winston Crawford 10/8/23 GT4 build Winston Crawford 10/8/23 GT4 Build - Garmin Catalyst Read More
GT4 build Winston Crawford 10/8/23 GT4 build Winston Crawford 10/8/23 GT4 Build - Tow straps Read More
GT4 build Winston Crawford 7/23/23 GT4 build Winston Crawford 7/23/23 GT4 Build - Suspension Upgrades Read More
GT4 build Winston Crawford 5/21/23 GT4 build Winston Crawford 5/21/23 GT4 Build - Racing harness Read More
GT4 build Winston Crawford 5/21/23 GT4 build Winston Crawford 5/21/23 GT4 Build - Fire extinguisher Read More
GT4 build Winston Crawford 5/21/23 GT4 build Winston Crawford 5/21/23 GT4 Build - Electrical hookup Read More
GT4 build Winston Crawford 4/2/23 GT4 build Winston Crawford 4/2/23 GT4 Build - Track Wheels and Tires Read More
GT4 build Winston Crawford 3/4/23 GT4 build Winston Crawford 3/4/23 GT4 Build - Cleaning Past Sins Read More