Sprinter Build - Water and Electrical Cabinets

There are so many configuration options out there, but once you decide to make a van that can comfortably sleep 4 people in 4 seasons your configuration options quickly shrink. One of the biggest choices you need to make is how comfortable are you trying to make the van, what are your water and electrical needs, and how to make your water and electrical needs fit with your sleeping needs. For us it was important that we could take our van anywhere at any time of the year. That meant we wanted the water tanks and water lines all inside the van to reduce the risk of freezing (we have a dedicated cabin heater). We also needed enough water for four people for multiple days. We also wanted the ability to take a shower, have a small fridge, hot and cold running water, and basic cooking. We needed enough electrical capacity to run our gear without shore power or a generator. And lastly all this needed to still allow a family of 4 to sleep comfortably, give us room for gear, and accommodate the Adventure Wagon interior kit and Flarespace pods.
After many hours of research I came across Truckee, CA based Trails Kitchens. Hans and his team hand build a variety of kitchen pods for Jeeps, trucks, and vans. Some of these are removable and some are permanent. They have configurations to accommodate fridges, sinks, water tanks, showers, electrical cabinets, stoves, you name it. All of their stuff is built using aluminum framing and then they finish off the units with aluminum or bamboo panels. They look great, they function well, and they are thoughtfully designed. Because Hans is an electrical engineer he has designed fully contained electrical cabinets with the latest electrical components. Once I saw the options Trails Kitchens offers I knew it was the way to go for our build.
So here is what I ordered. Driver side wheel well cabinet that houses all the water elements, a driver side sink and fridge galley, and a passenger side wheel well cabinet that houses all the electrical components. I also ordered a bed panel that spans across the wheel well cabinets to form the main bed. This lines up perfectly with the Flarespace pods. The bed panels are removable so that you can take the bed out and use the van for hauling. We are in the process of converting the bed panels to be mounted on a hinge versus bolts like they are today. This will allow an even quicker conversion from hauling van to camper van, but that will be a future post. For now let’s dig into the water and electrical system details.
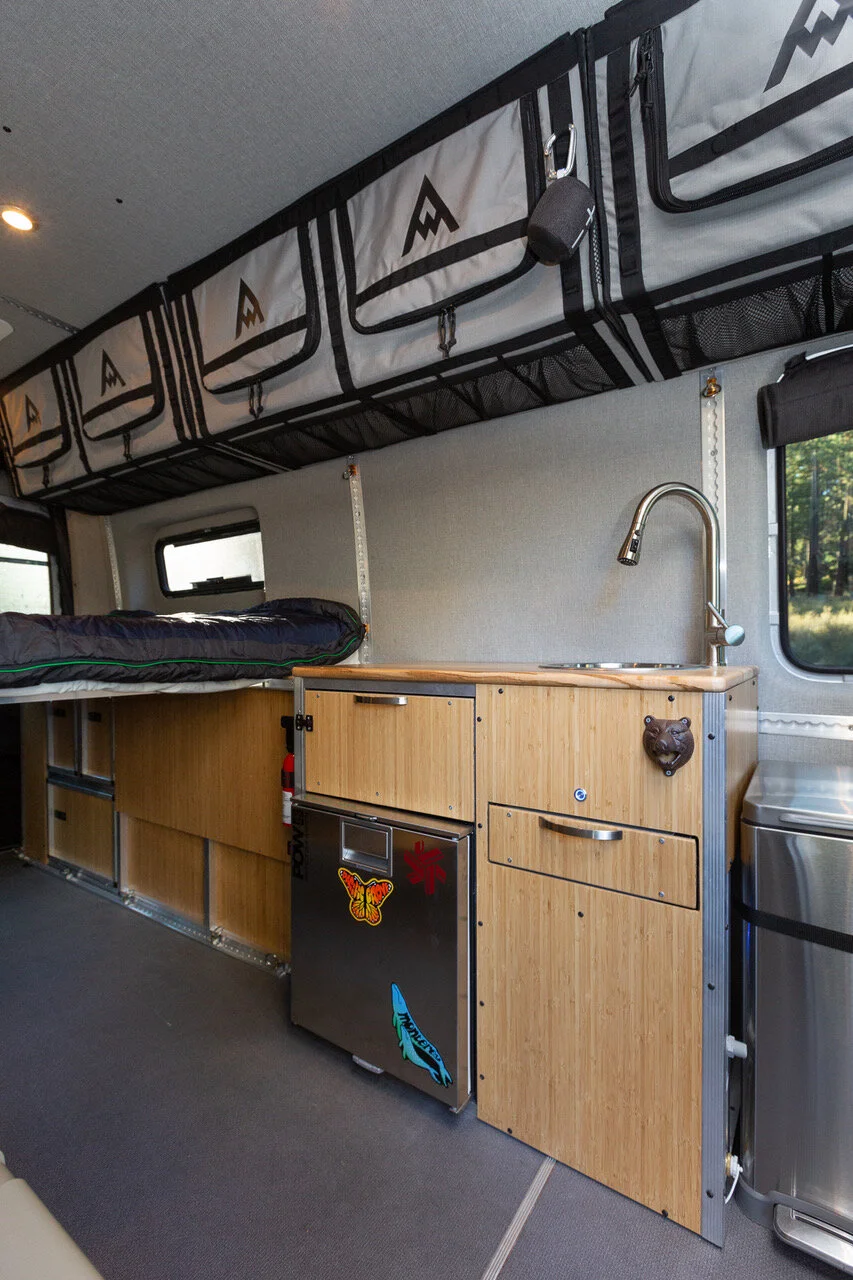
First let’s talk about the water system. For the water wheel well cabinet we have a 20 gal tank, an electric on-demand water heater and a propane on-demand water heater, plus outdoor shower hookups. The reason we wanted both electrical and propane water heaters is because we wanted flexibility on which to use based on our trip needs. For quick and easy hot water the electric heater is perfect but it comes at a cost…..battery draw. If we were doing a short trip this is the way to go, but if we were doing an extended off the grid trip that heavy battery draw would eventually take its toll. That is where the propane water heater comes in. We can simply hook up a small propane tank and get hot water with no power draw. This does make the water system more complex but it also makes it more flexible. The driver side galley also has a water tank that is about 10 gal. The galley also houses the gray water thank, a small fridge, a sink, and two drawers for kitchen items. There are electrical switches to isolate the two water tanks or you can link the two tanks together for around 30 gals of water capacity. Trail Kitchens even provides a four person dish set and a single burner stove. What I like is that the stove is portable so that you can cook inside when the weather is nasty or you can take the stove outside to cook when the weather is nice. This is smart because you will find that cooking outside is WAY better than cooking in your van. I know many other builds have a stove built-in but I honestly don't think that is ideal if you plan on using your van year round. Permanent cook tops takes up valuable counter space and you are stuck cooking inside making your van smell (just wait until you cook fish). One last comment on the water system that I get questions on all the time. “Why have an outside shower versus an inside shower?” The short answer is….space. Inside showers, or wet closets, take a ton of space and create a fixed element in your floor plan design. We have found that we don't need a shower for short trips and for longer trips where you do want to clean up an outdoor shower does the job without taking ANY space in the van. You shower off the back of the van with the rear doors open and we put up an RB Components shower curtain for privacy. Or just give the world a show :)

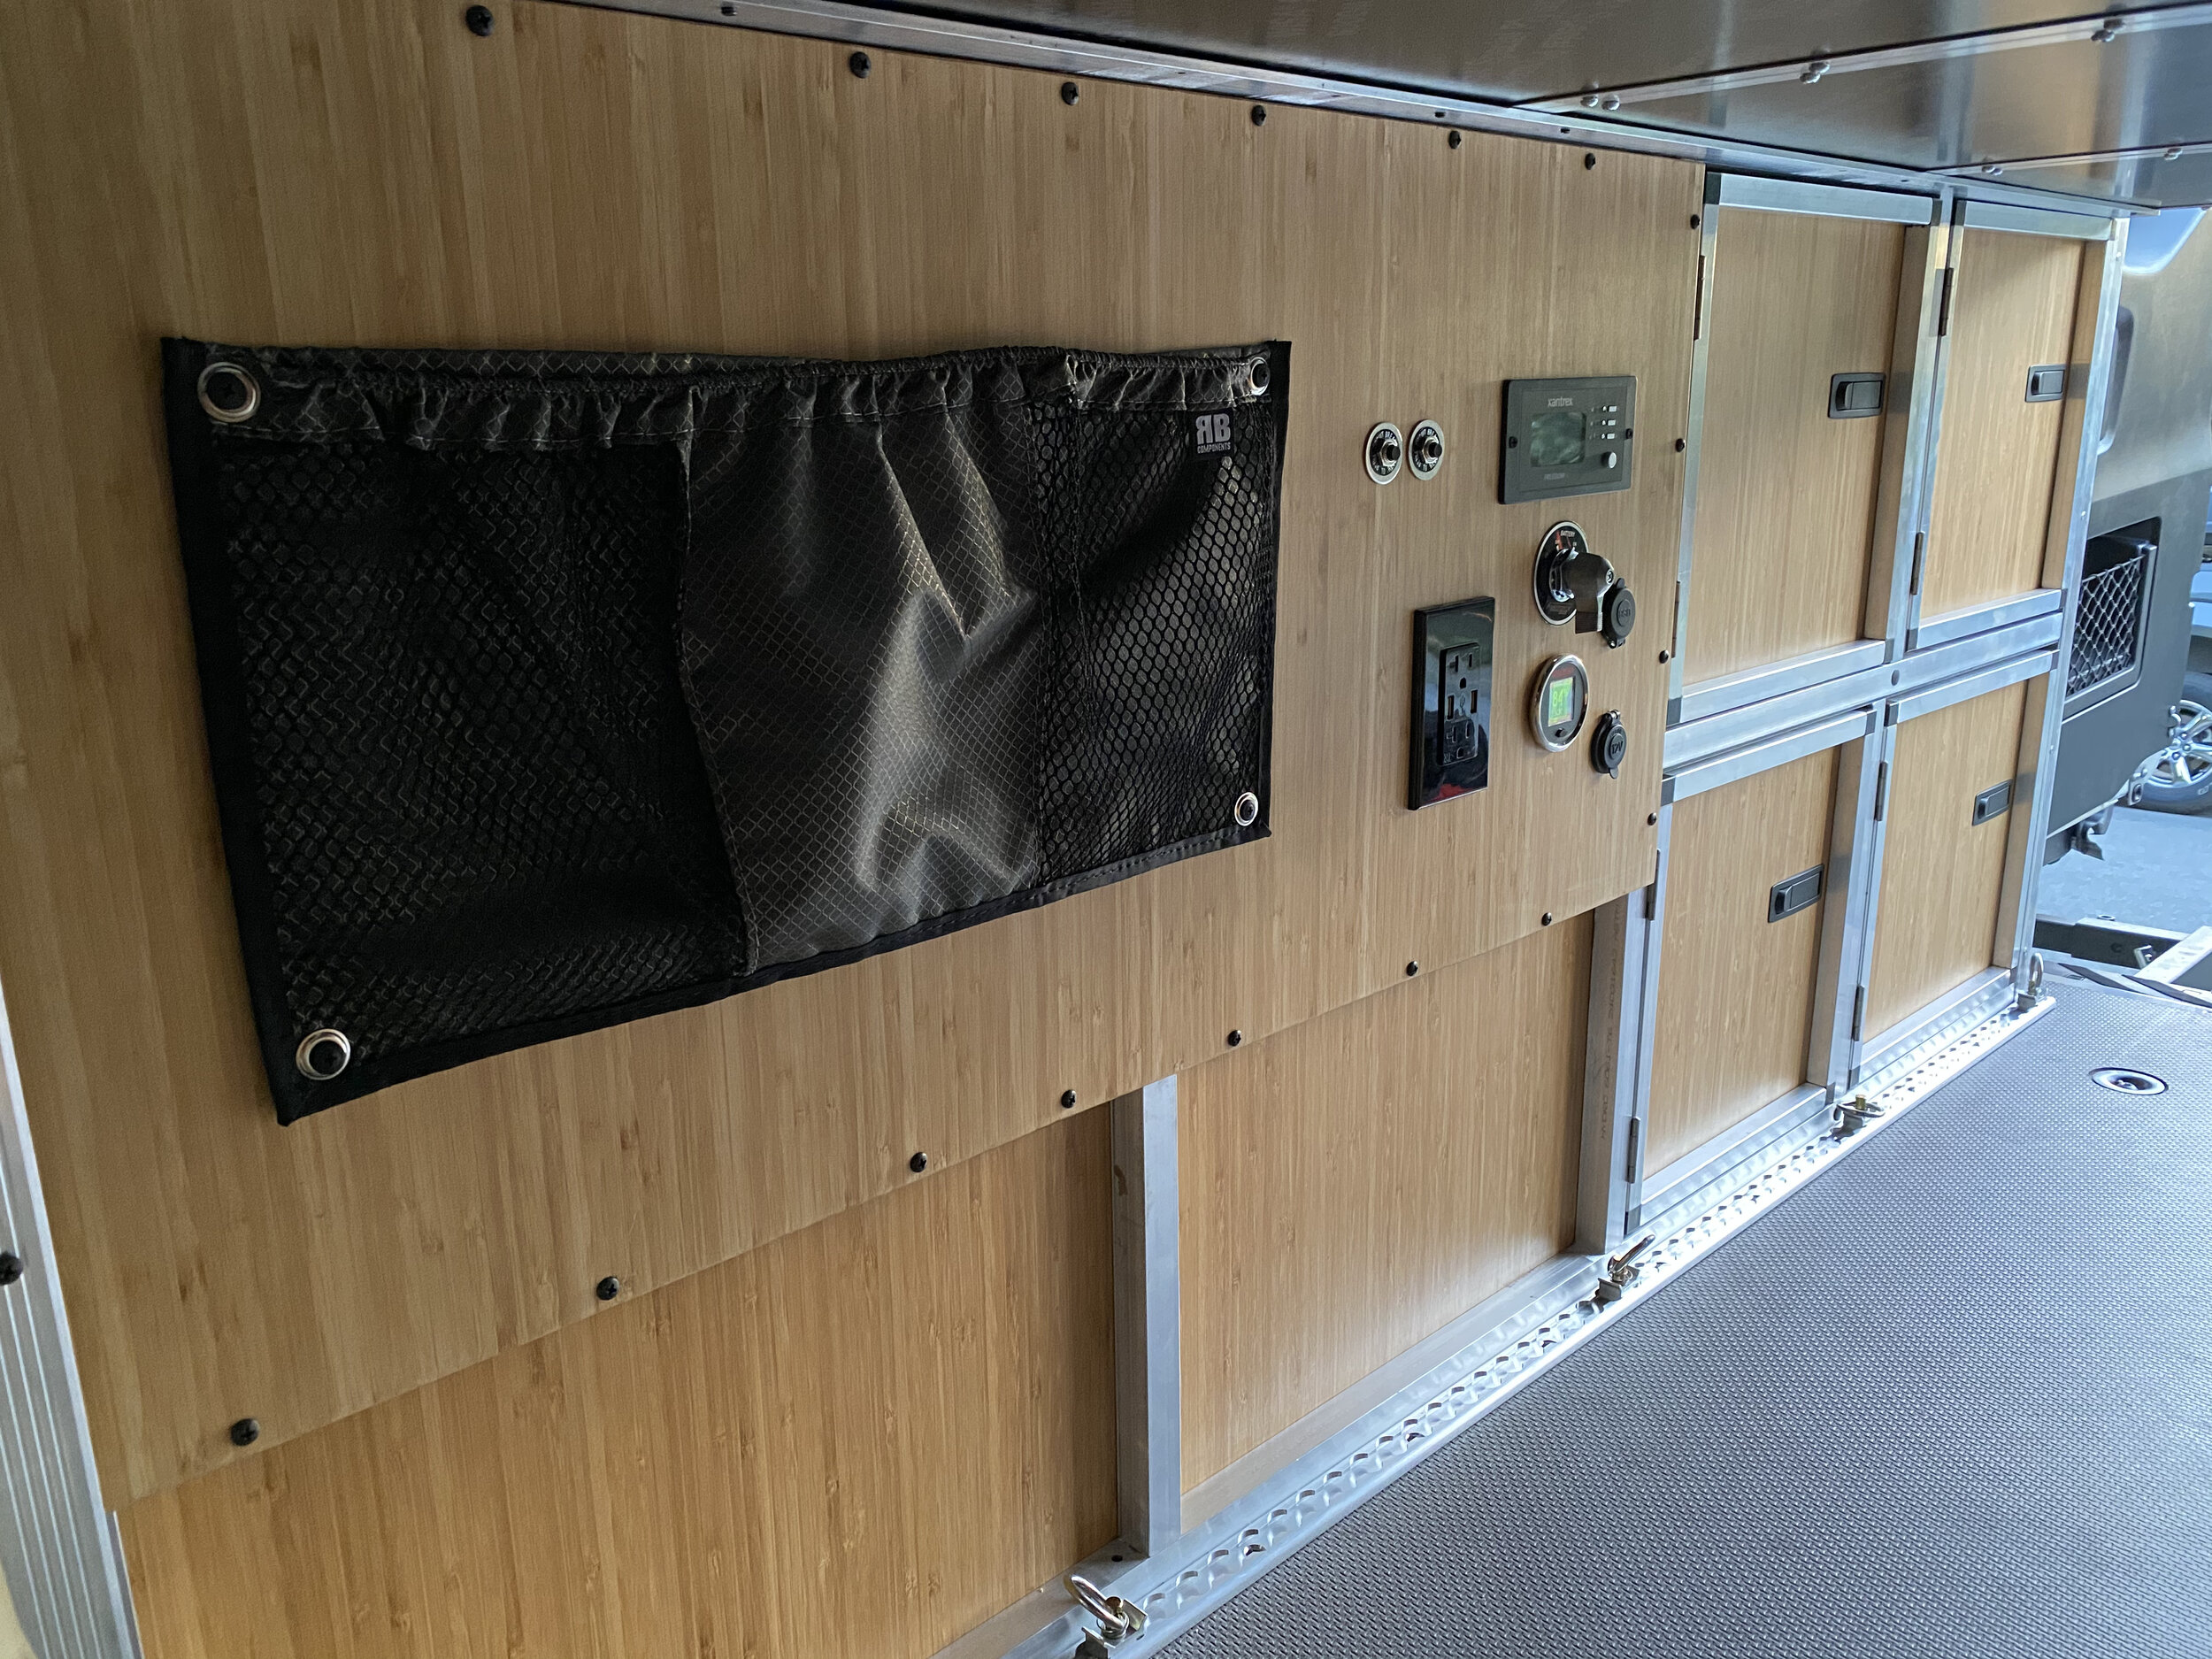
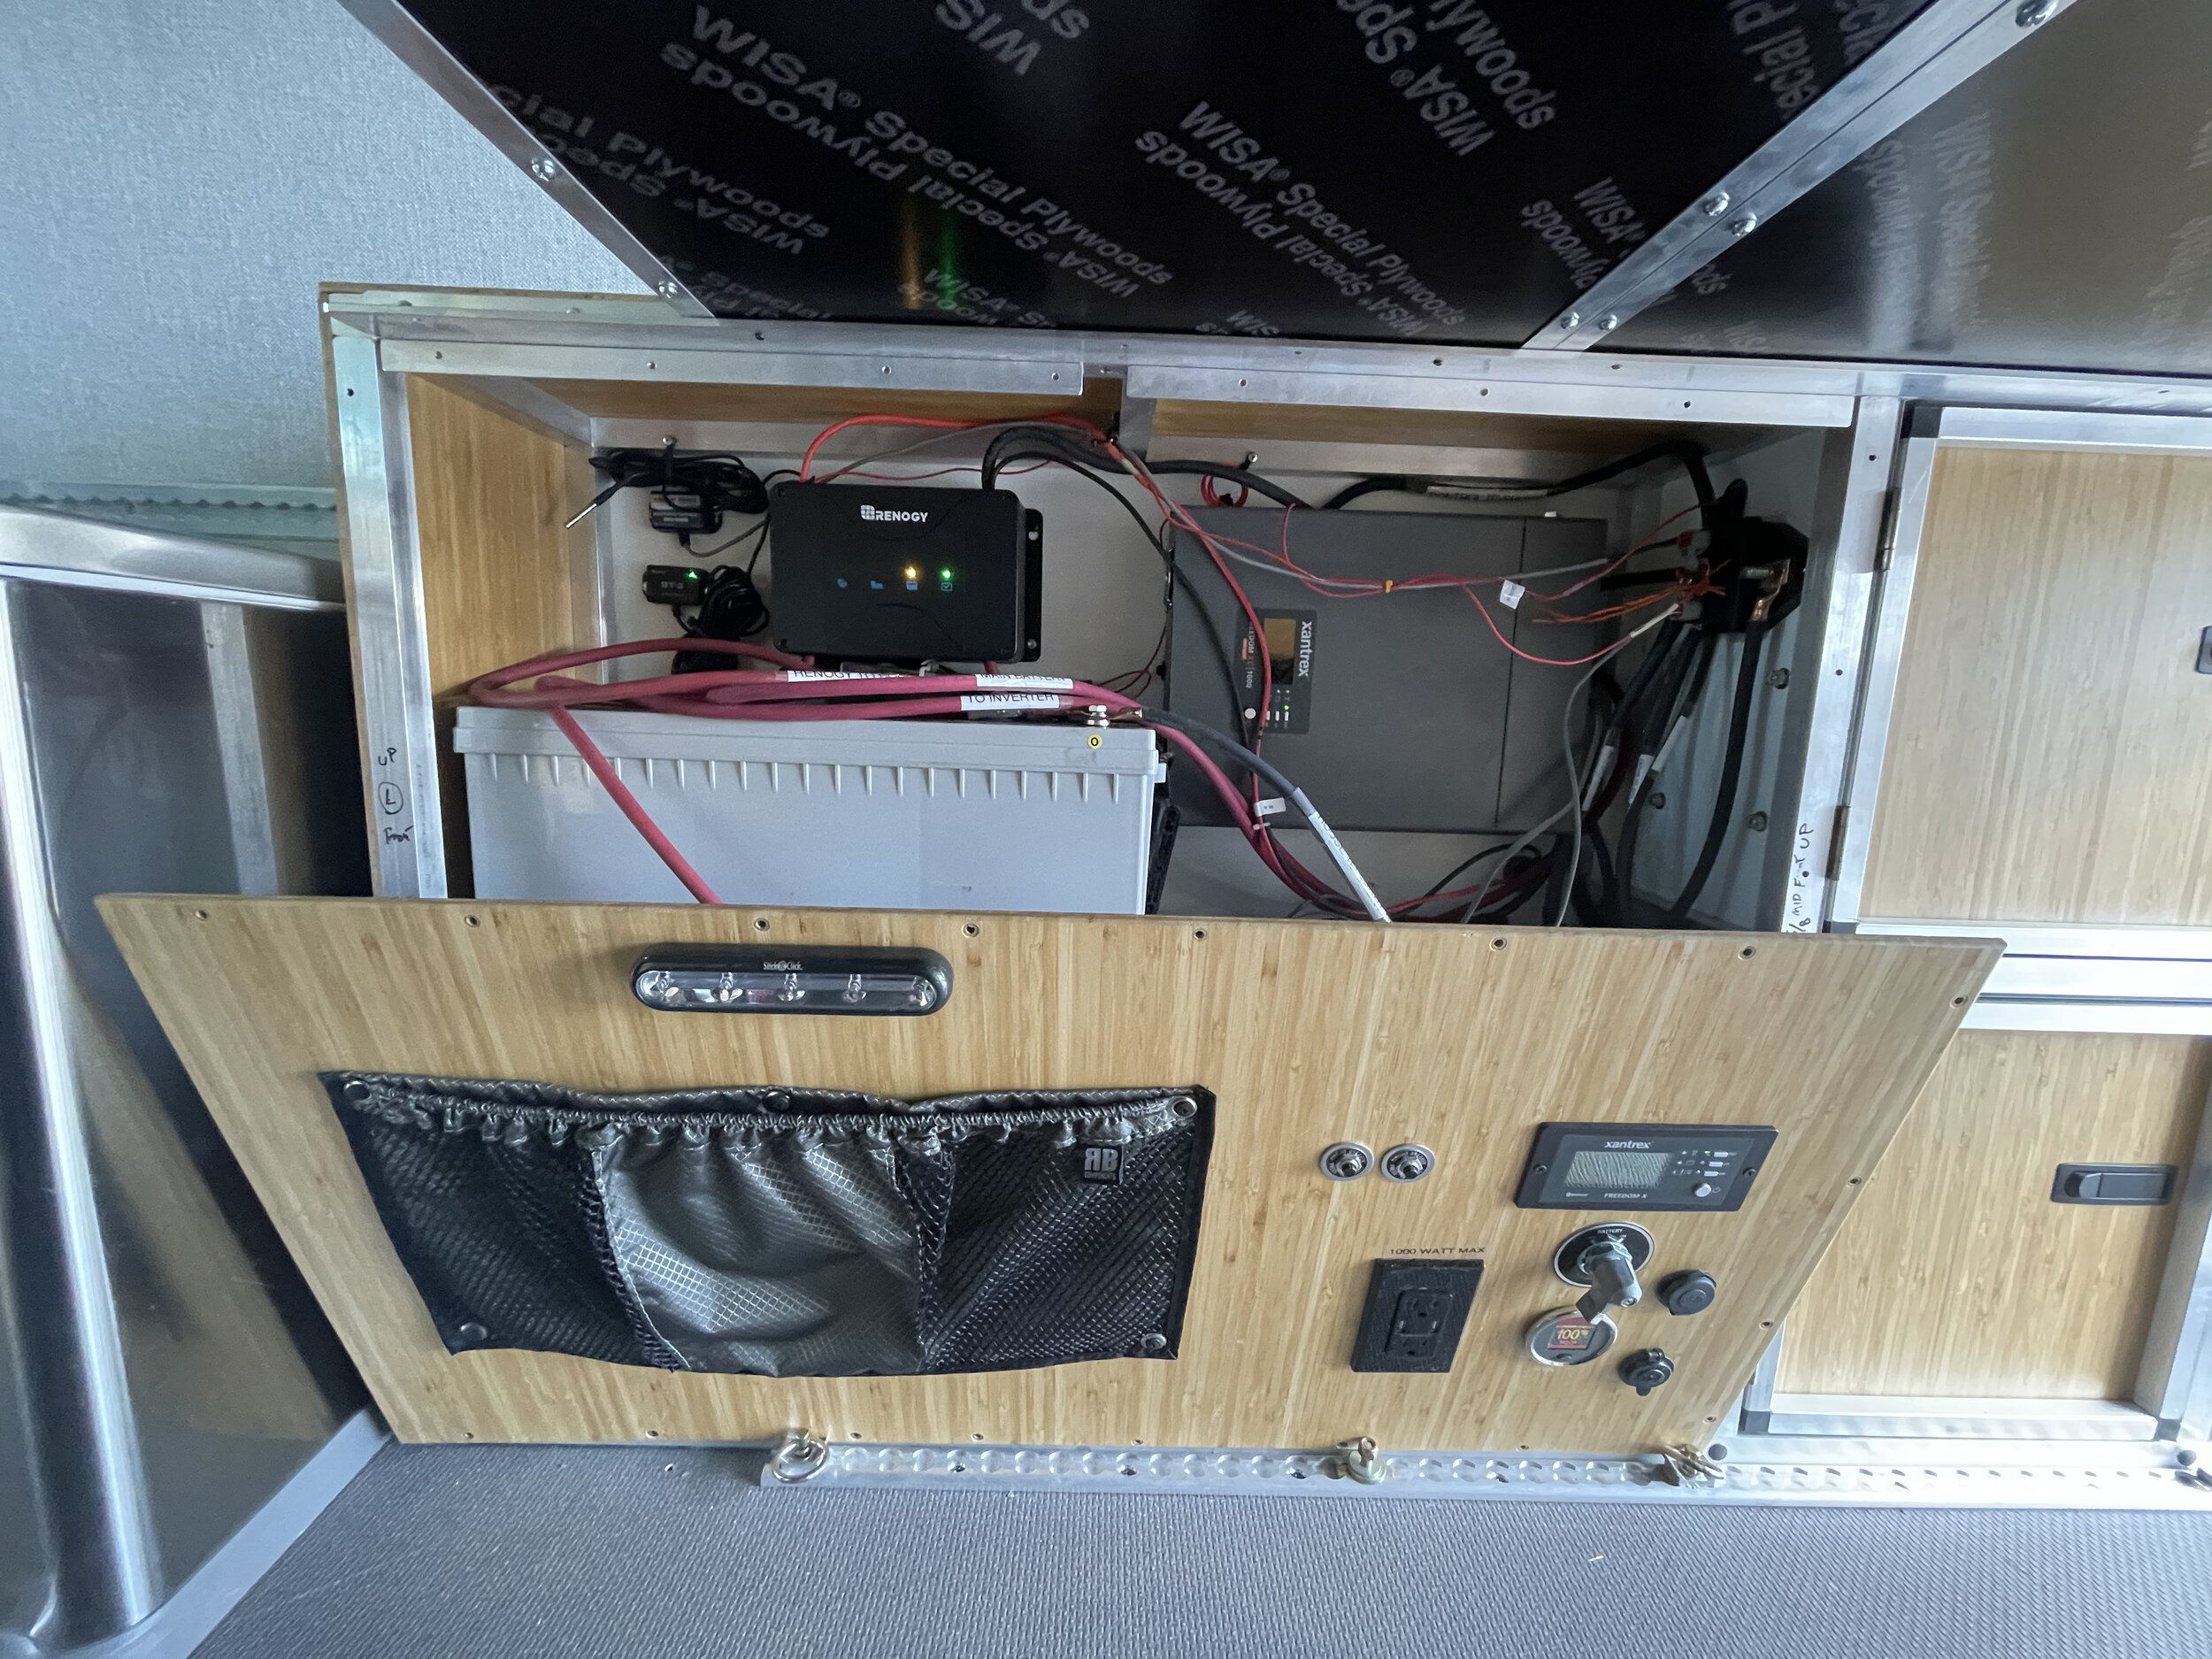
That brings us to the electrical wheel well cabinet on the passenger side. It took us some time to really dial this in but now its amazing and works perfectly. We ran into some issues due to the Sprinter’s smart alternator. This seems to be an issue mostly with 2019 and 2020 models. What happens is that the smart alternator decides when to engage based on the needs of the van battery which often results in your house battery not getting charged even after driving for hours. I have outlined the solution we used below. The electrical cabinet houses a Renogy 200 amp hour AGM battery, all the electrical components, and most of the wiring. We went with an AGM battery because lithium batteries don’t like the cold and this van sees a lot of snow. But AGM does have a downside in that you don’t want the SOC (state of charge) to drop too low, in our case below 50%. I am sure at some point we will switch to lithium batteries but for now the AGM works just fine for our needs. That battery has a dual charge controller by Renogy (RBC30D1S) which is the solution to the smart alternator issue I mentioned. This controller will monitor the van battery, the smart alternator and the solar panels to determine how best to charge the house battery. It even takes into account the temperature of the house battery to optimize the charge. It can have a bluetooth module added to make it app enabled and you can add a dedicated display panel for the controller if you want.
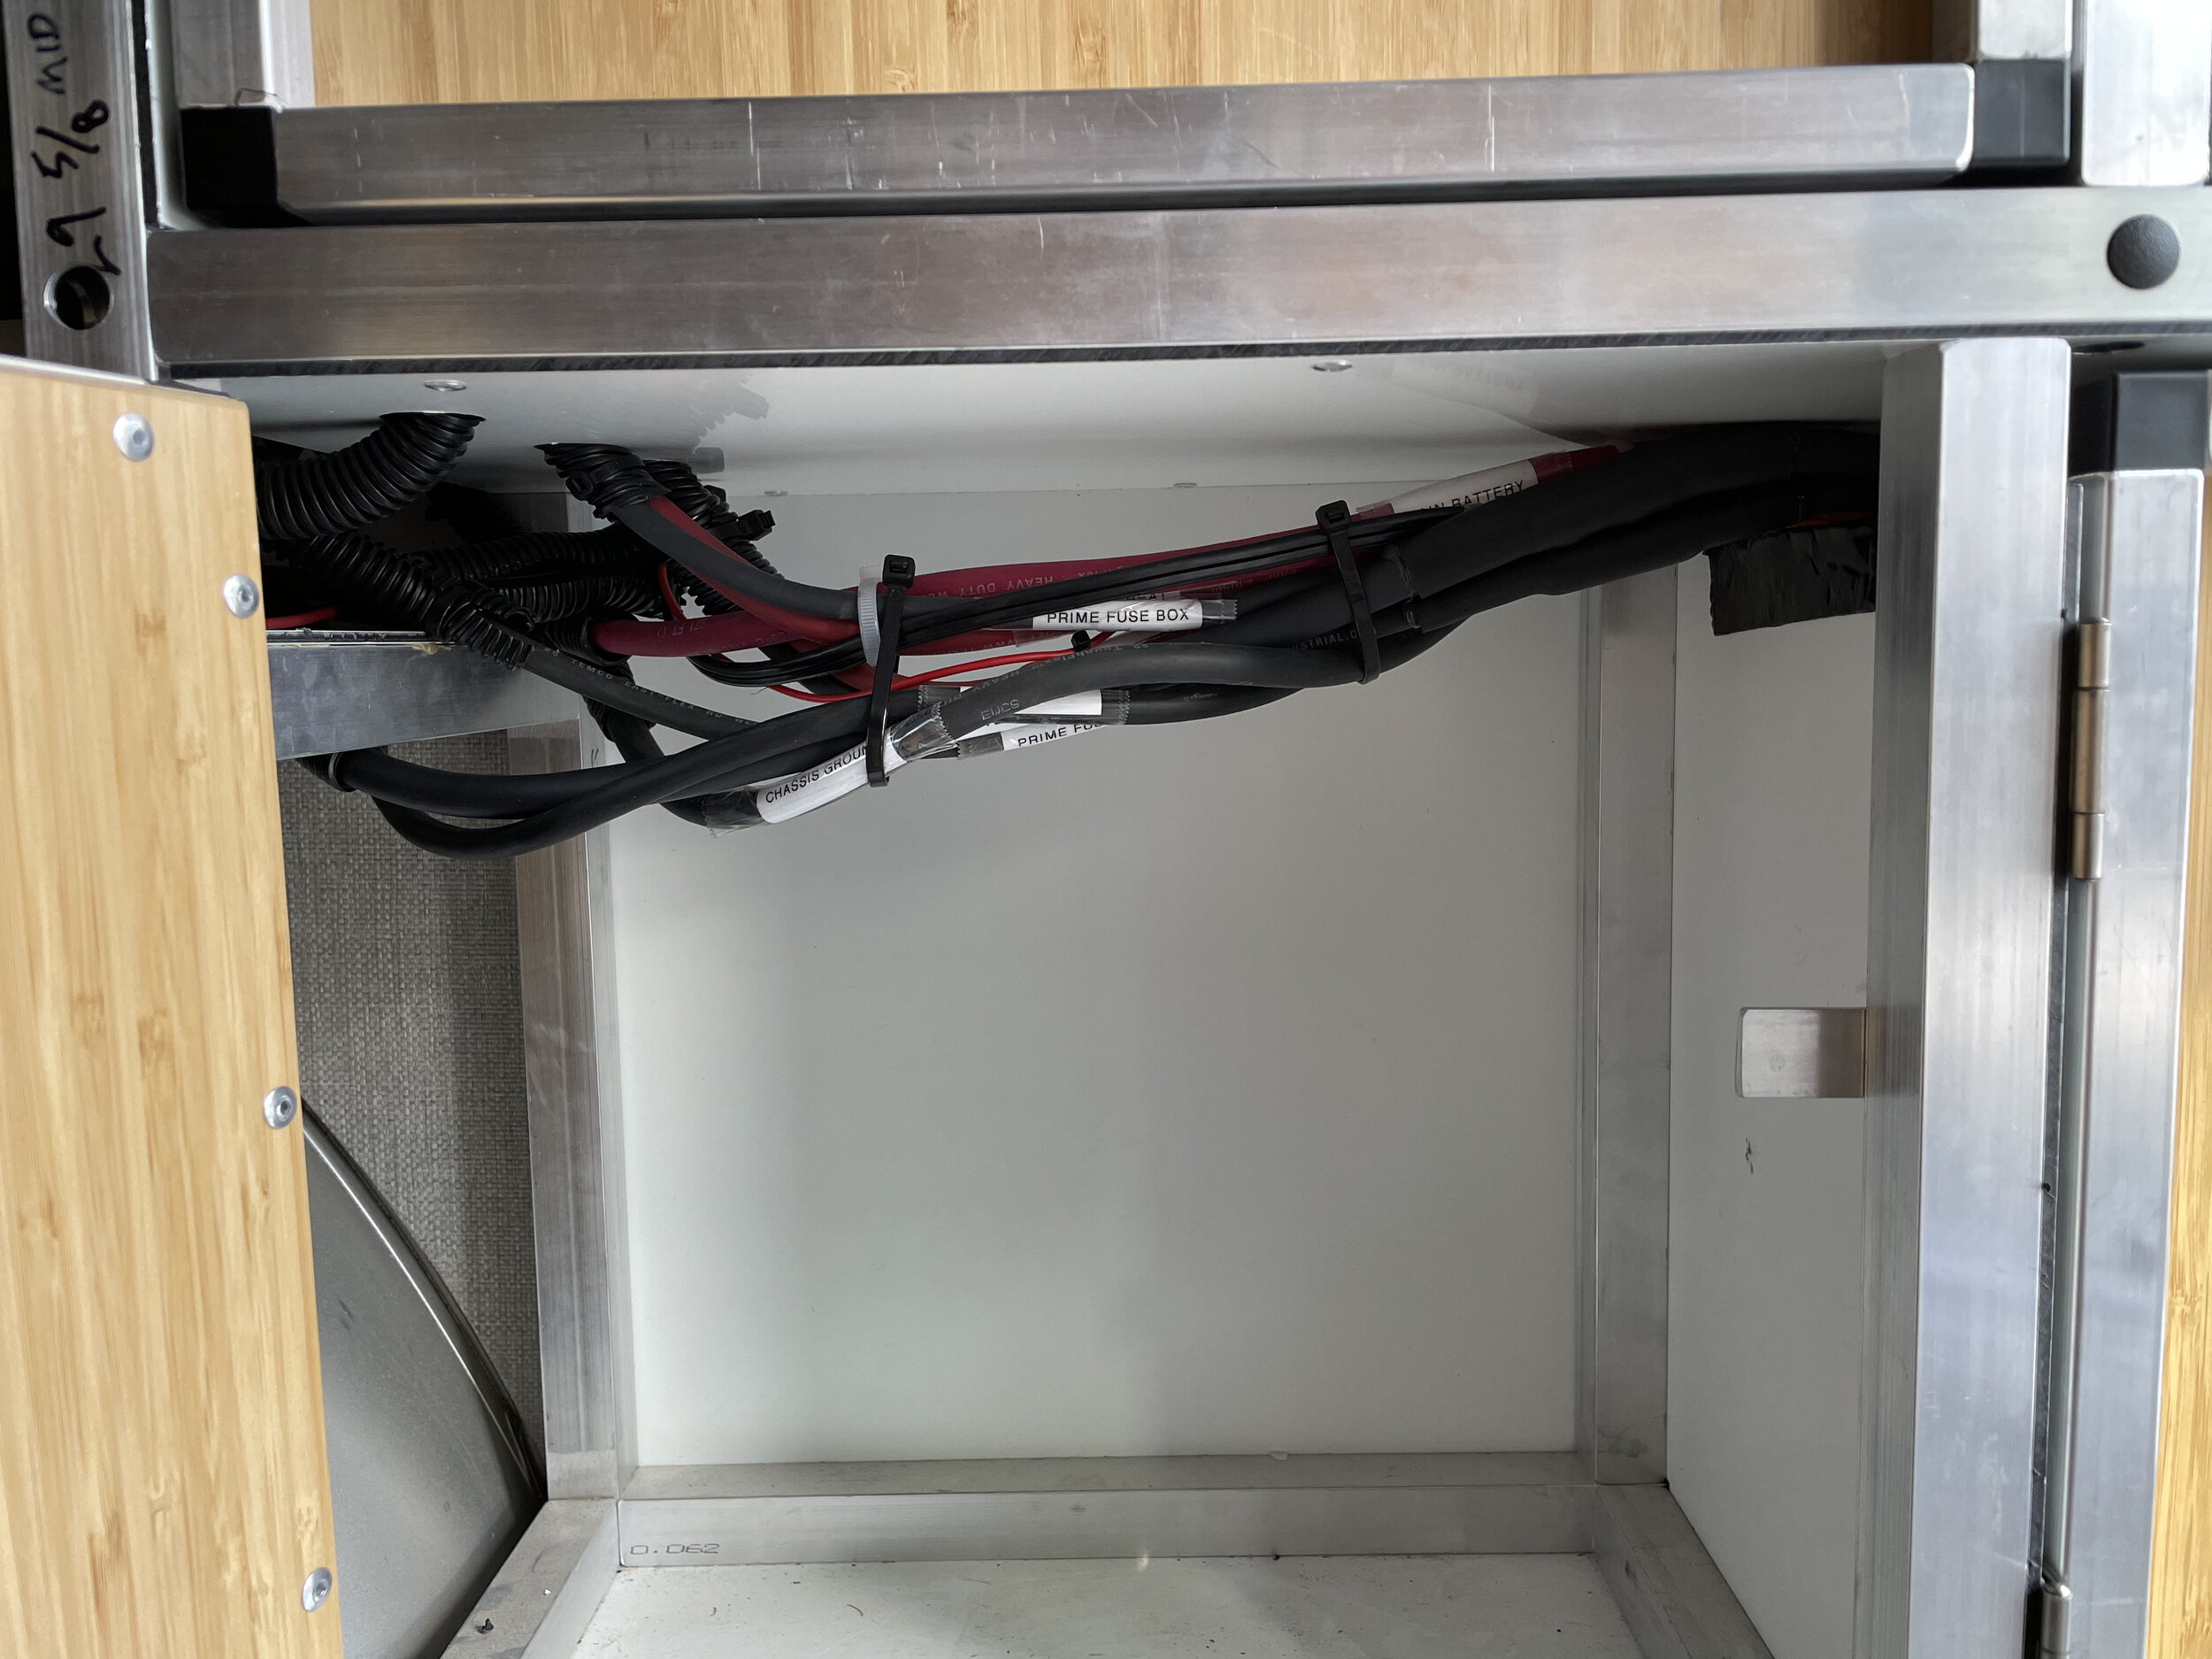
We also use a Balmar SG200 to monitor the entire system. When wired properly, the Balmar will monitor all the charges and draws on the system to give you a net impact reading along with SOC (state of charge) and SOH (state of health) readings for the house battery. It even calculates the time remaining on the battery at the current net draw level. In order to get a complete view of your system you need to wire all the negatives to the Balmar shunt. The Balmar also has a module to make it app enabled. For solar we installed two Renogy 160w solar panels on the roof. To round out the electrical system we have a Xantrex Freedom XC 1000 inverter that gives us 1000 watts of AC power in the van as well as access to shore power for charging. All of the accessories (lights, fridge, etc) wire into one of two fuse boxes or to a safety hub so that each circuit can be on a dedicated fuse.
When it is all said and done our van can be charged by the alternator, solar, or shore power. We have enough power for the four of us without needing a stinky, loud generator. The only thing we need to top off about once a week for long trips is water….making this a great off-the-grid van for our family.