
Sprinter Build - Captain Chairs
This was the hardest part of the build…..by far. When we started this project we began with a 2019 2500 170 WB crew 4x4. That meant we had some windows, a full wood floor, a ceiling panel with lights, some half wall panels, and the three person bench seat. We got rid of the ceiling and wall panels and replaced them with an Adventure Wagon interior kit. We kept the wood floor as it is a high quality wood floor yet we ended up with some regrets with that decision which we will talk about later. But the bench seat had to go. It is a nice quality bench seat but it is big, heavy, does not slide, and generally is always in the way. It blocks the full use of the side door but it also does not have much leg room for the passengers. Overall it sucks unless you are looking for a people mover van.
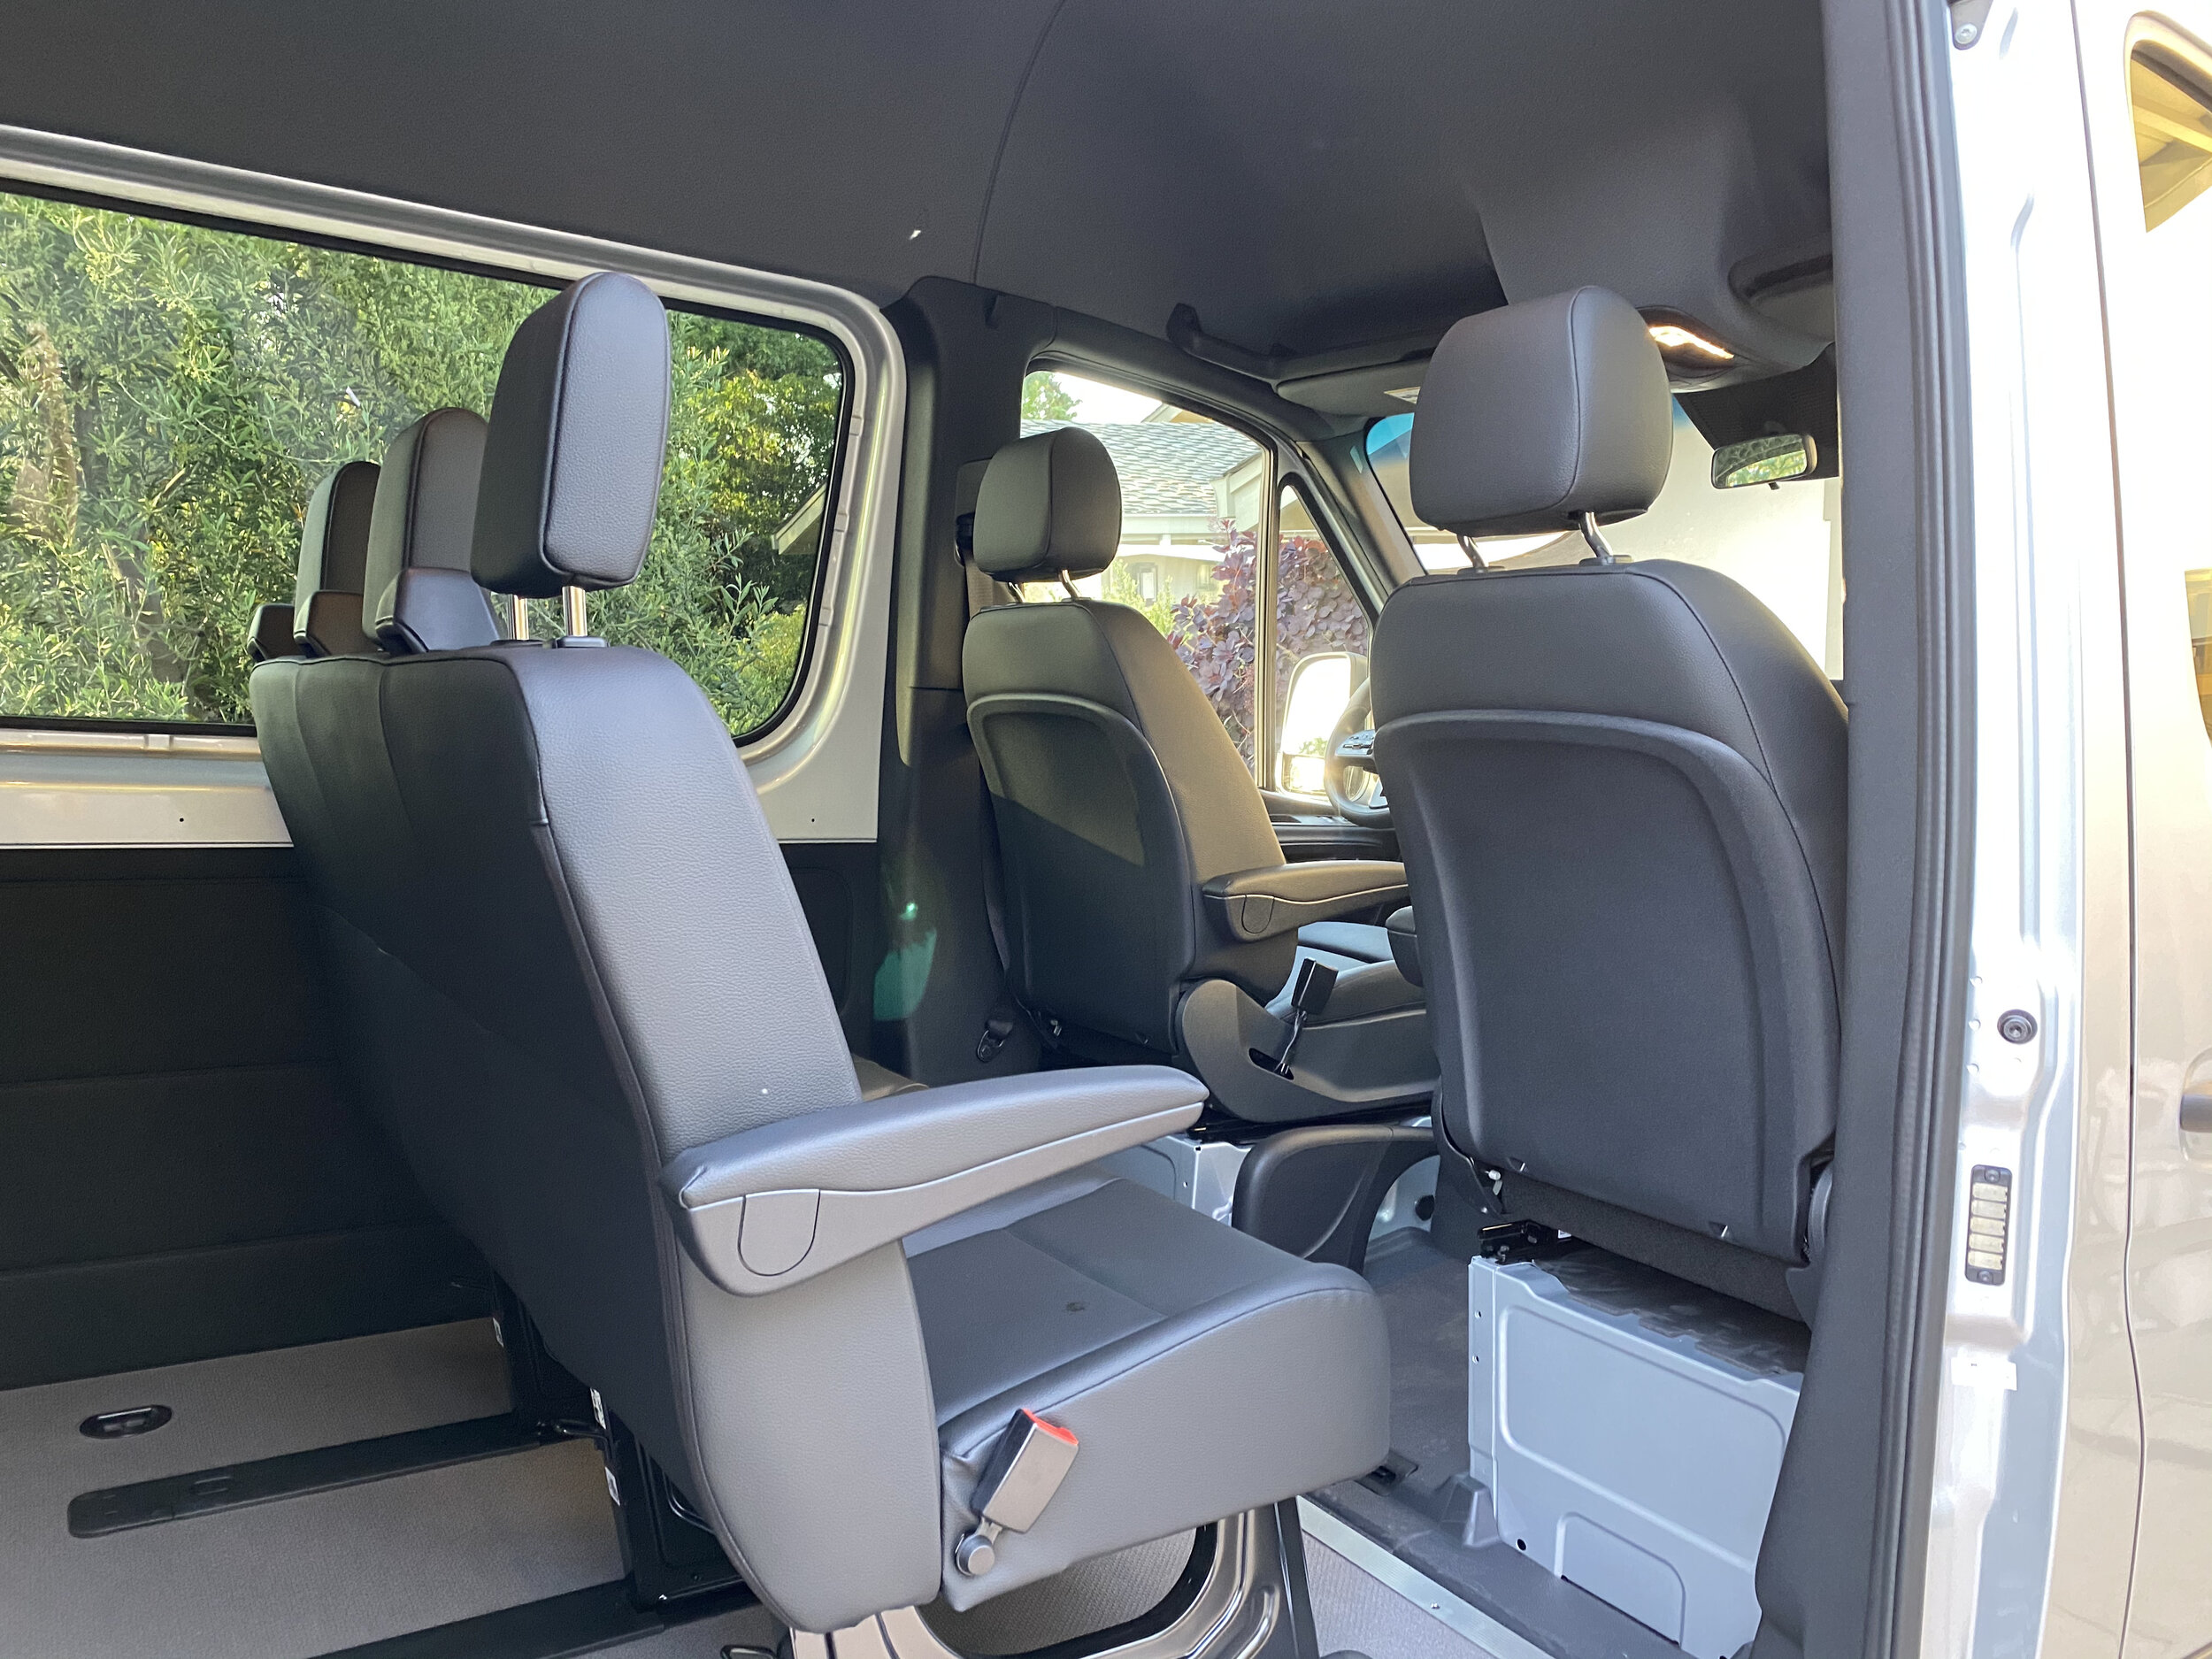
In our build we only needed seating for four but we wanted as much usable space as possible while also making it comfortable for LONG road trips (we are talking road trips through 4 states with kids). So we decided we wanted two comfortable captain chairs to replace the bench seat where we could mount them further back in the van to provide more leg room plus a bigger entrance for the side door. We also wanted to put a removable table in front of those chairs so we could turn the driver and front passenger seat around (we installed swivels for those chairs already) so we would end up with a four person dining area.
Here is the problem. It is not easy to find safe, comfortable, captain chairs that easily mount into the Sprinter. Most of the seat options don’t leverage the factory mounting points from the bench and frankly even if they did the seats would be too far forward. So that means you need a mounting system for nearly any seat option you can find for the Sprinter. Some of those mounting options require you to replace the entire floor of the van at a cost of $10k+. These floors give you rails to move around the seats which is perfect for some applications but not for a simple 2 captain chair option like we were trying to create. Other mounting systems seem too light weight and are not tested for safety. And then you have the DIY version which frankly I would not trust unless it was designed and built by an engineer and tested to meet specs and by then they are not DIY. And then if all that didn’t make it hard enough just try to find something in stock. I ended up placing two orders with two different companies both of which had back orders for 4 months and in both cases I had to simply cancel the order because they could not fulfill my order.
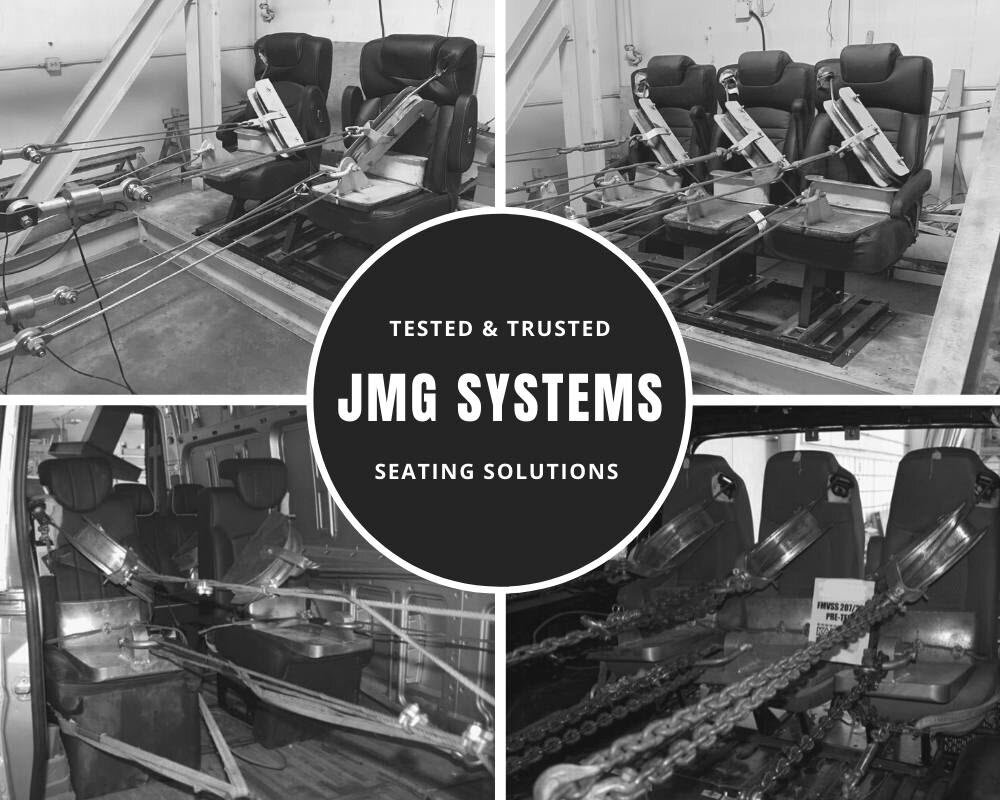
But then we found one option that is well designed by pros, tested, purpose built for Sprinters, comfortable, has great features, and readily available…..JMG Systems in Souther California. This small family owned company has been in the seat business for over 40 years and got their start designing, manufacturing, and installing seating solutions for commercial vehicles like luxury shuttles, high end tour buses and VIP coaches. They also supply some of the larger seat resellers with vehicle specific base plate mounting systems. The company was founded and run by engineers who test their seating solutions to verify each one complies with federal motor vehicle safety standards (FMVSS) and therefore DOT compliant. Recently they have branched out to the camper van space and sell and install direct as well as supplying a handful of high end van outfitters.

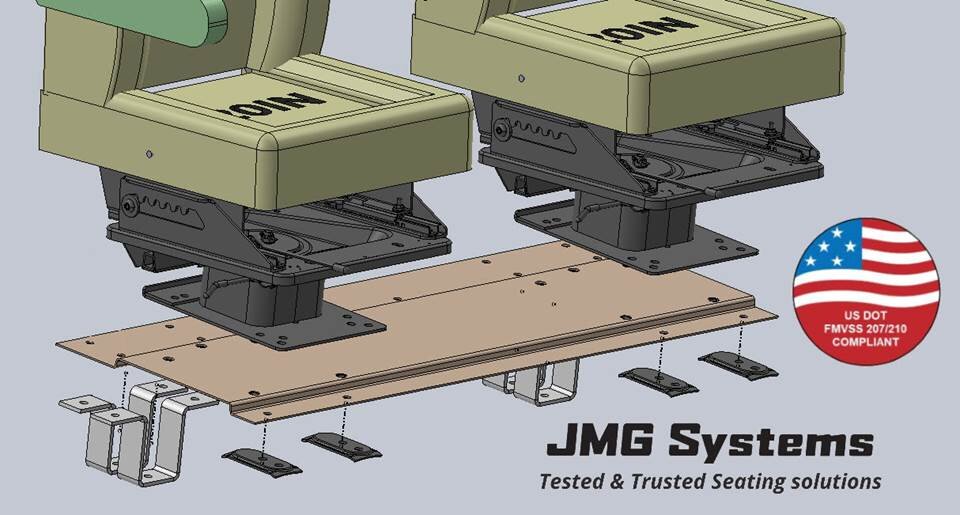
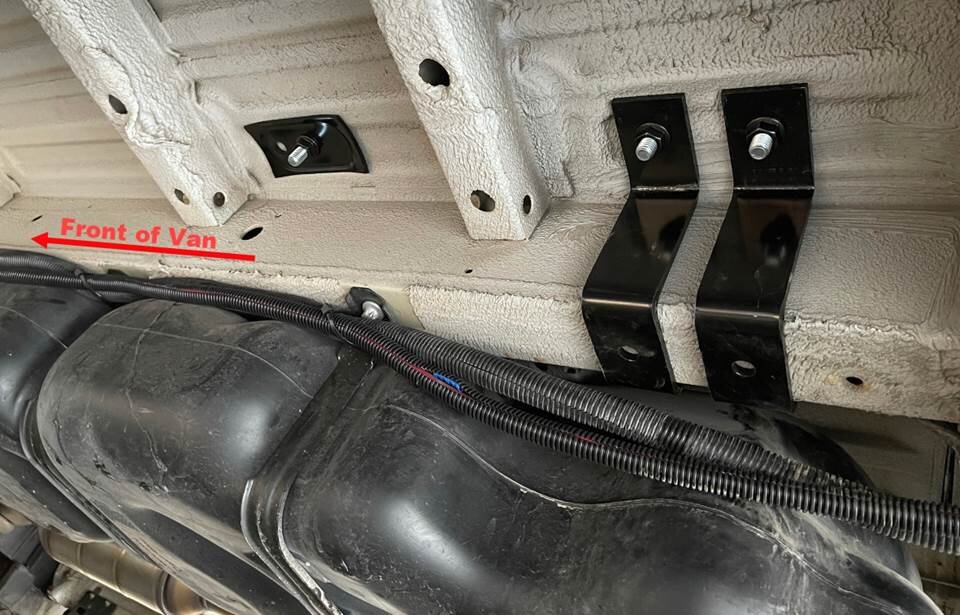
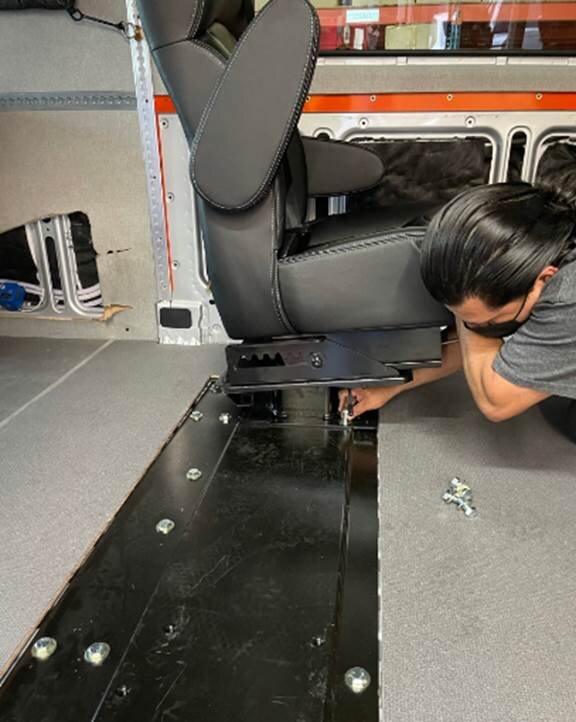
I was impressed with JMG’s product. For the Sprinter they have three different seat sizes to choose from, a few different upholstery options, and two different types of mounting solutions. The drop in/bolt on seating solution is a custom 1, 2 or 3 person seating solution that uses the OEM Sprinter seat rails. While this is a great solution for a quick and easy upgrade you cannot adjust the seating location because they bolt onto the factory seat rails. So we went with their custom swivel captain chair mounting system which uses the JMG mounting plate that the two chairs bolt to. The mounting plate then bolts down through the floor to brackets that wrap around the chassis rails and anchor the whole seating solution down to the Sprinter frame rails. This seating solution allows for a couple different mounting locations to give you more leg room. It’s also built like a tank. After seeing how they install the base plate I have to think it is stronger than the OEM bench and seat rails.
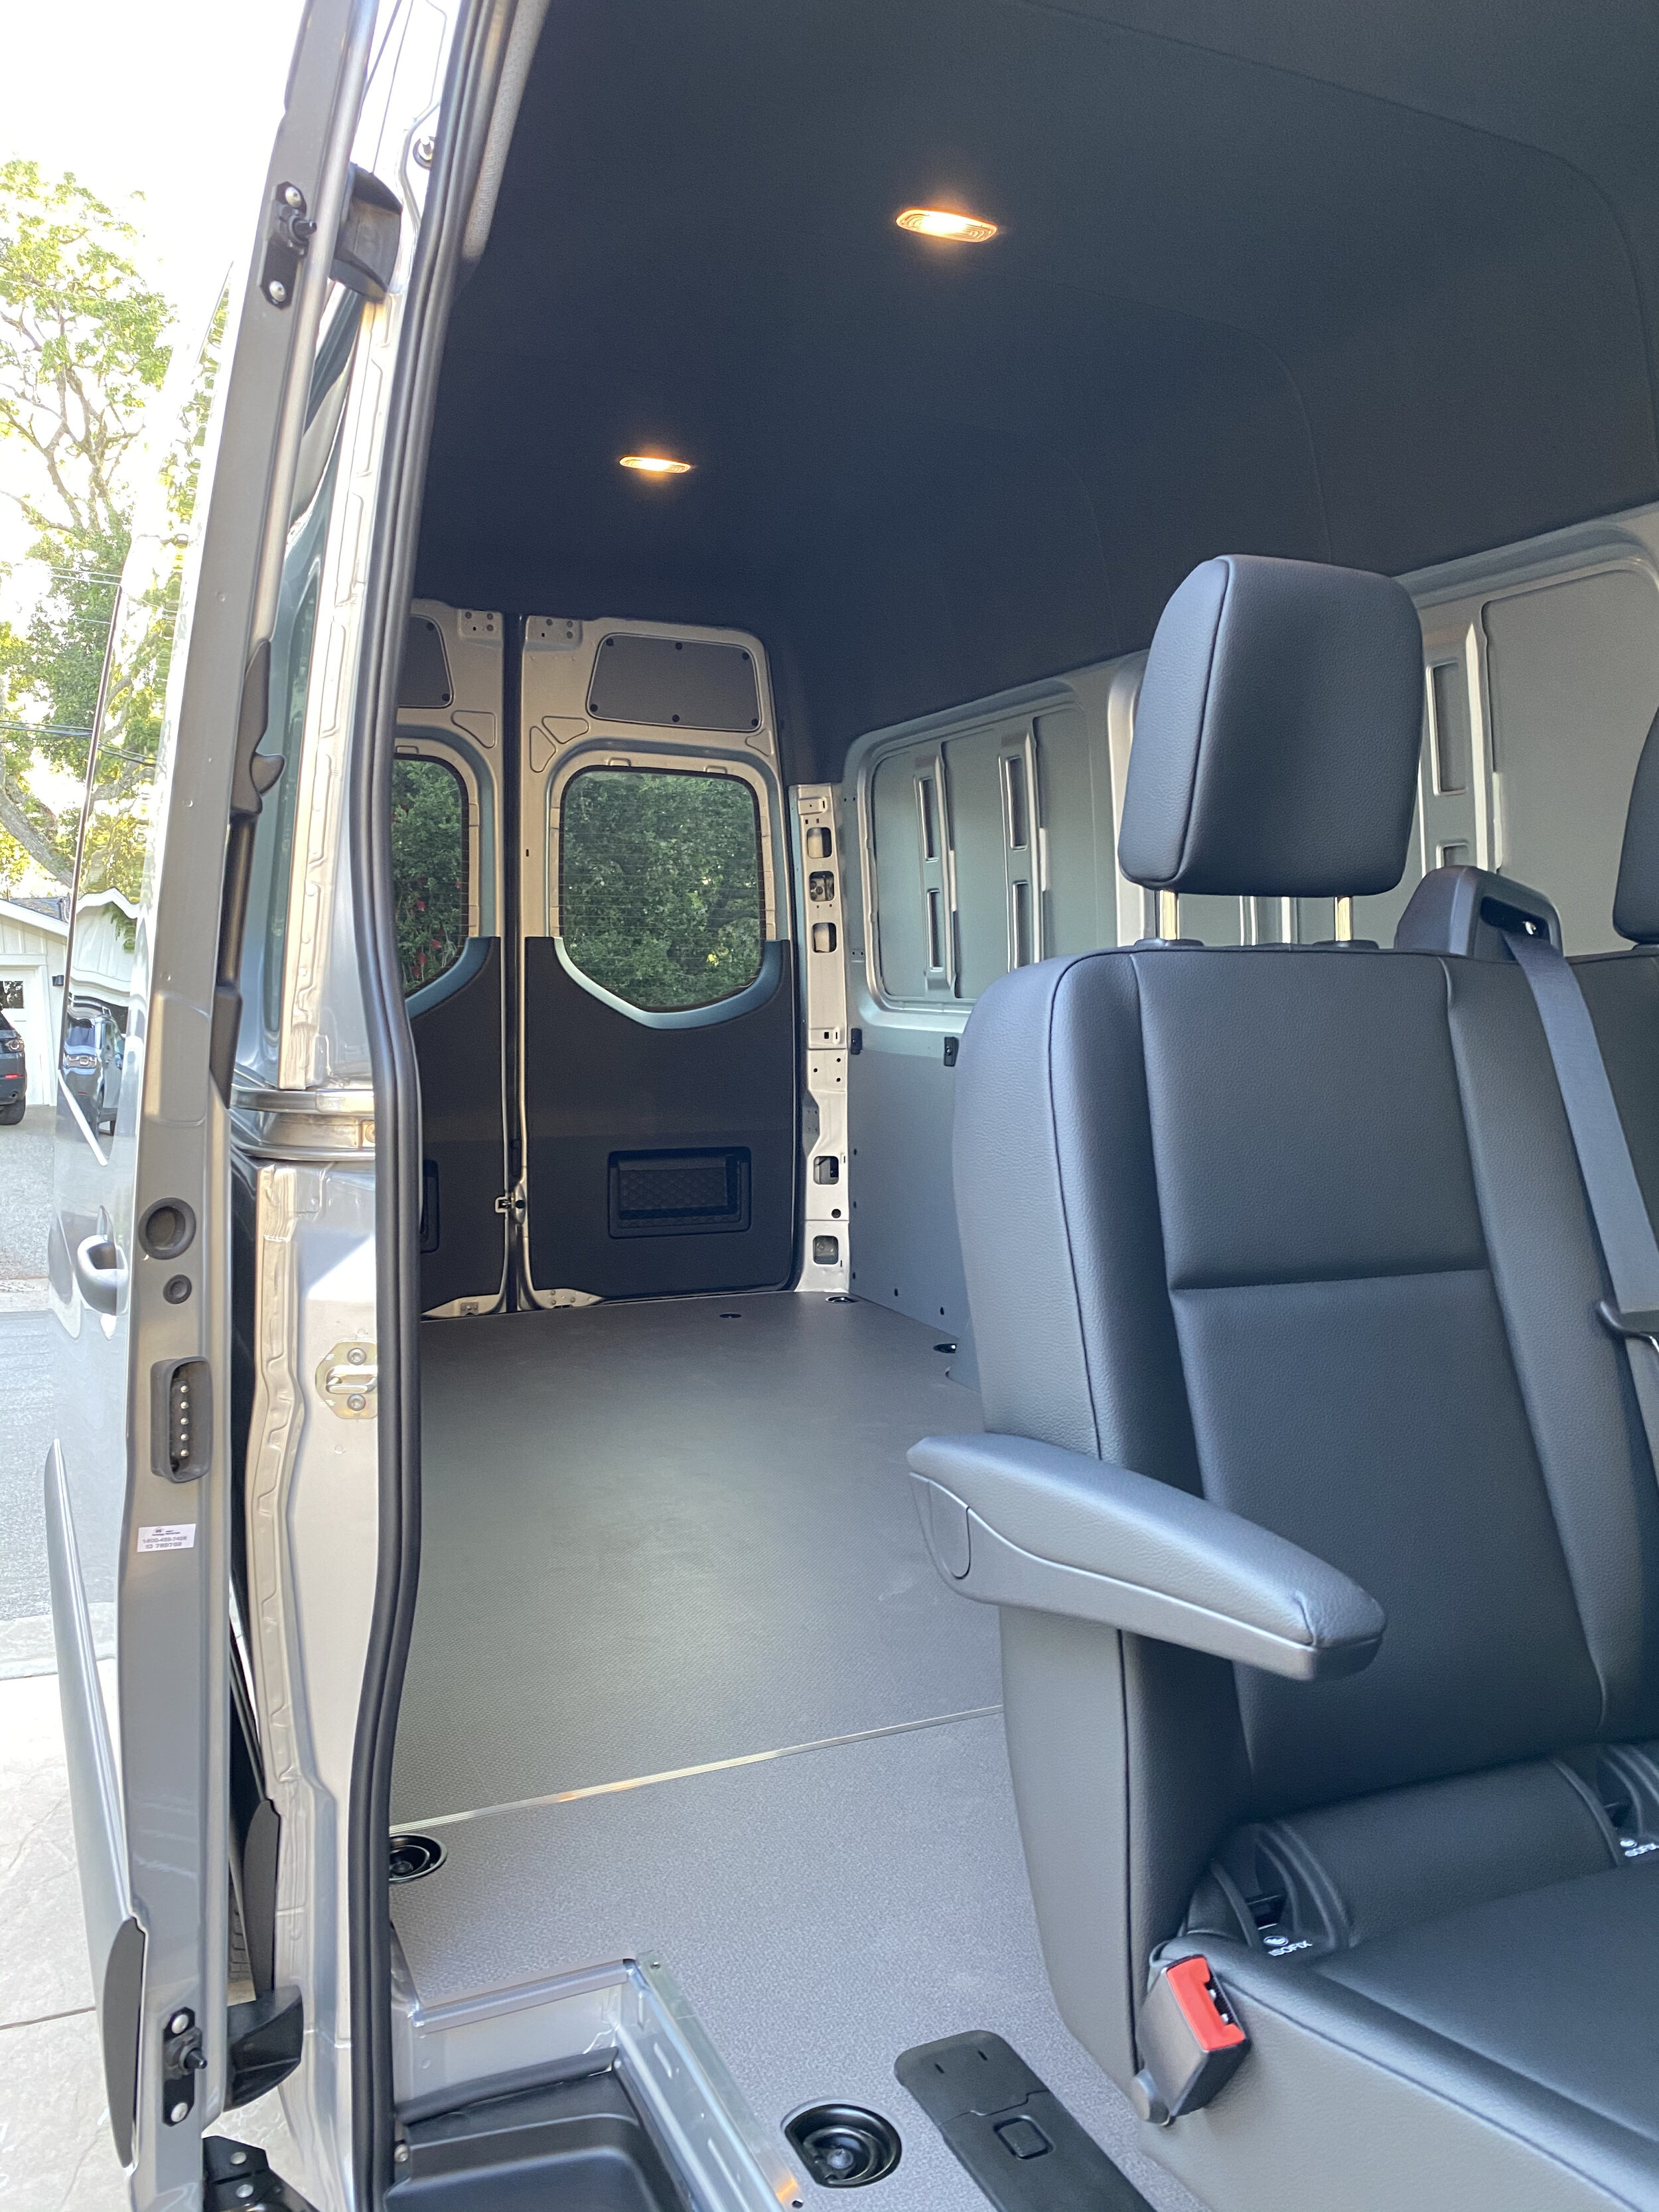
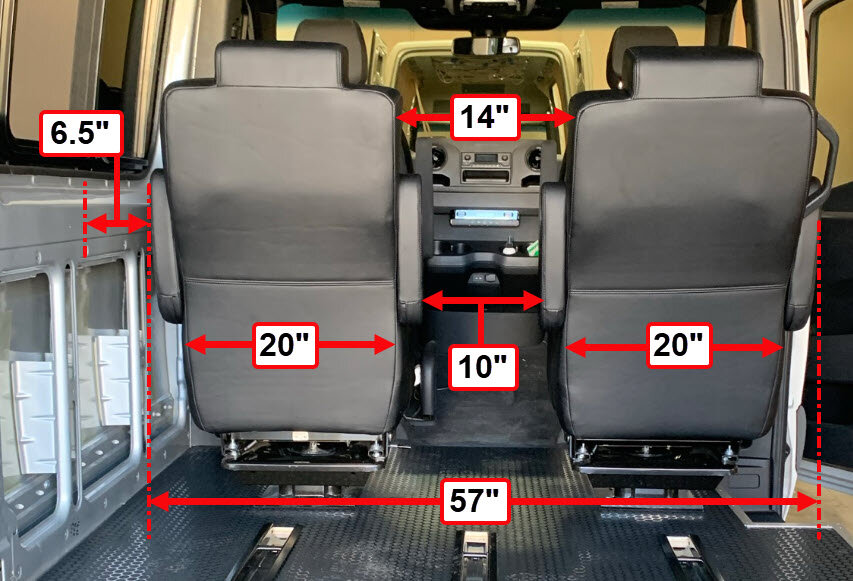
We went with the 20” wide seats, which are plenty big but still narrow enough to allow easy passage to walk between the seats. They are mounted as far back as we can go, which gives a huge space to enter the van and a ton of leg room. The seats recline back to a 40 degree angle from the upright position, have arm rests, swivel, and can slide forward & back 6”. They have integrated 3 point seat belts and even have child seat anchoring points. JMG Systems follows Mercedes' Body Equipment Guideline (BEG) book and has designed their FMVSS Tested/Certified swivel chair seating solution to avoid drilling through any frame rails or cross members. The seats are upholstered in black leatherette with light grey stitching that really matches our van and the foam is custom formed to provide an incredibly comfortable seat. Also because these are not electric they are lighter and we don’t run the risk of motors breaking down and we don’t have to complicate our van wiring.

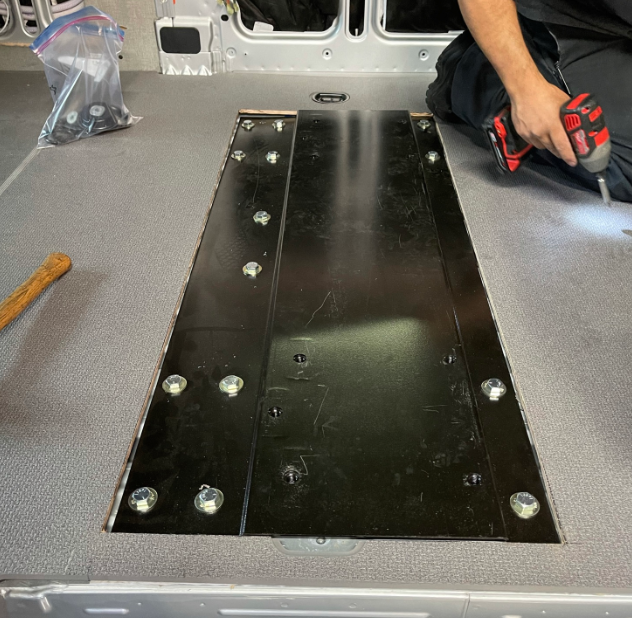
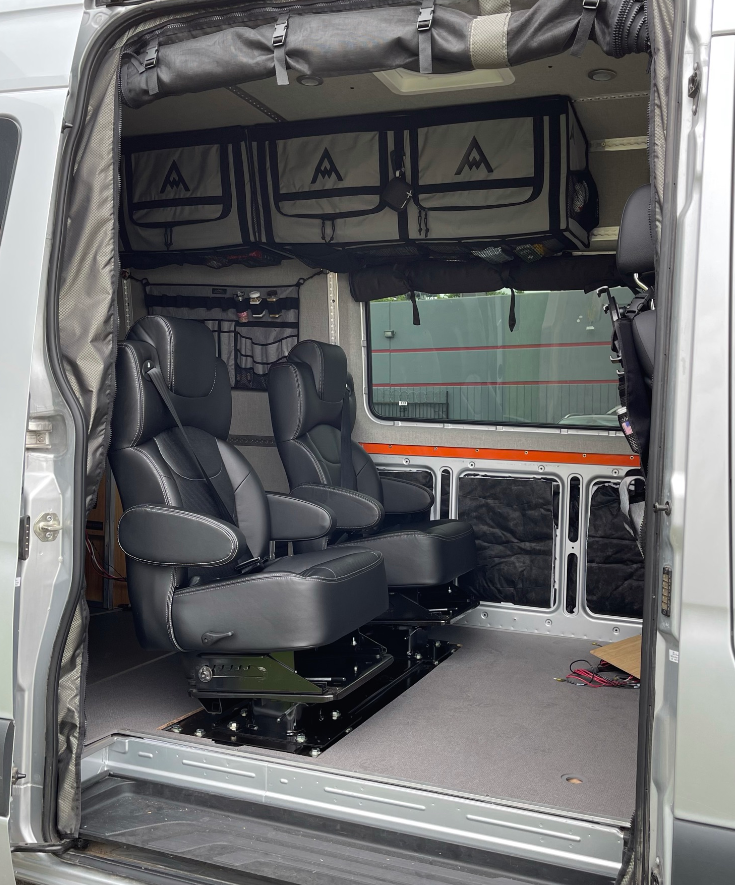
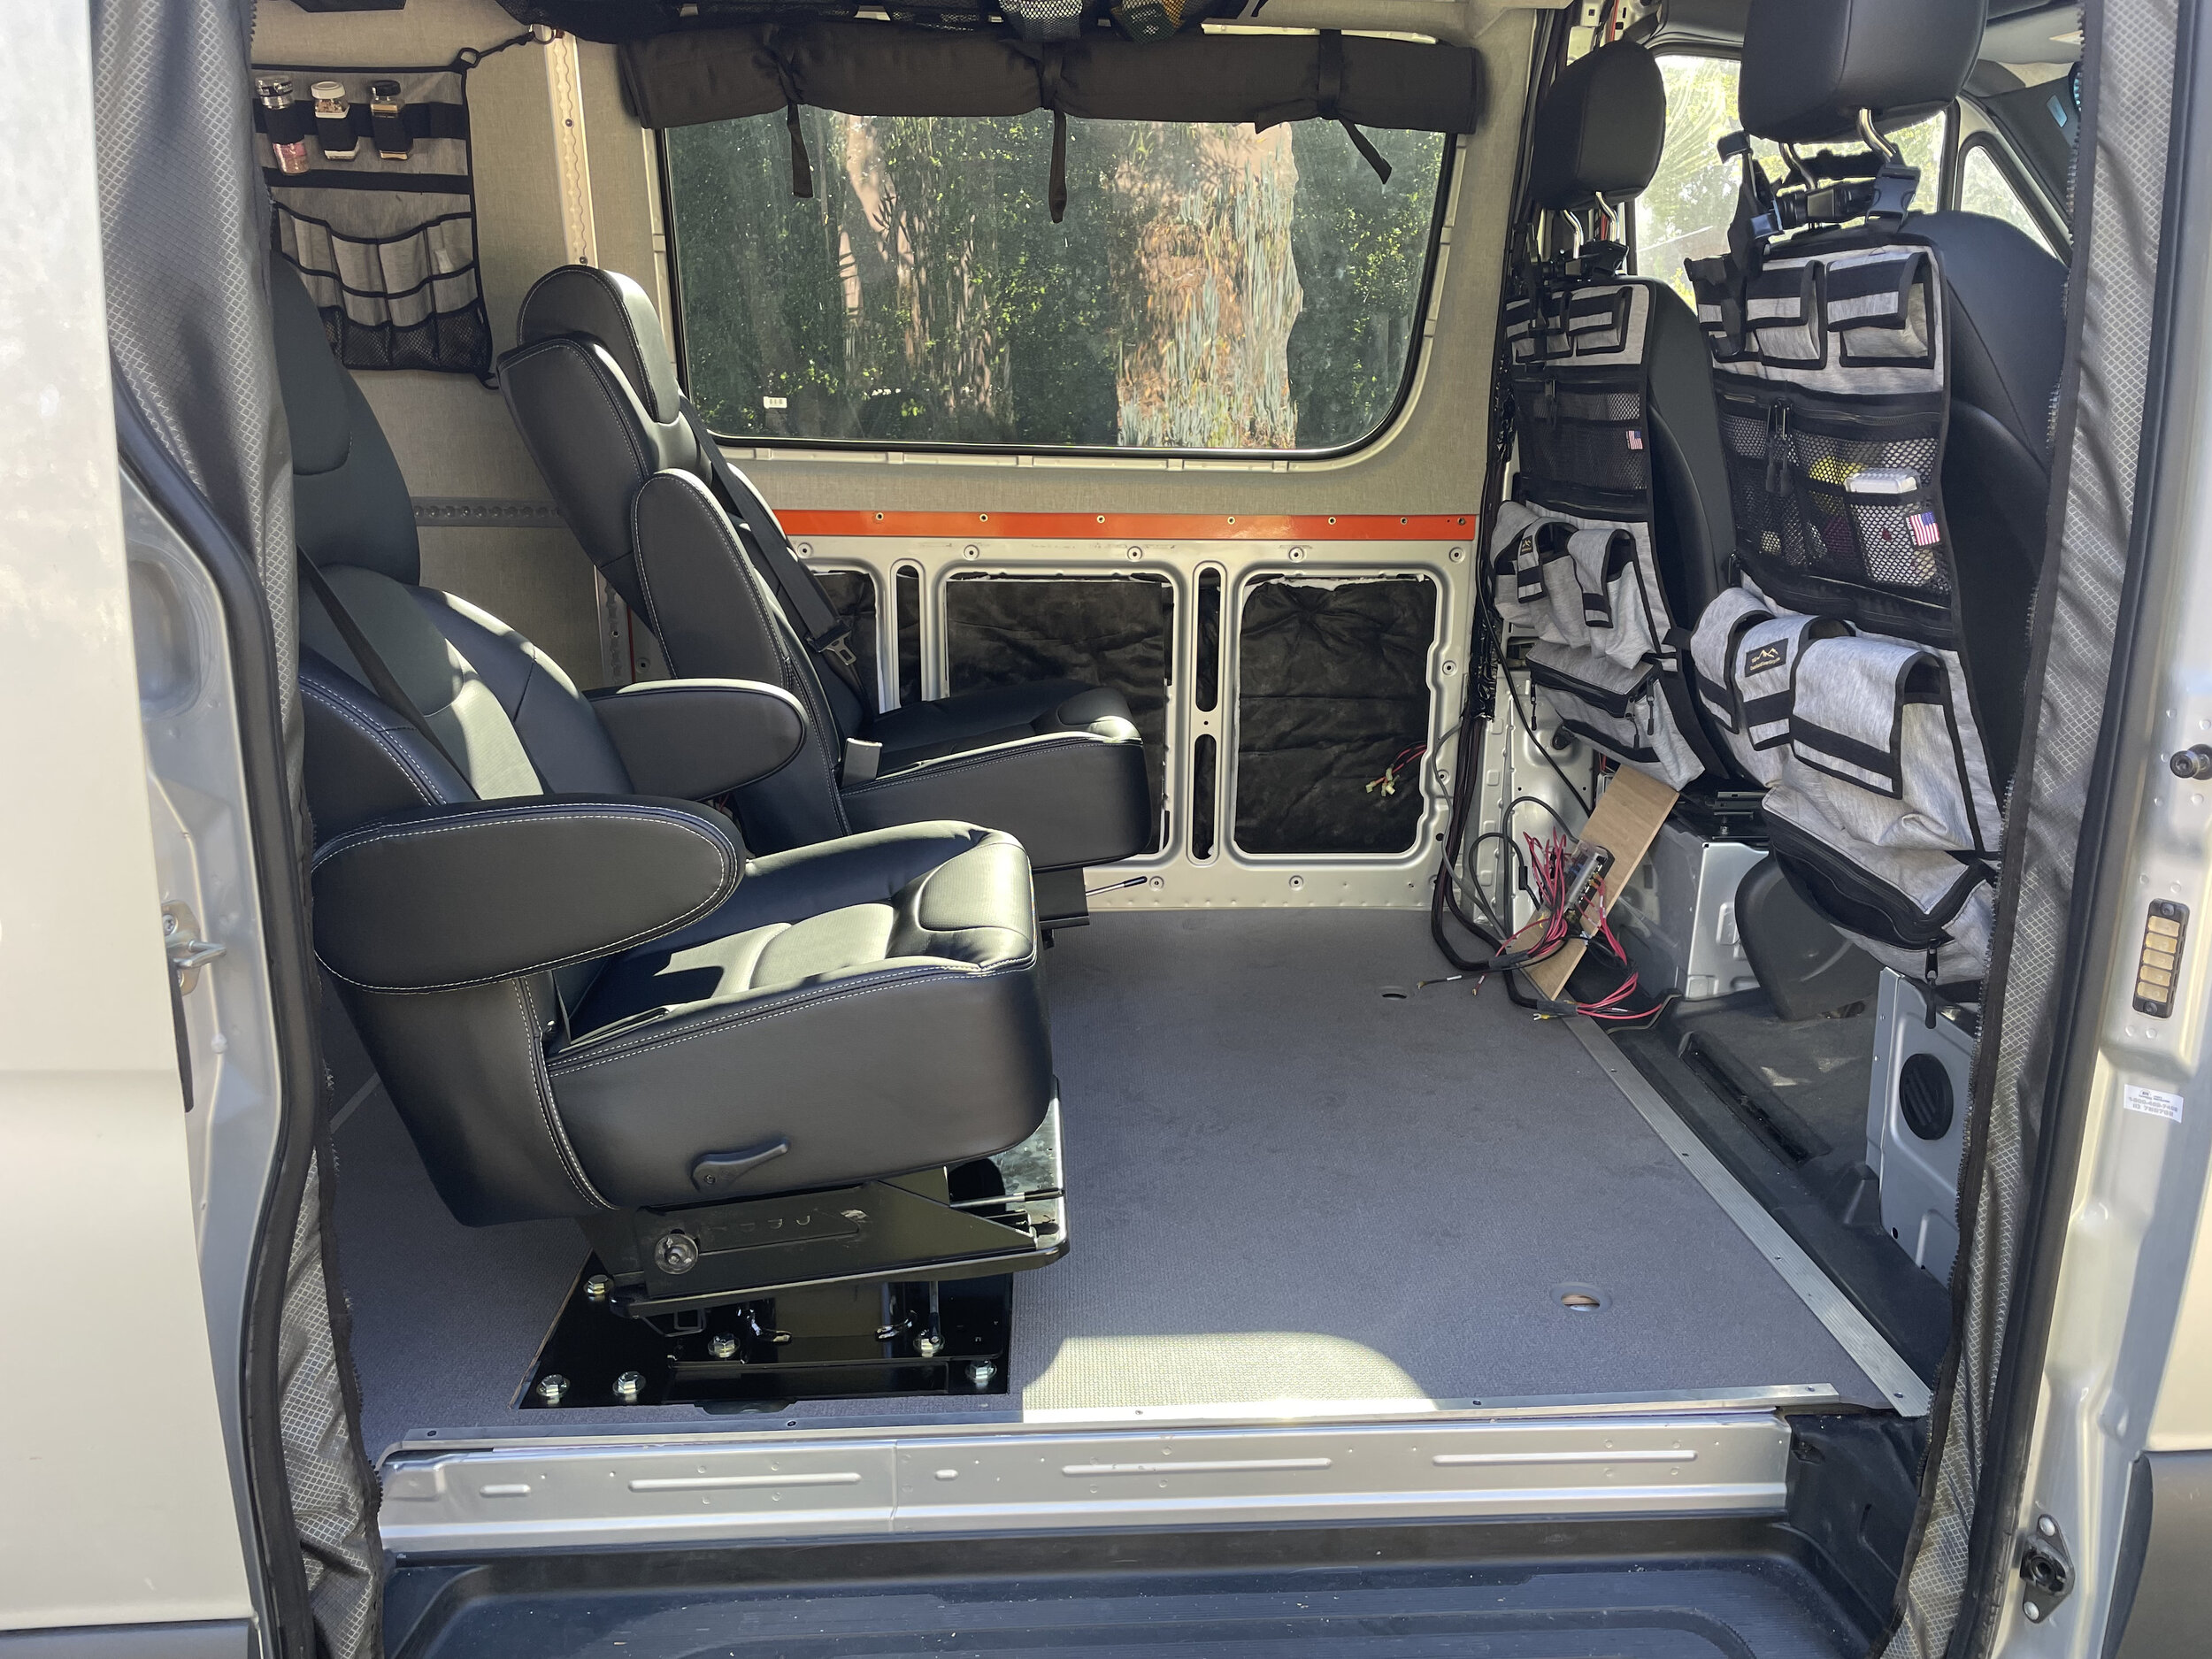
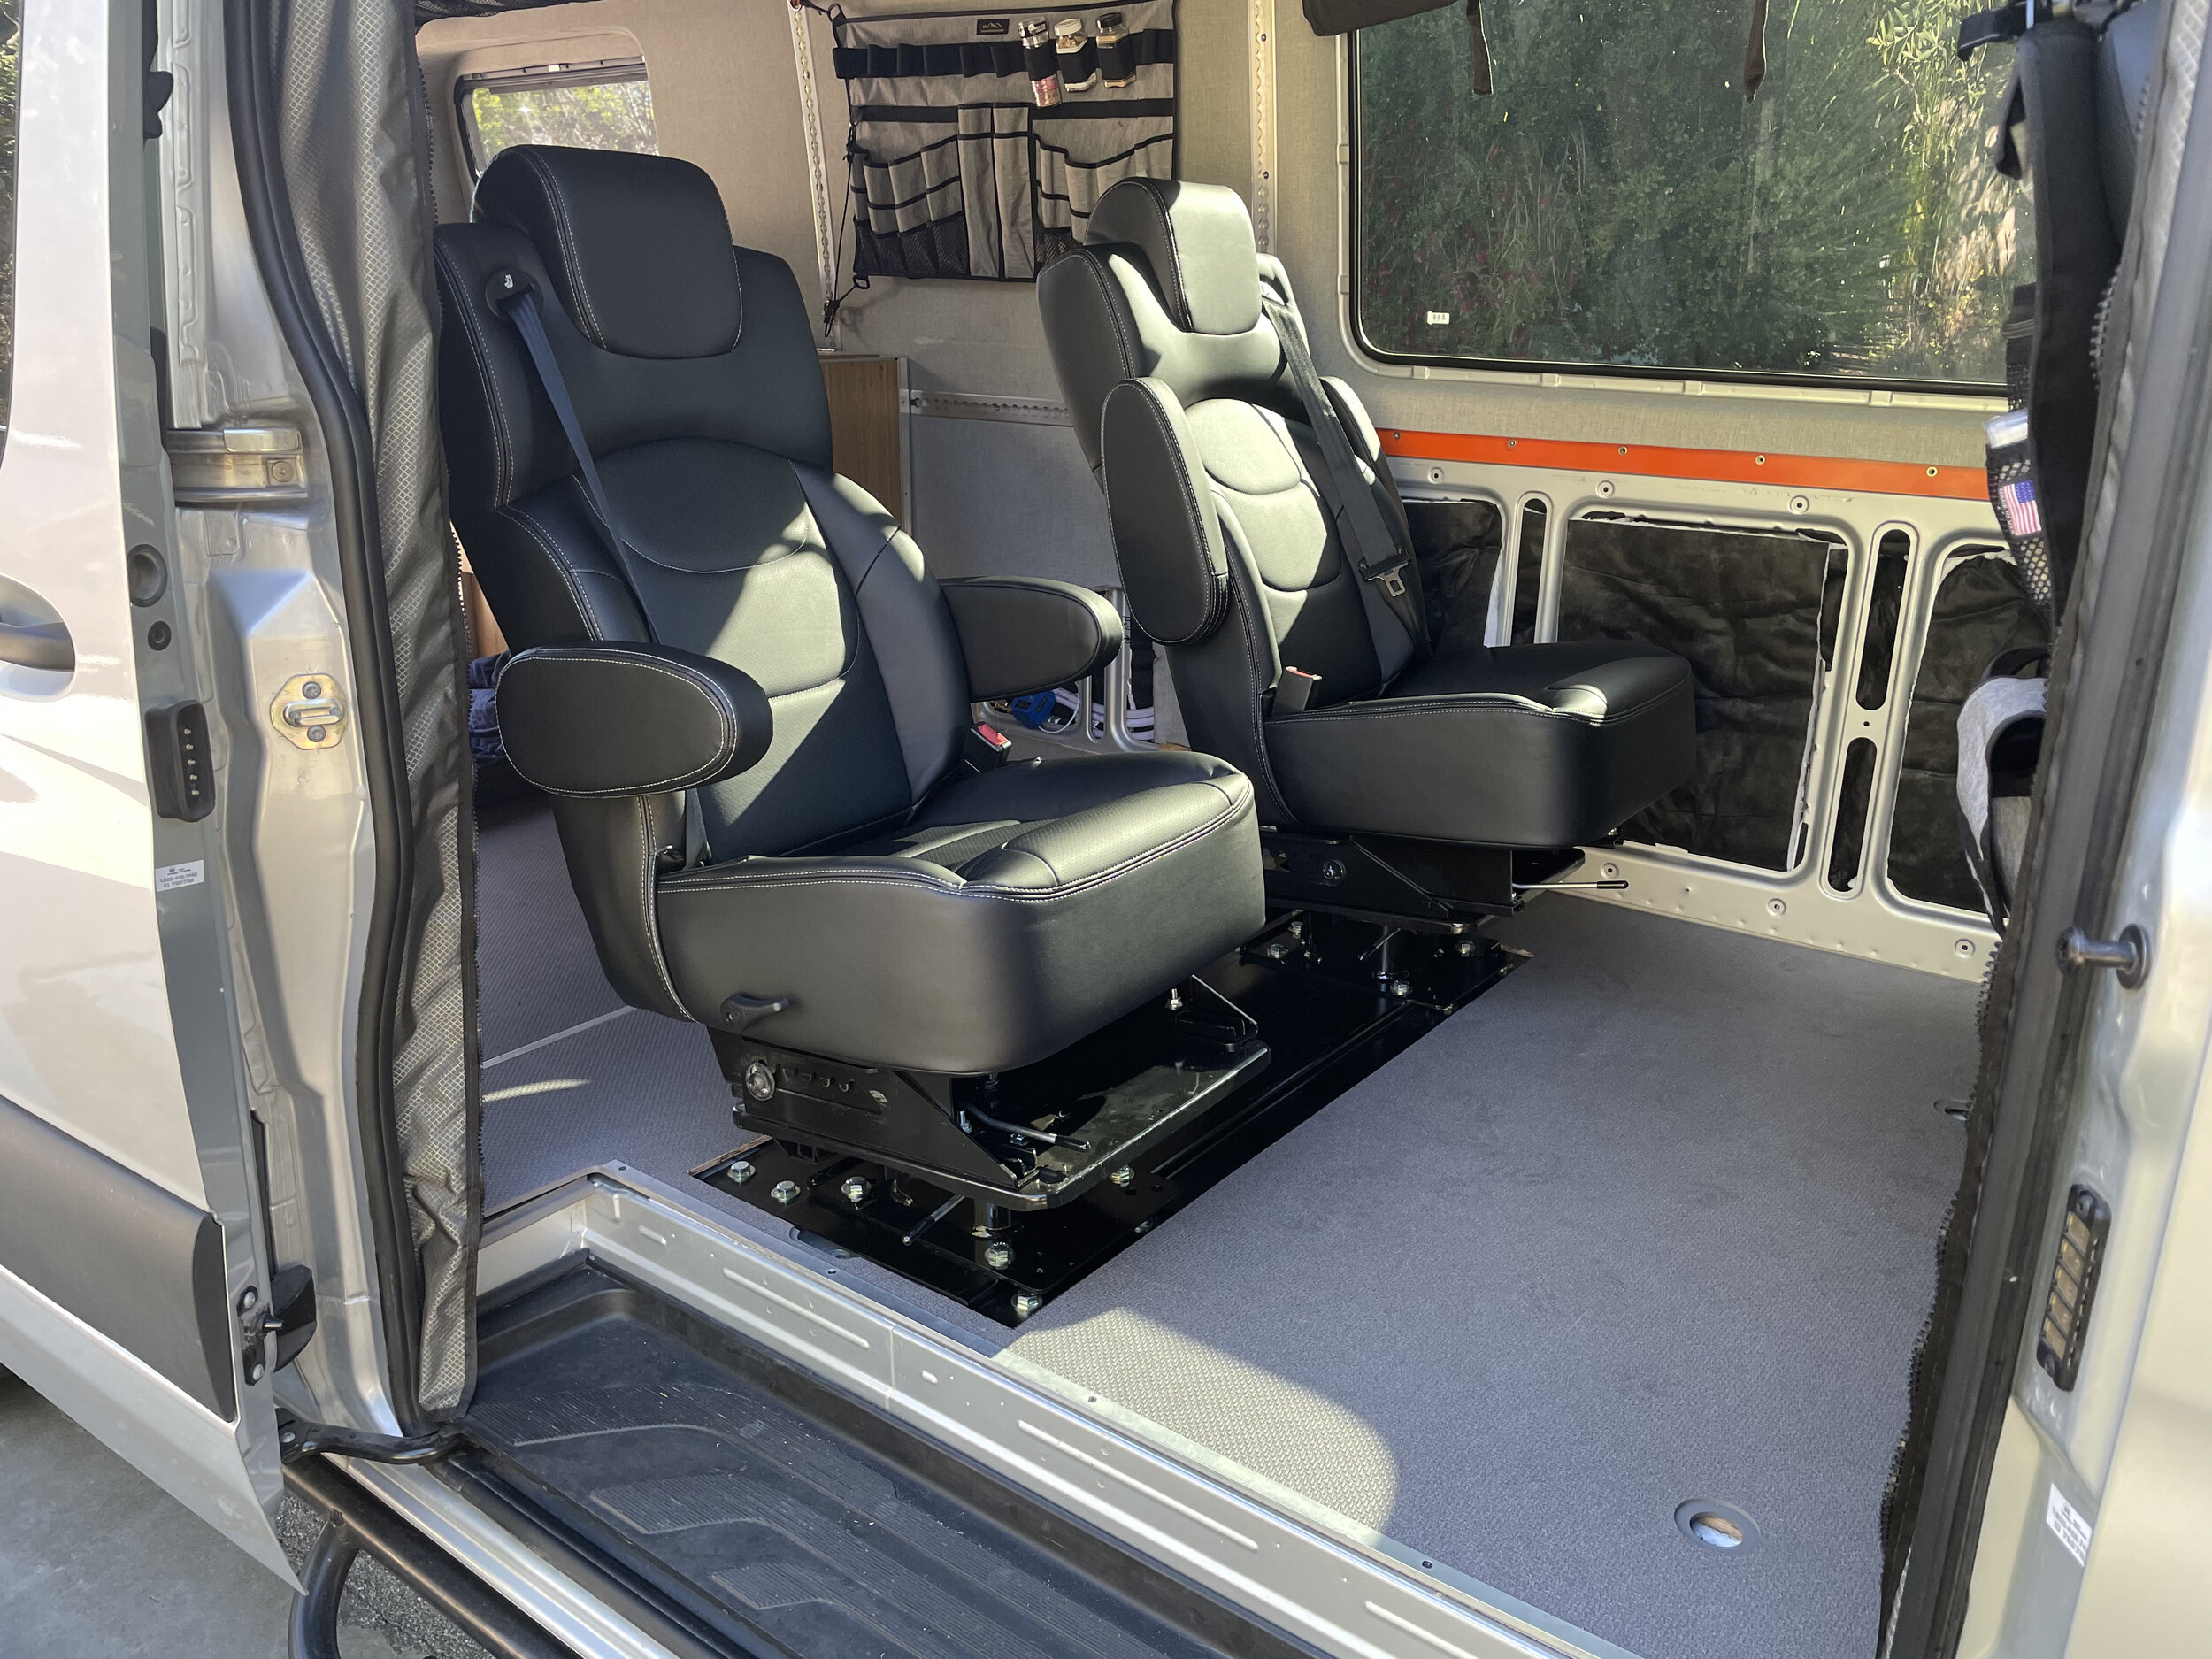
As for the floor we bought a brand new MB wood floor designed for a cargo van and cut around the mounting plate to have a clean transition. This is where I wish I had done something different. Don’t get me wrong what we have works extremely well. Our plan is to get some marine grade carpet and custom cut and bound it for a perfect flush fit that is also removable for easy cleaning. Once that is done the floor will be better insulated and more comfortable and very practical for 4 season trips. But, if I could do it again I would have removed everything from the van and put in a custom wood floor that is even more flush (example pictures below). We didn’t do this because we didn’t want to remove the cabinets, electrical, and water tanks for such a minimal improvement. My suggestion is that if your build allows (which ours did not) install the seating solution FIRST, as JMG requires installing the mounting plate on the bare metal floor with no compressible material in between them. After the mounting plate is in place you can build up the sub-floor around the mounting plate for a perfectly smooth flat floor. Then you can move onto the interior kit, and then build your cabinets and bed on top of all that. This will allow for a perfect wood, vinyl, or carpet floor without any compromises.

Example of a custom floor that completely hides the mounting plate.
The install was quick. I drove down to Orange County on a Sunday, spent the night with some relatives, and showed up at JMG’s shop at 7:30 am and in less than 3 hours they had installed the base plate, seats, and custom cut the wood floor. I was on the road back to the Bay Area by 10:30. JMG SYSTEMS also works with other Upfitter Partners who can do the install for you. If you are really handy, you can do the installation yourself with a bit of guidance from JMG’s lead design engineer. I am thrilled with how everything turned out. JMG has a fantastic product that more van builders should look into. Reach out to them and have them recommend a certified & tested seating solution that is right for your van.