
Defender 90 Build - Seating
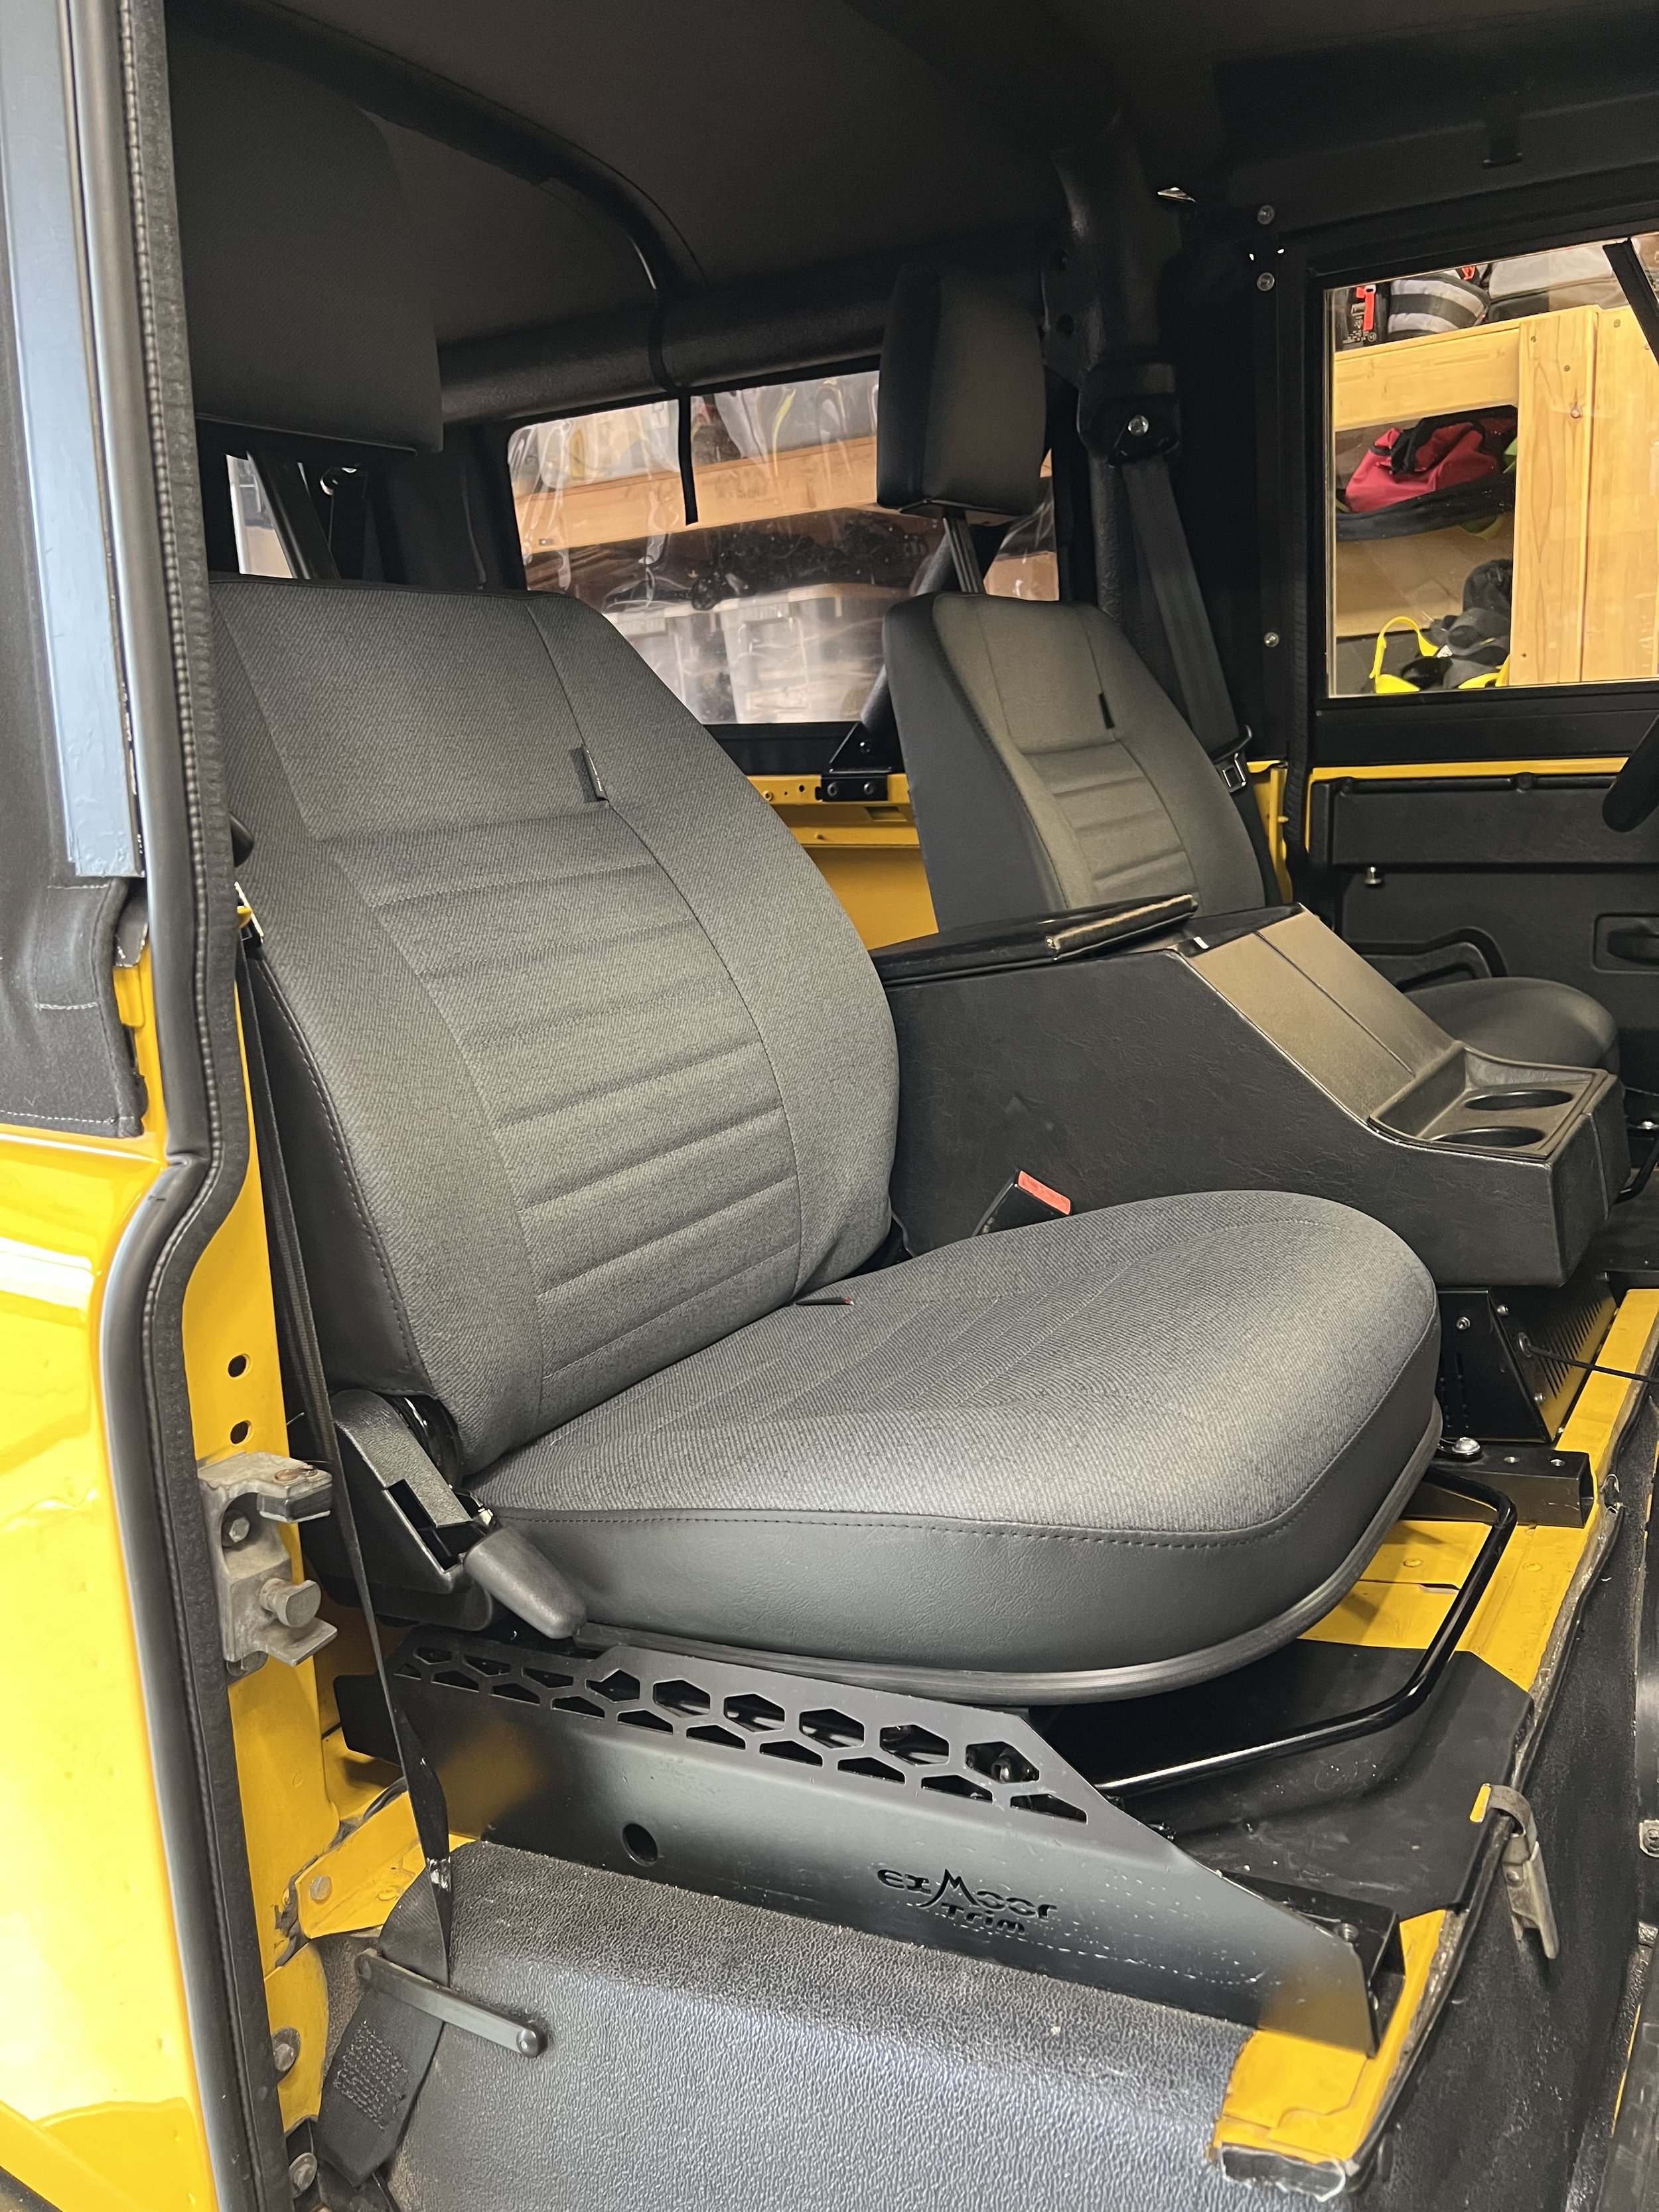
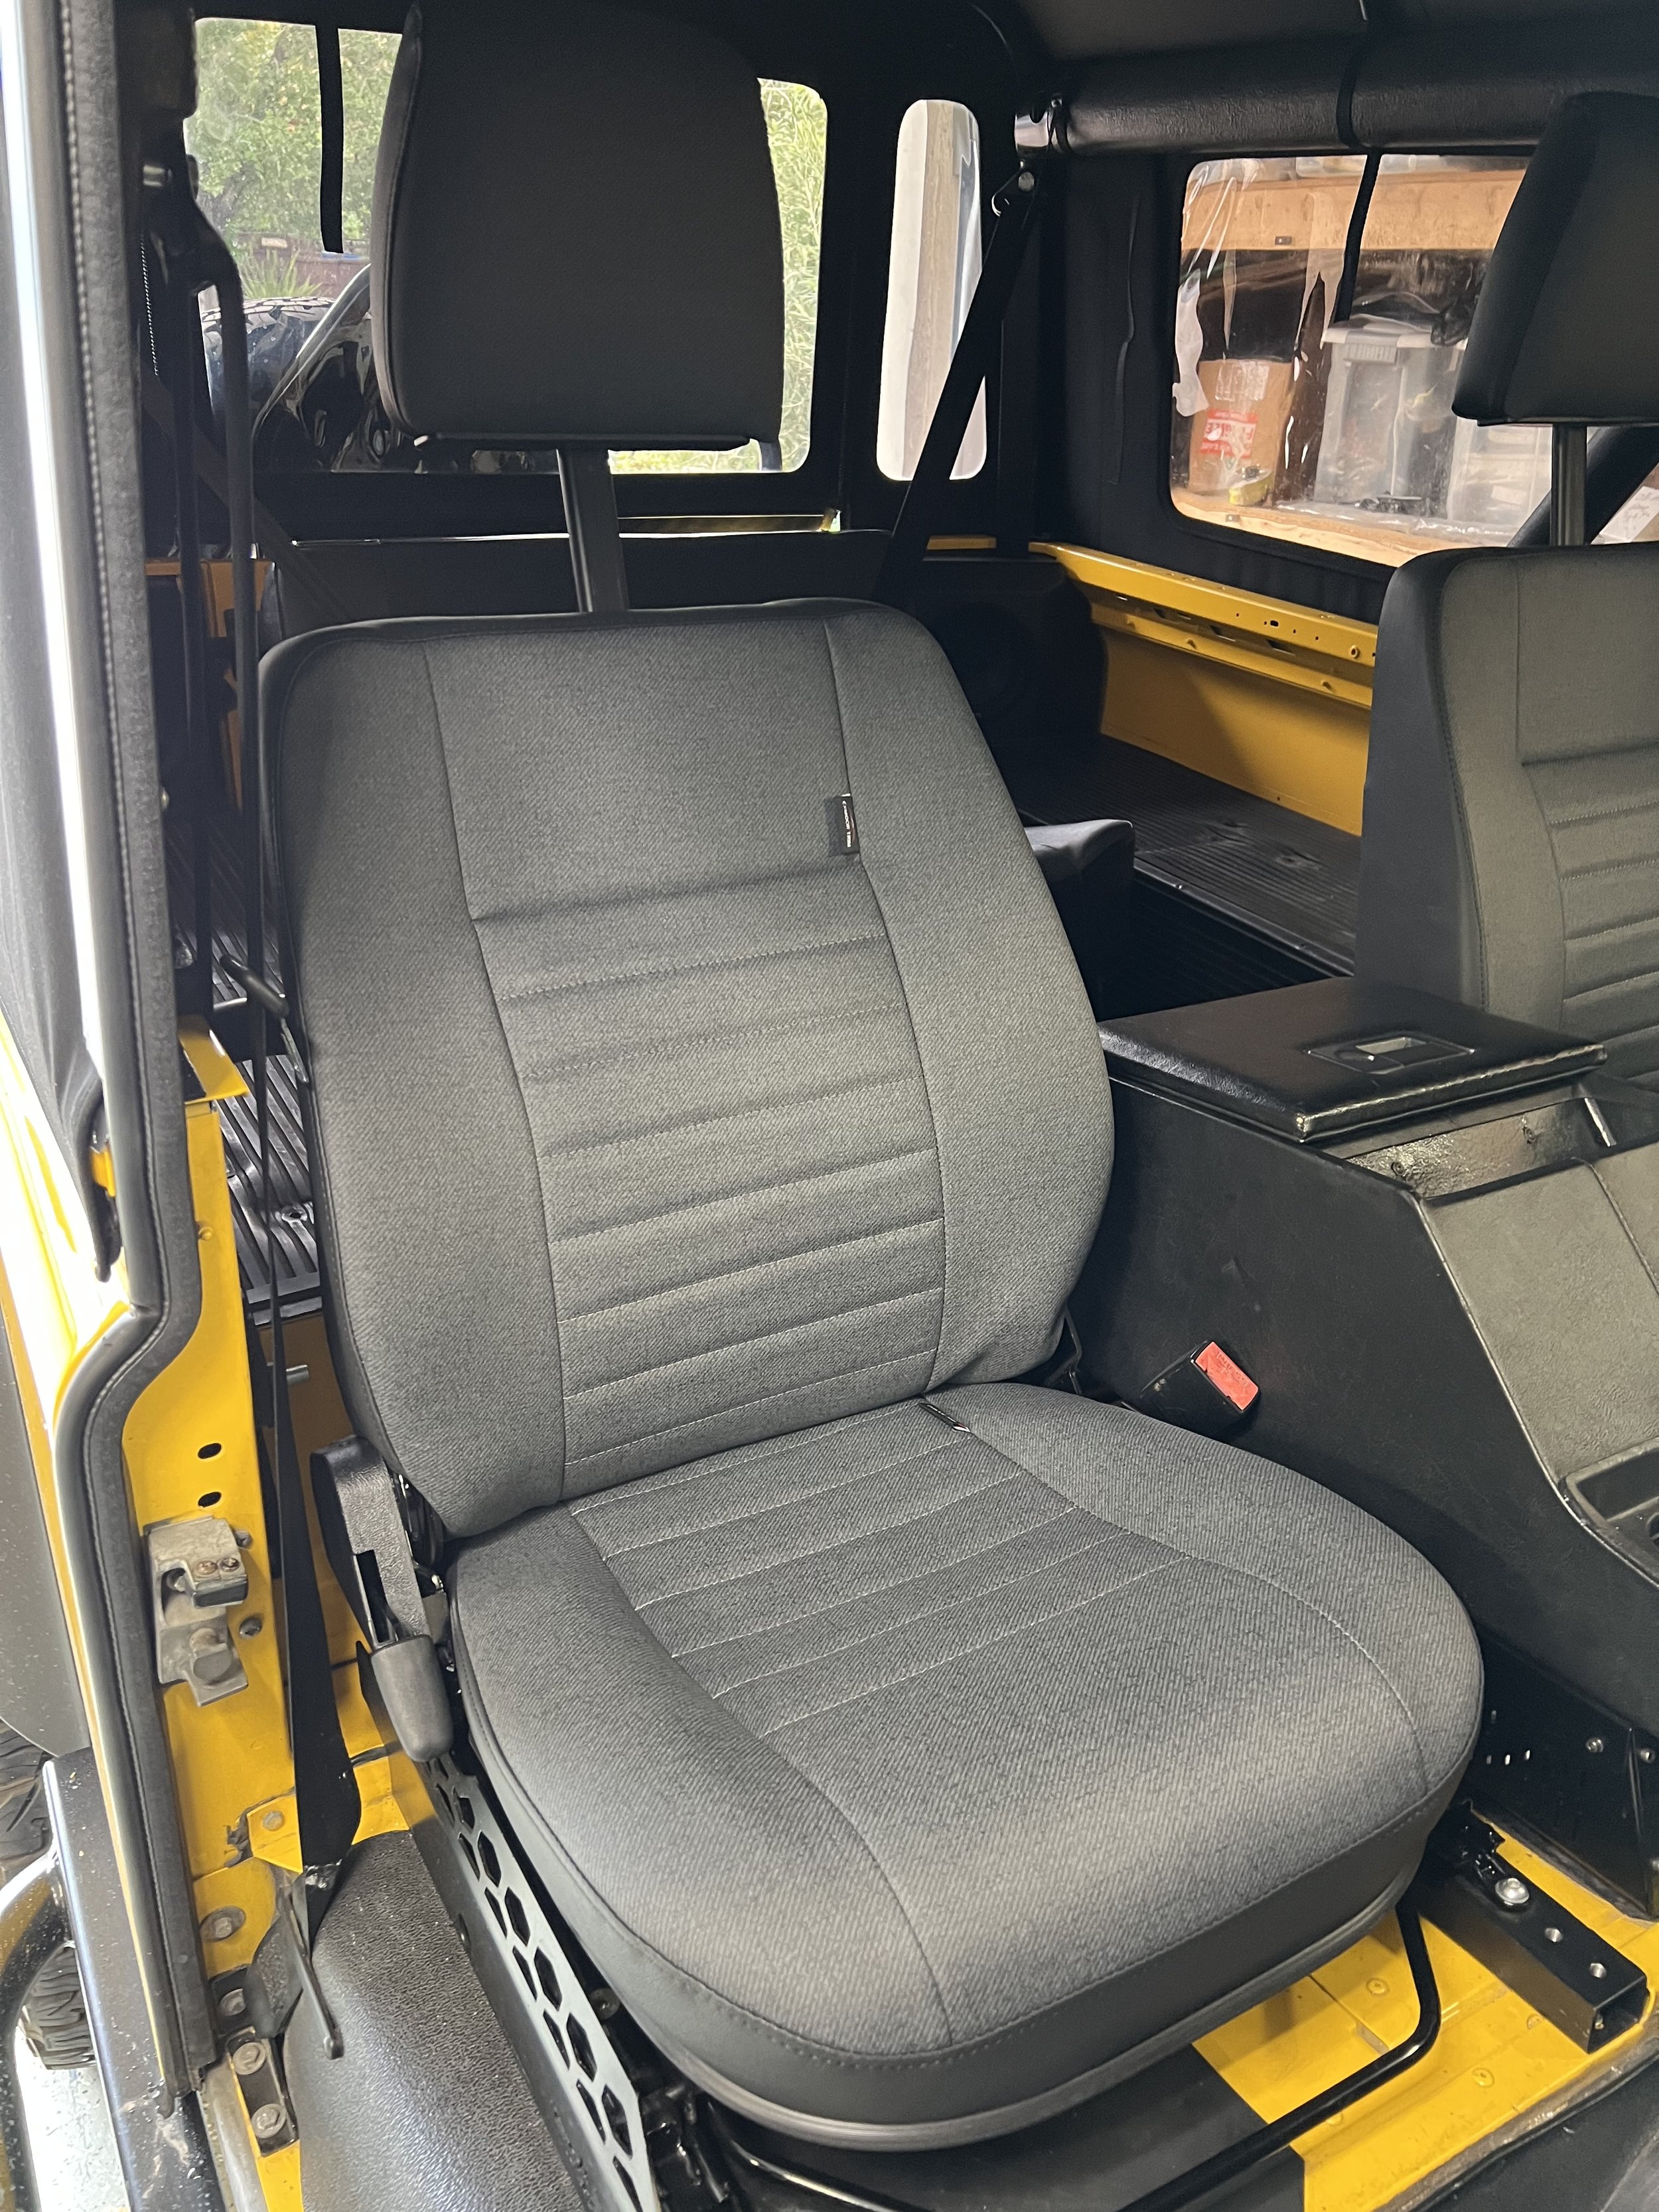
My truck came with the original OEM front seats but aftermarket rear side facing seats. The front seats where in rather good condition but the foam was getting compressed, the sliding mechanism was no longer smooth, and the plastic end cap was cracked. All in all, exactly what you would expect from a 1994 car. At first I was going to simply reupholster the seats but the cost of doing that was not that much cheaper than simply buying new seats. So I decided to replace the front seats with Exmoor factory spec seats. This would keep the original look while making the seats more comfortable. I decided to add Exmoor seat risers to give the driver and passenger a more comfortable seating position. The new seats also come with seat heaters which is a nice feature but not really necessary if you ask me given the truck runs warm due to the fact there is zero heat shielding from the engine bay.
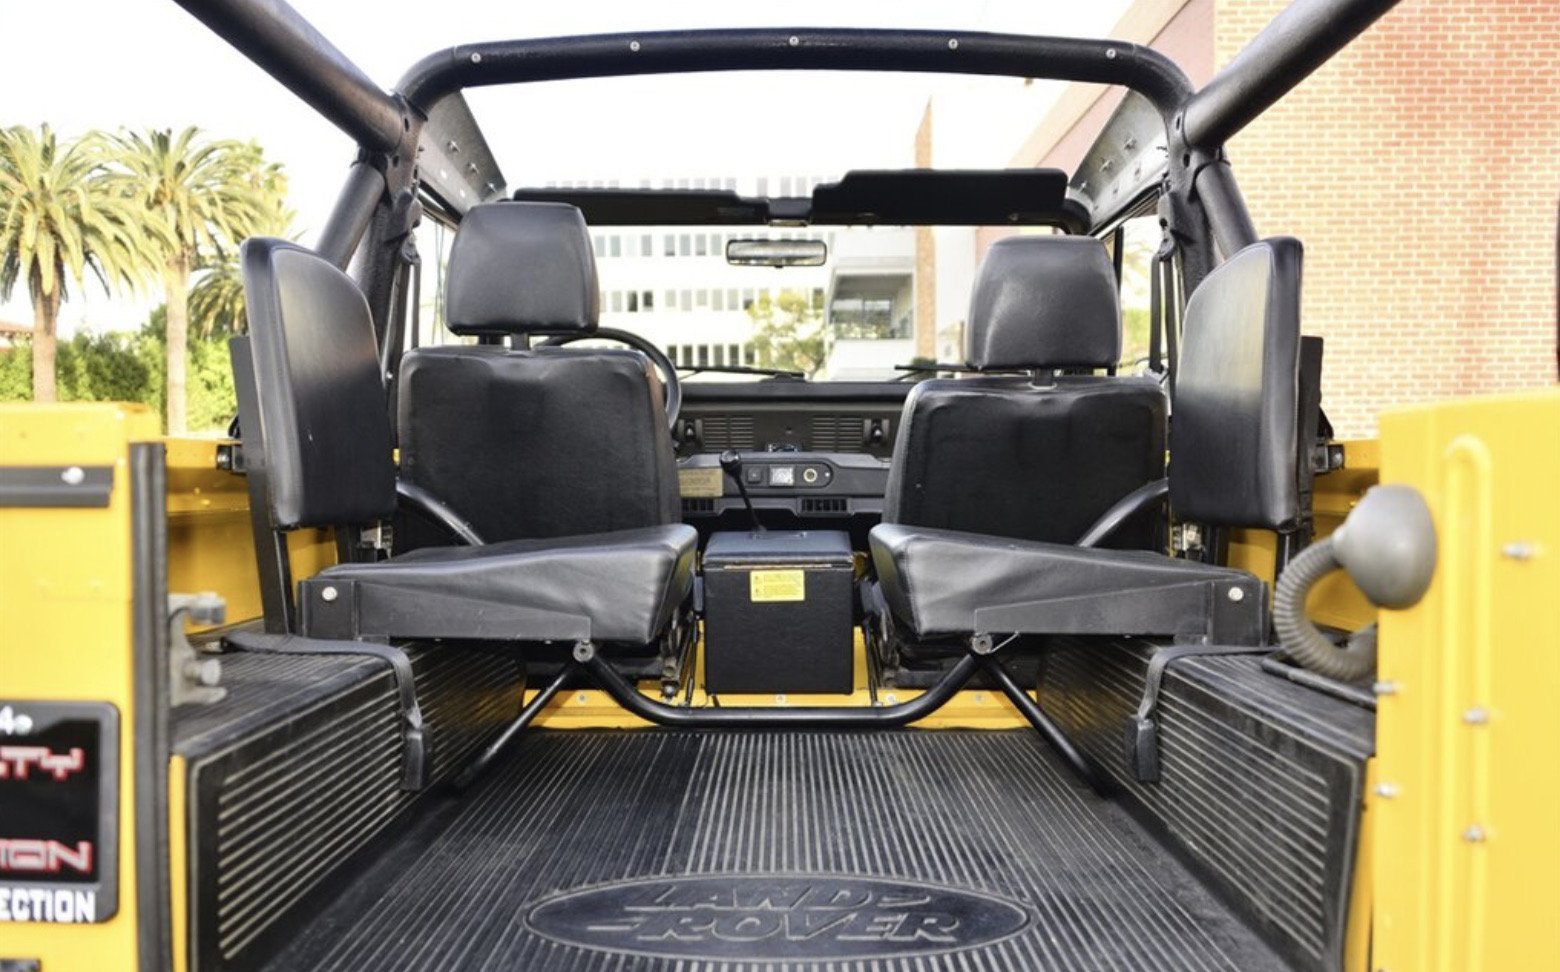
The side facing seats are a classic option for Defenders but not very practical or safe. The passengers sit very high since the seats mount to the wheel wells and the seats only have lap belts so in an accident the passengers would most certainly get hurt. They were also not a factory option for a NAS due to US DOT regulations, so if you are going for a period correct build these seats do not match. The trucks came stock with no rear seat but you could get a rear bench as an option from the dealer. These benches are no longer made but many people who have them sell them in order to put in the side facing jump seats. Another option for rear seats on Defenders is to get modern bucket fold down seats by Exmoor. These are very functional and safer than the side facing seats but are not period correct so for my build they were not a contender.
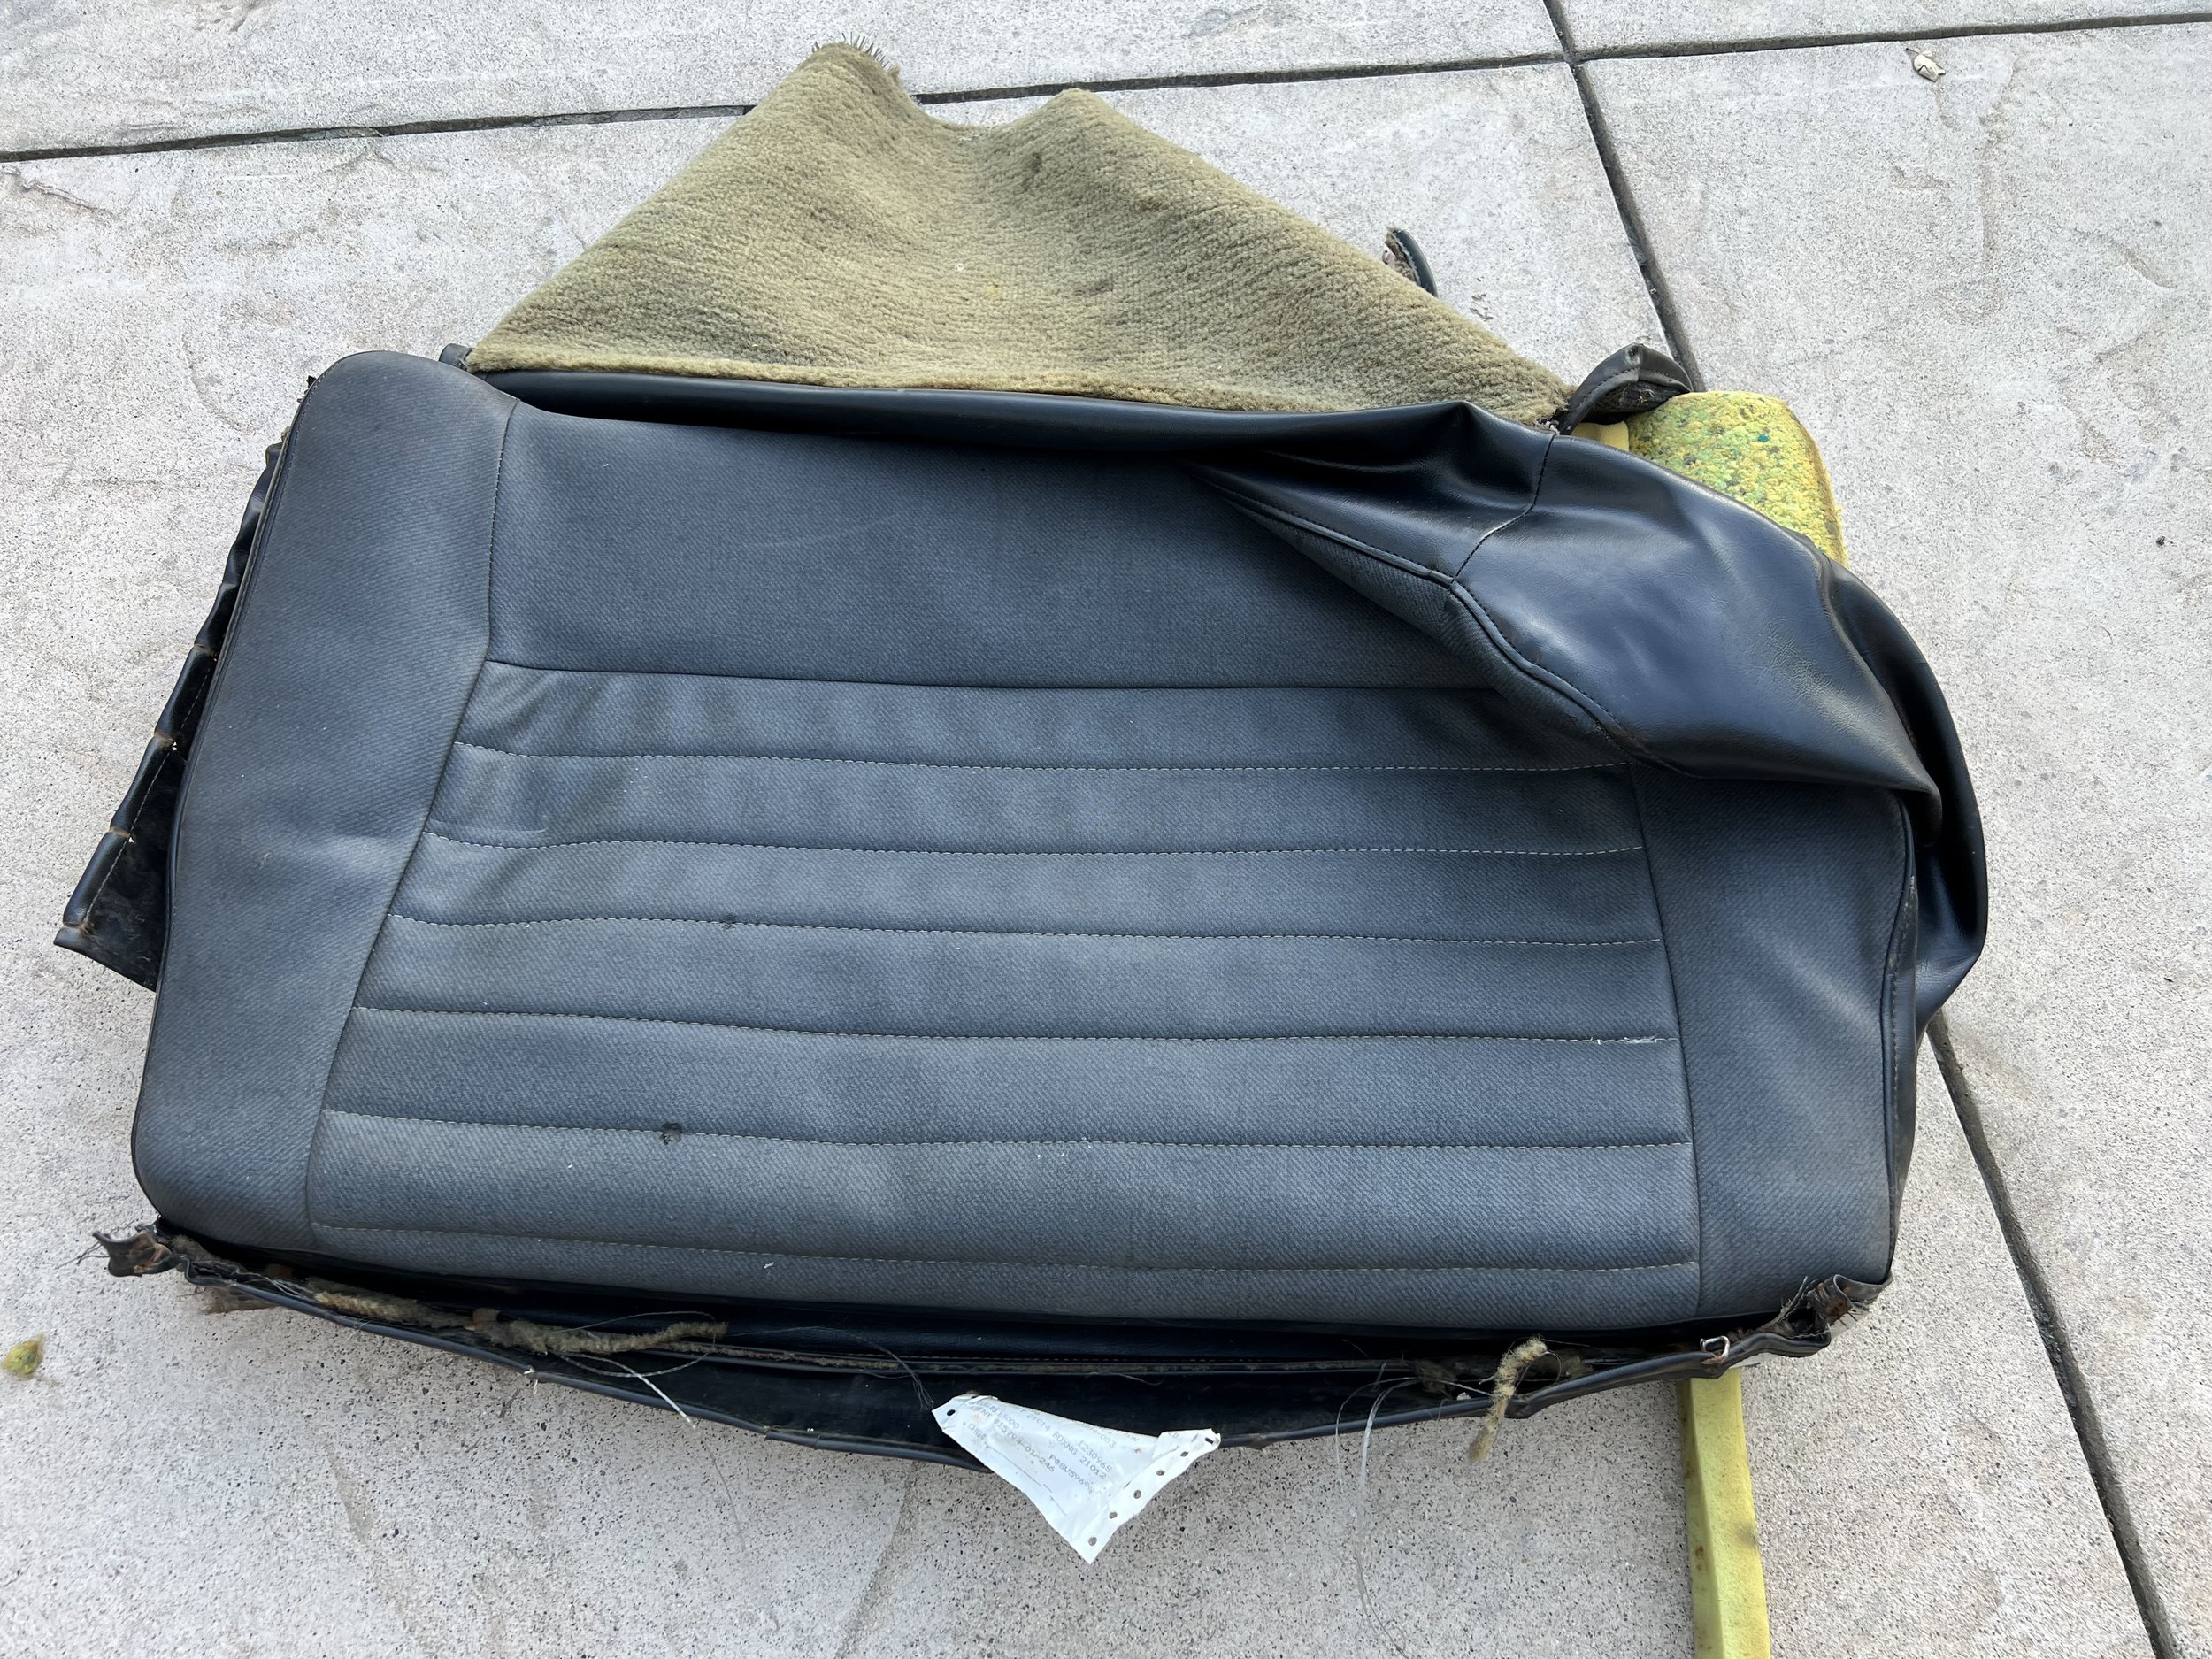
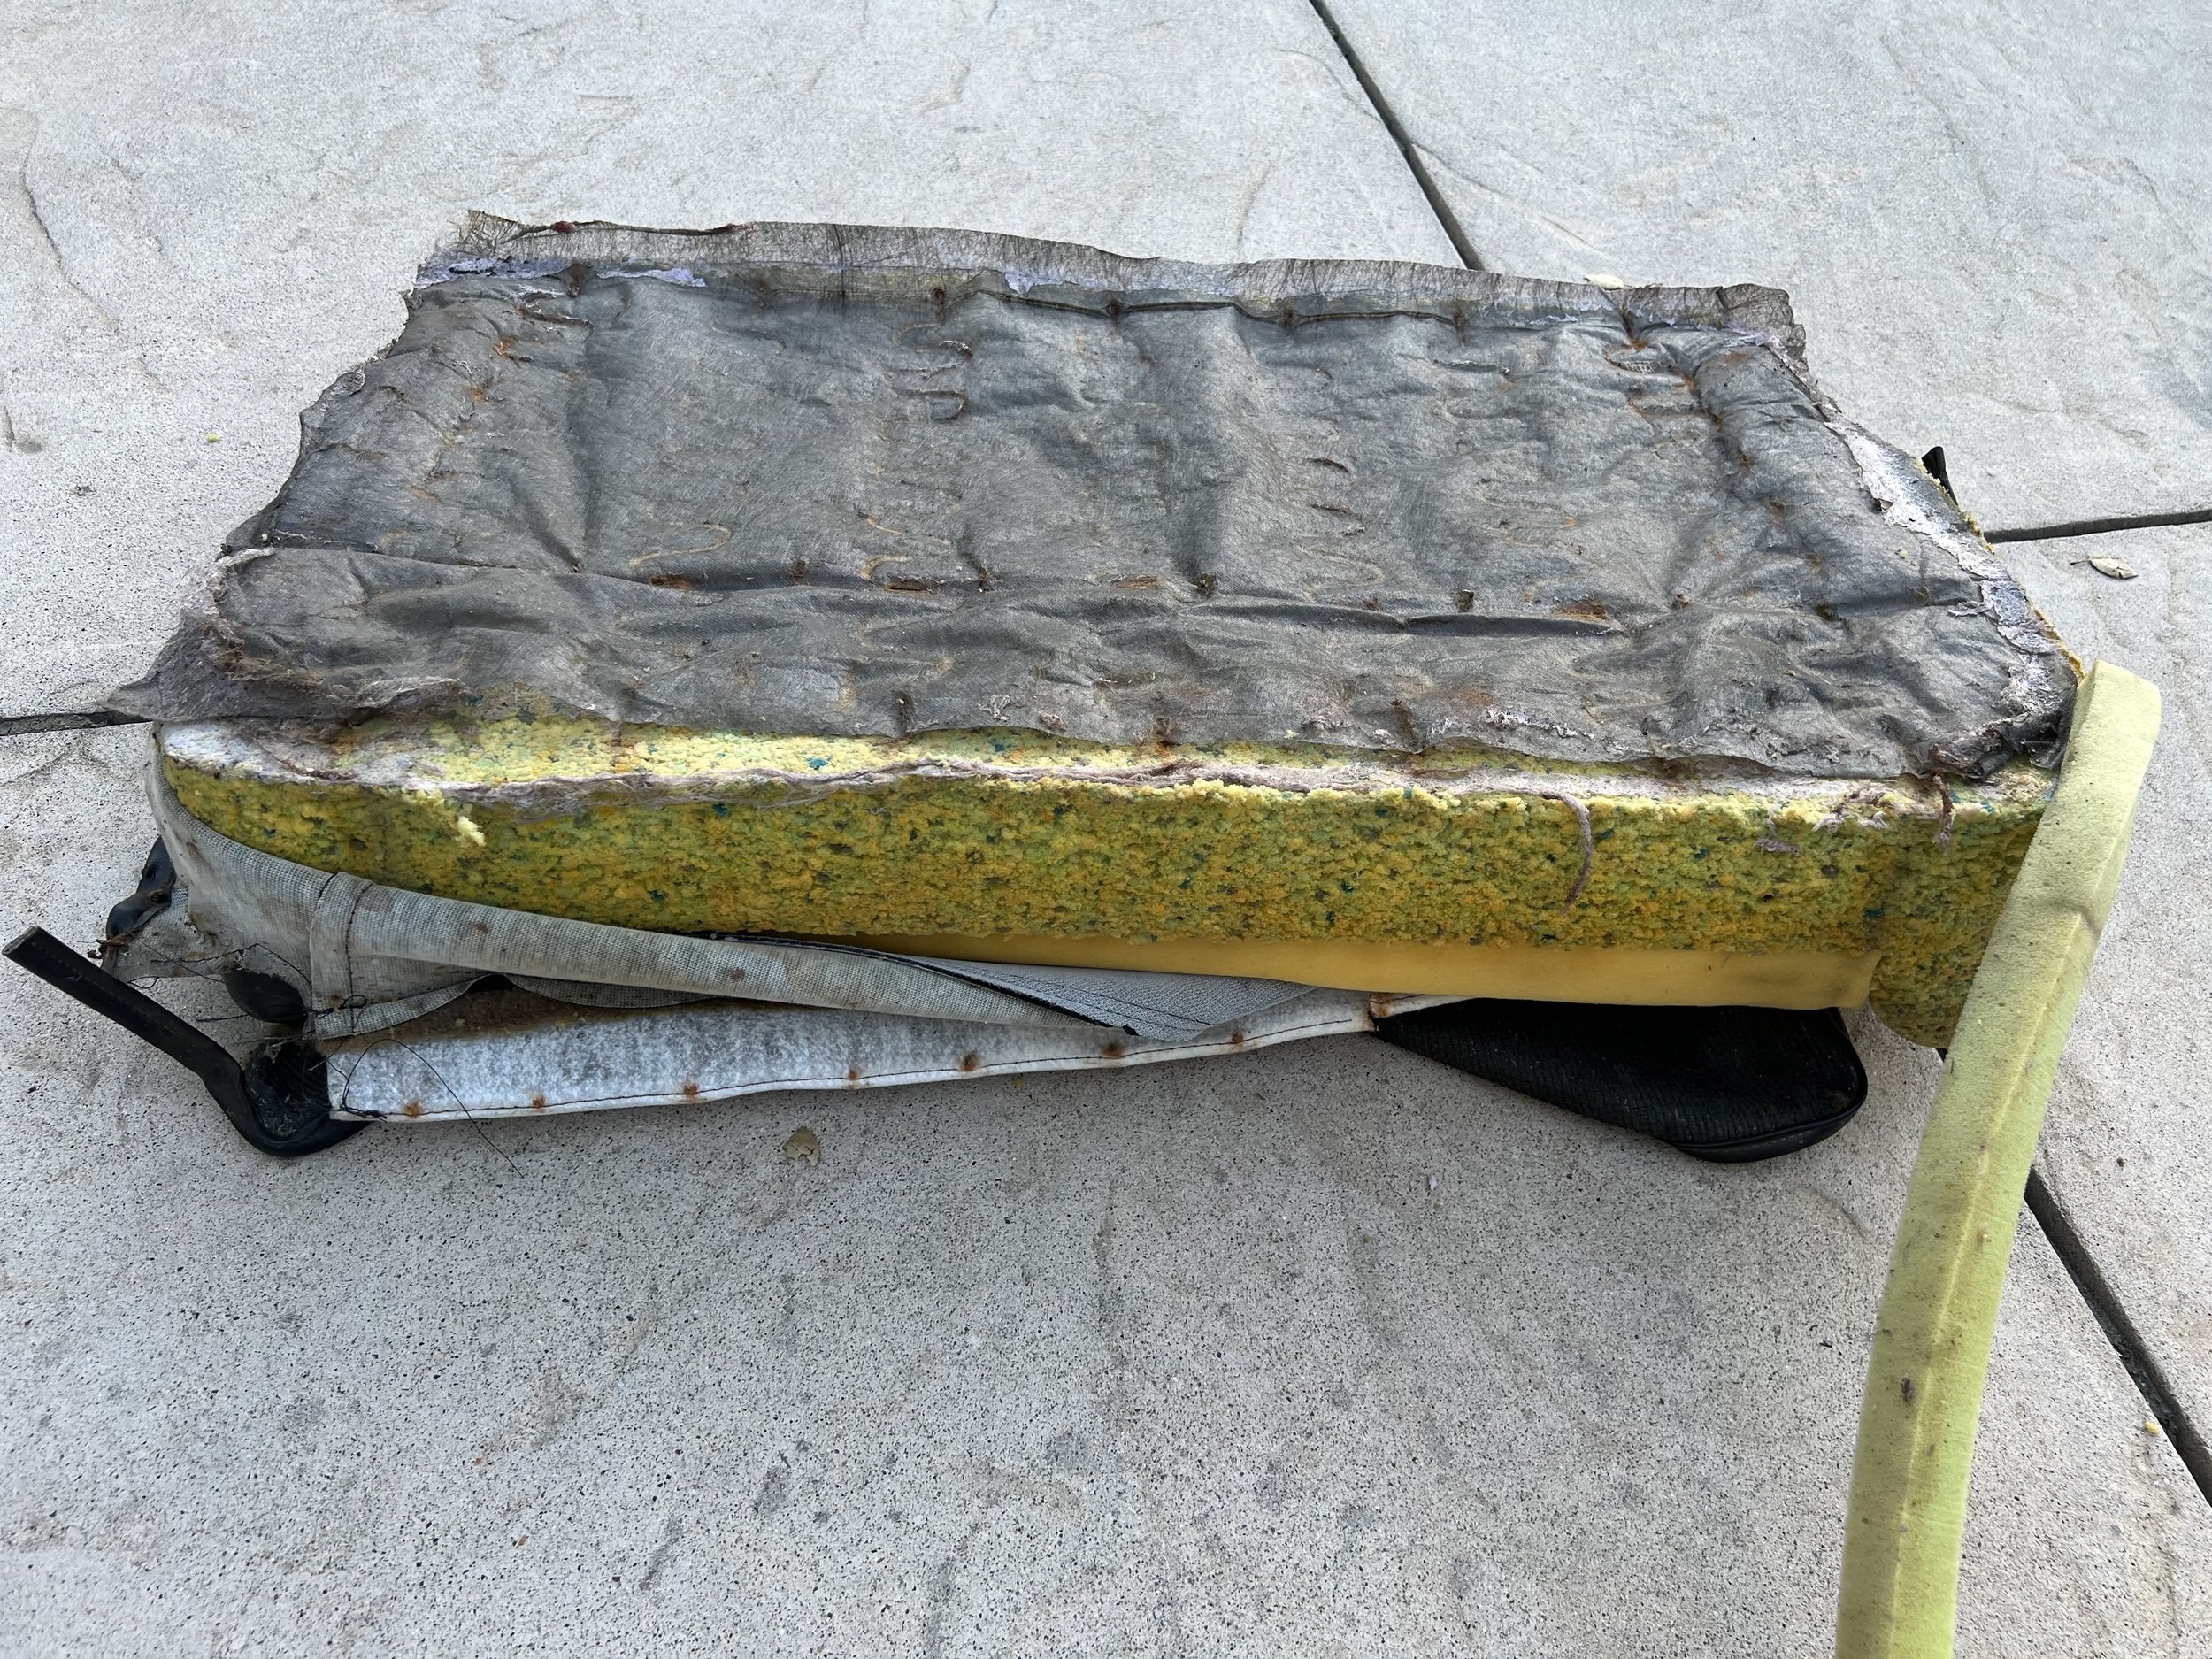
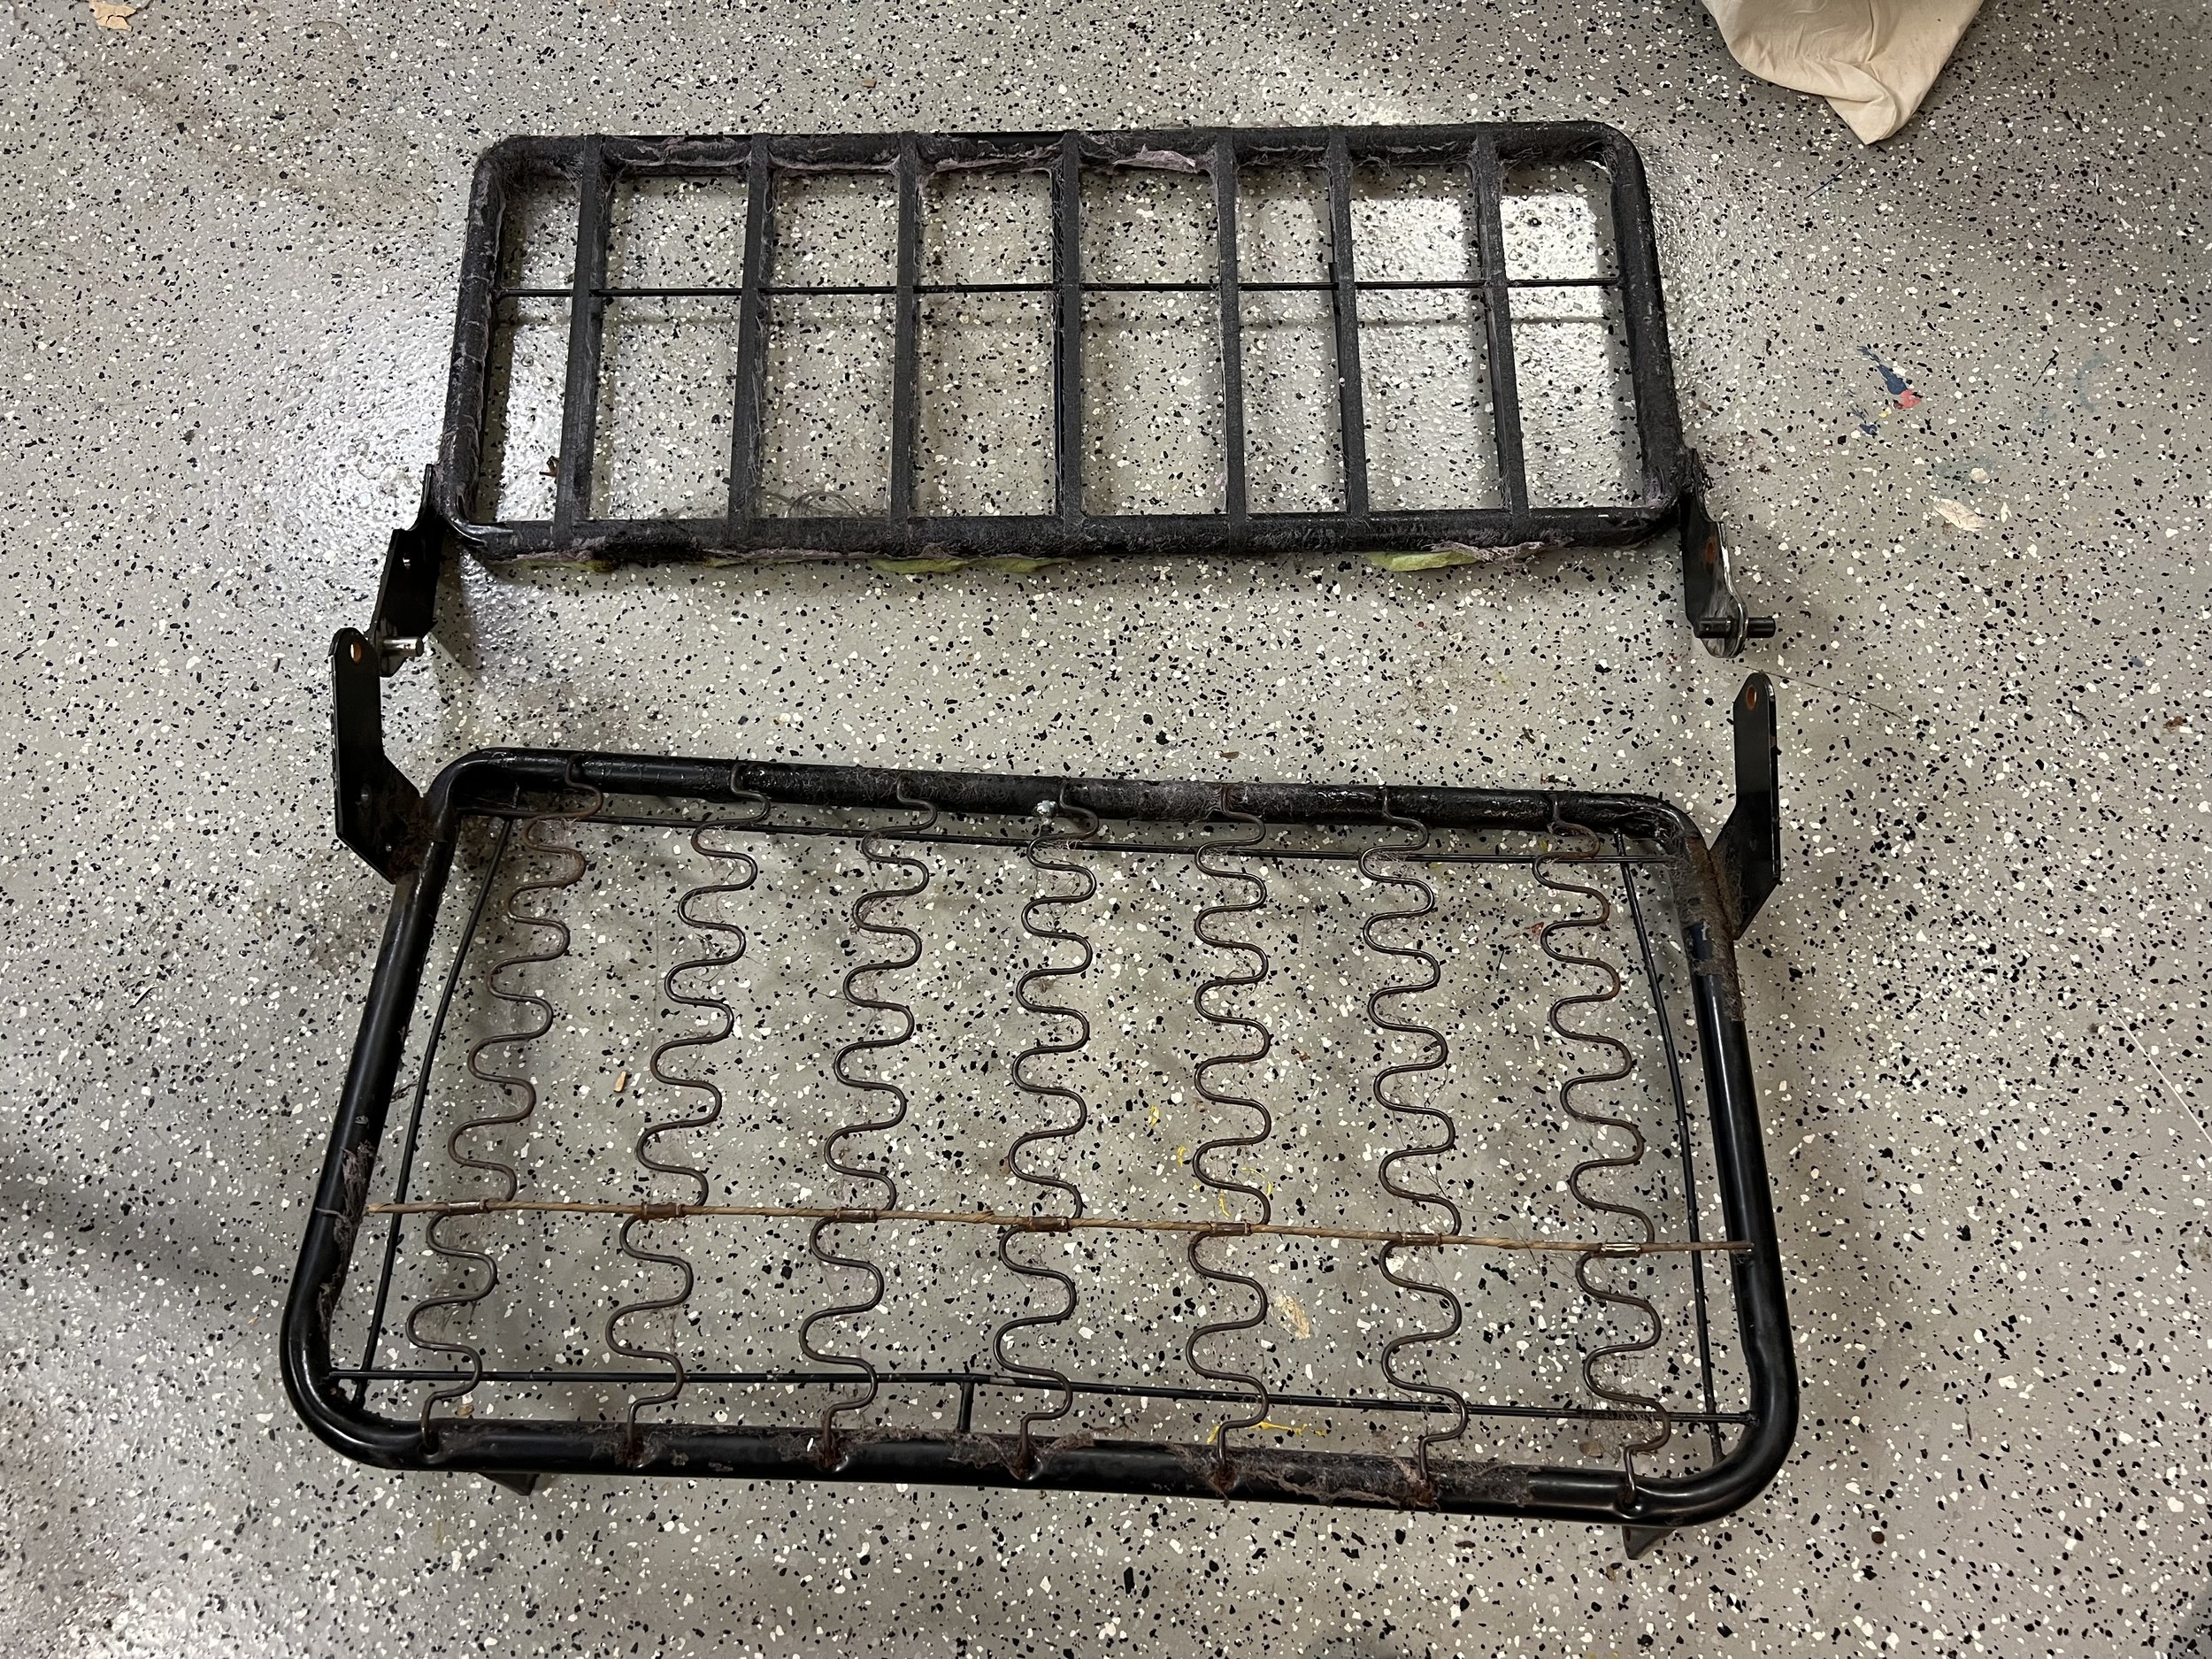
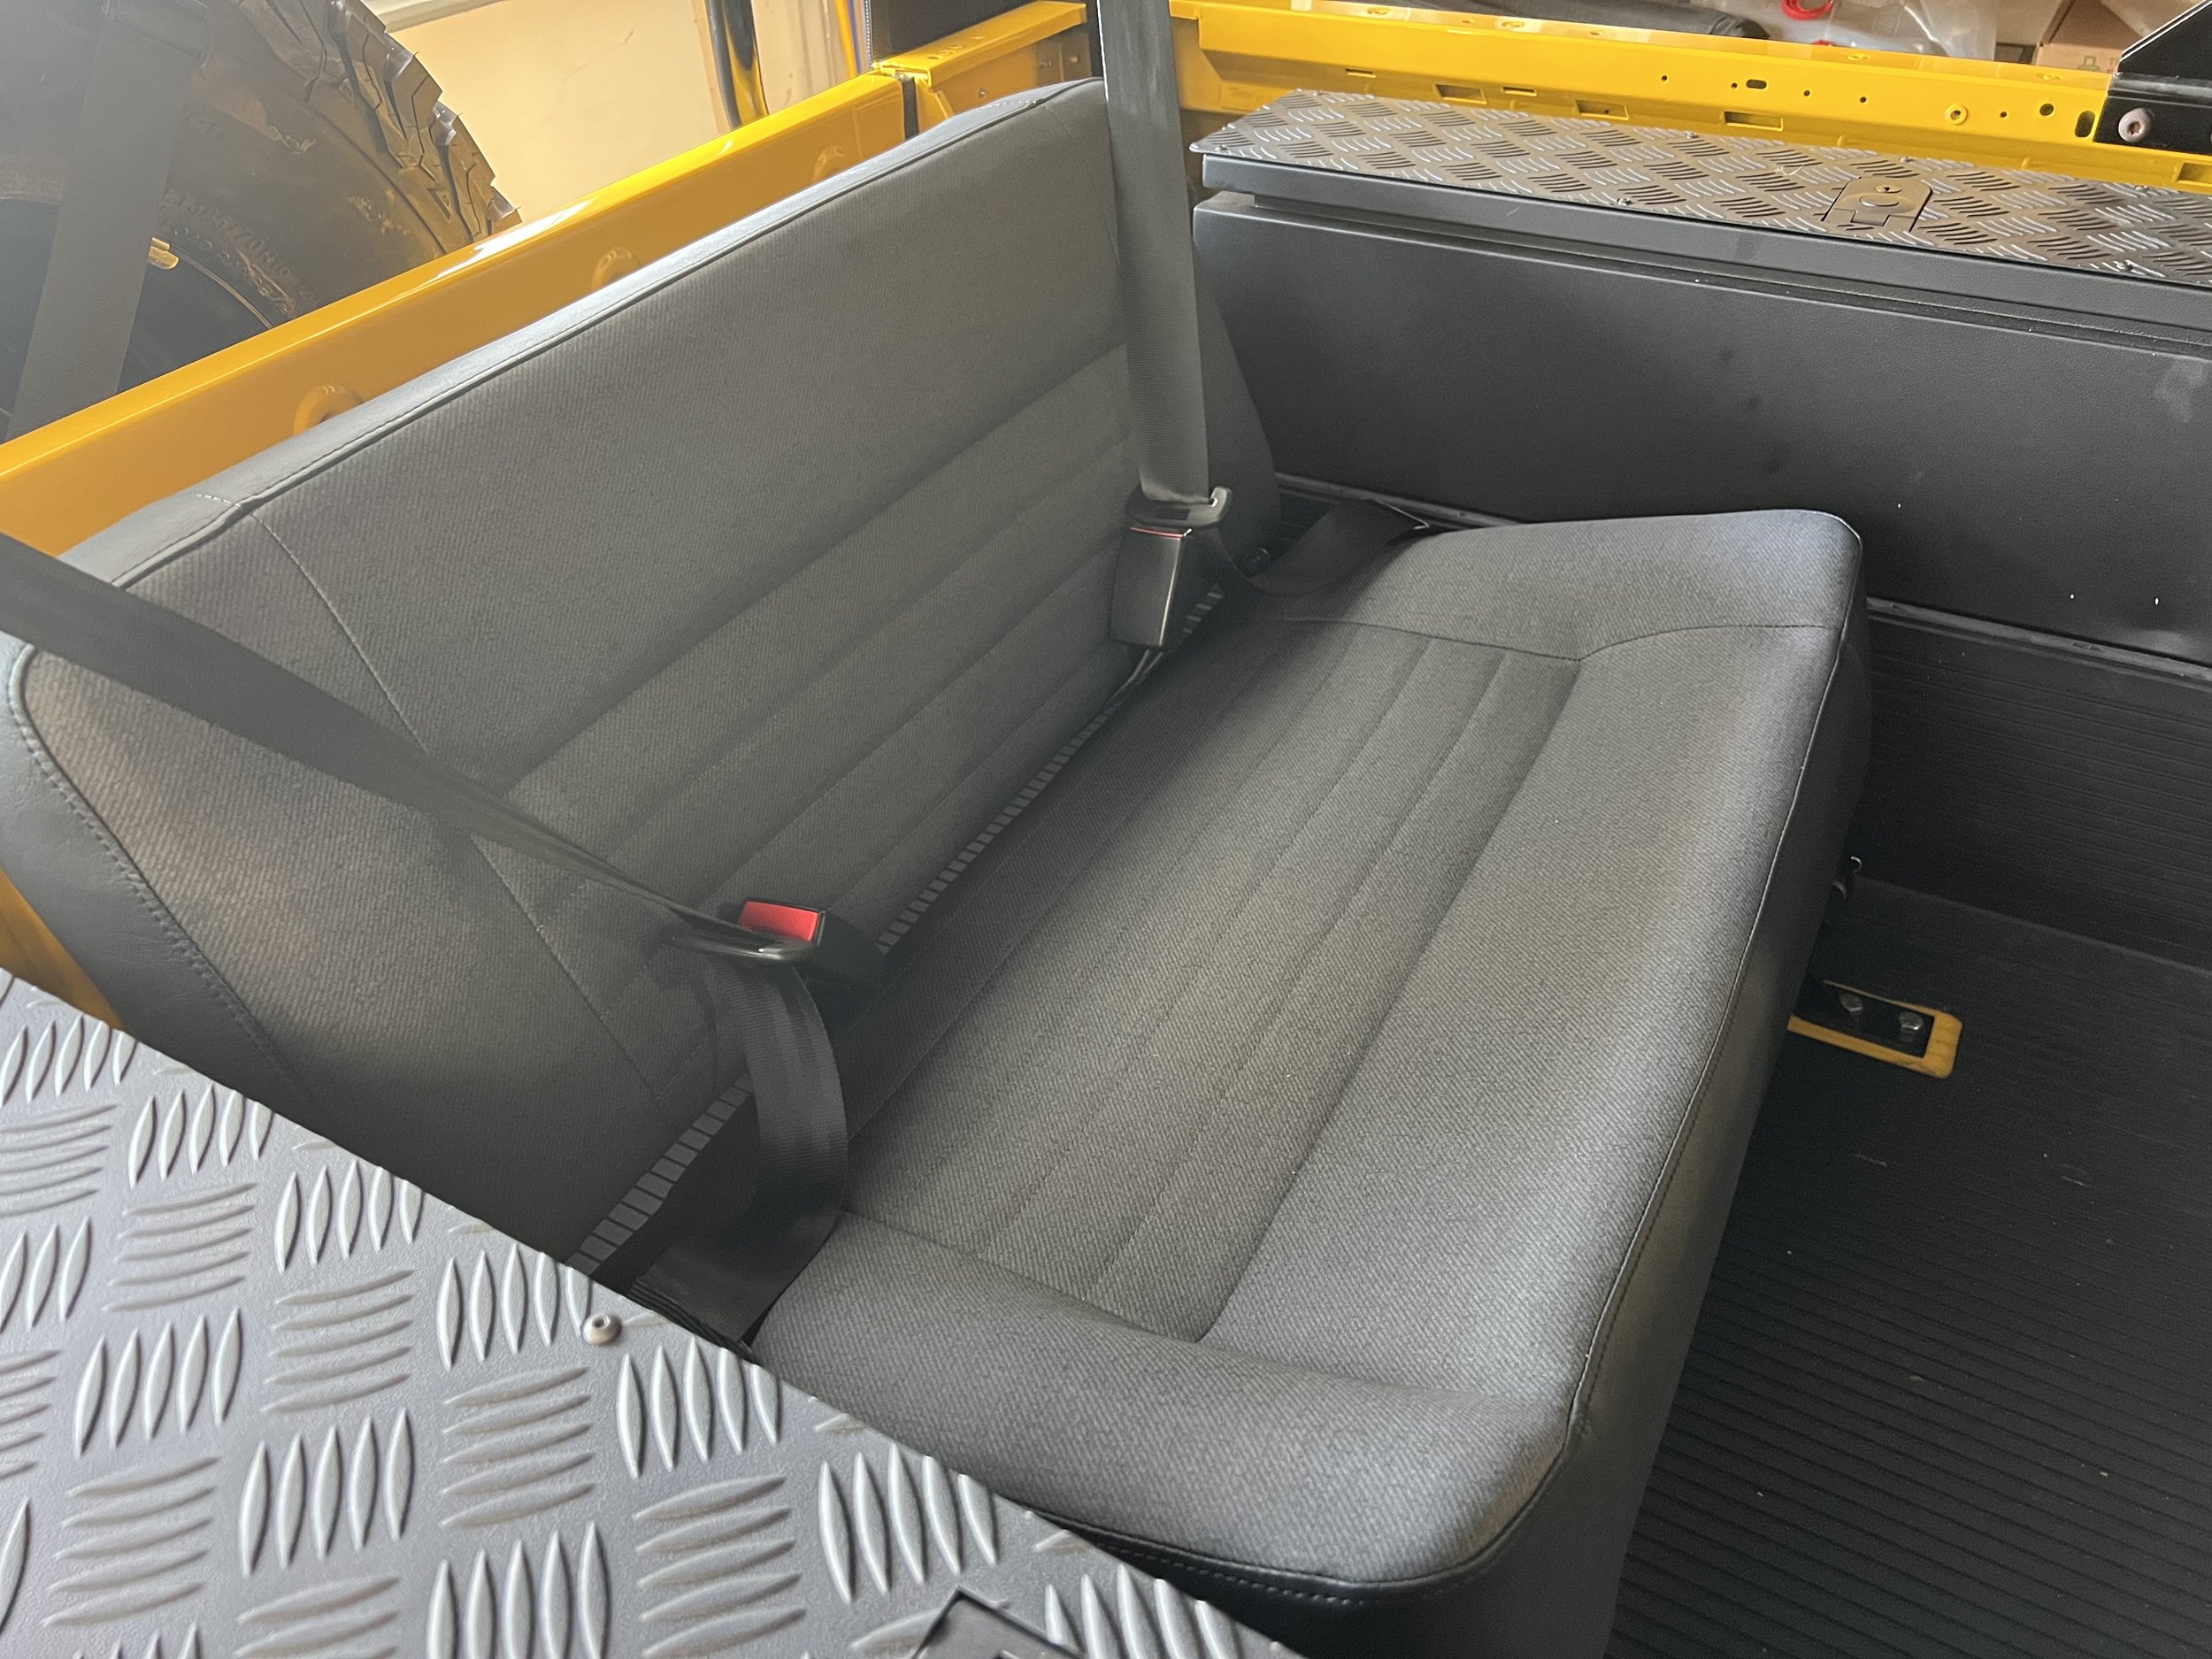
I decided my kids were worth the money and effort to get a proper rear seat that was safe(ish) but would also be in the spirit of my build. I found an original bench seat a local Defender owner was selling. It was not in the best shape but it functioned and I figured I could refurbish it. My truck did not come with rear seat belt mounts or the bench brackets. The bench brackets that came with the bench I bought were bent and rusted so I bought a new set offered by Rovers North. I also bought OEM seat belts and mounts as well as a reupholstery kit from Exmoor to match the OEM fabric and to match the front seats.

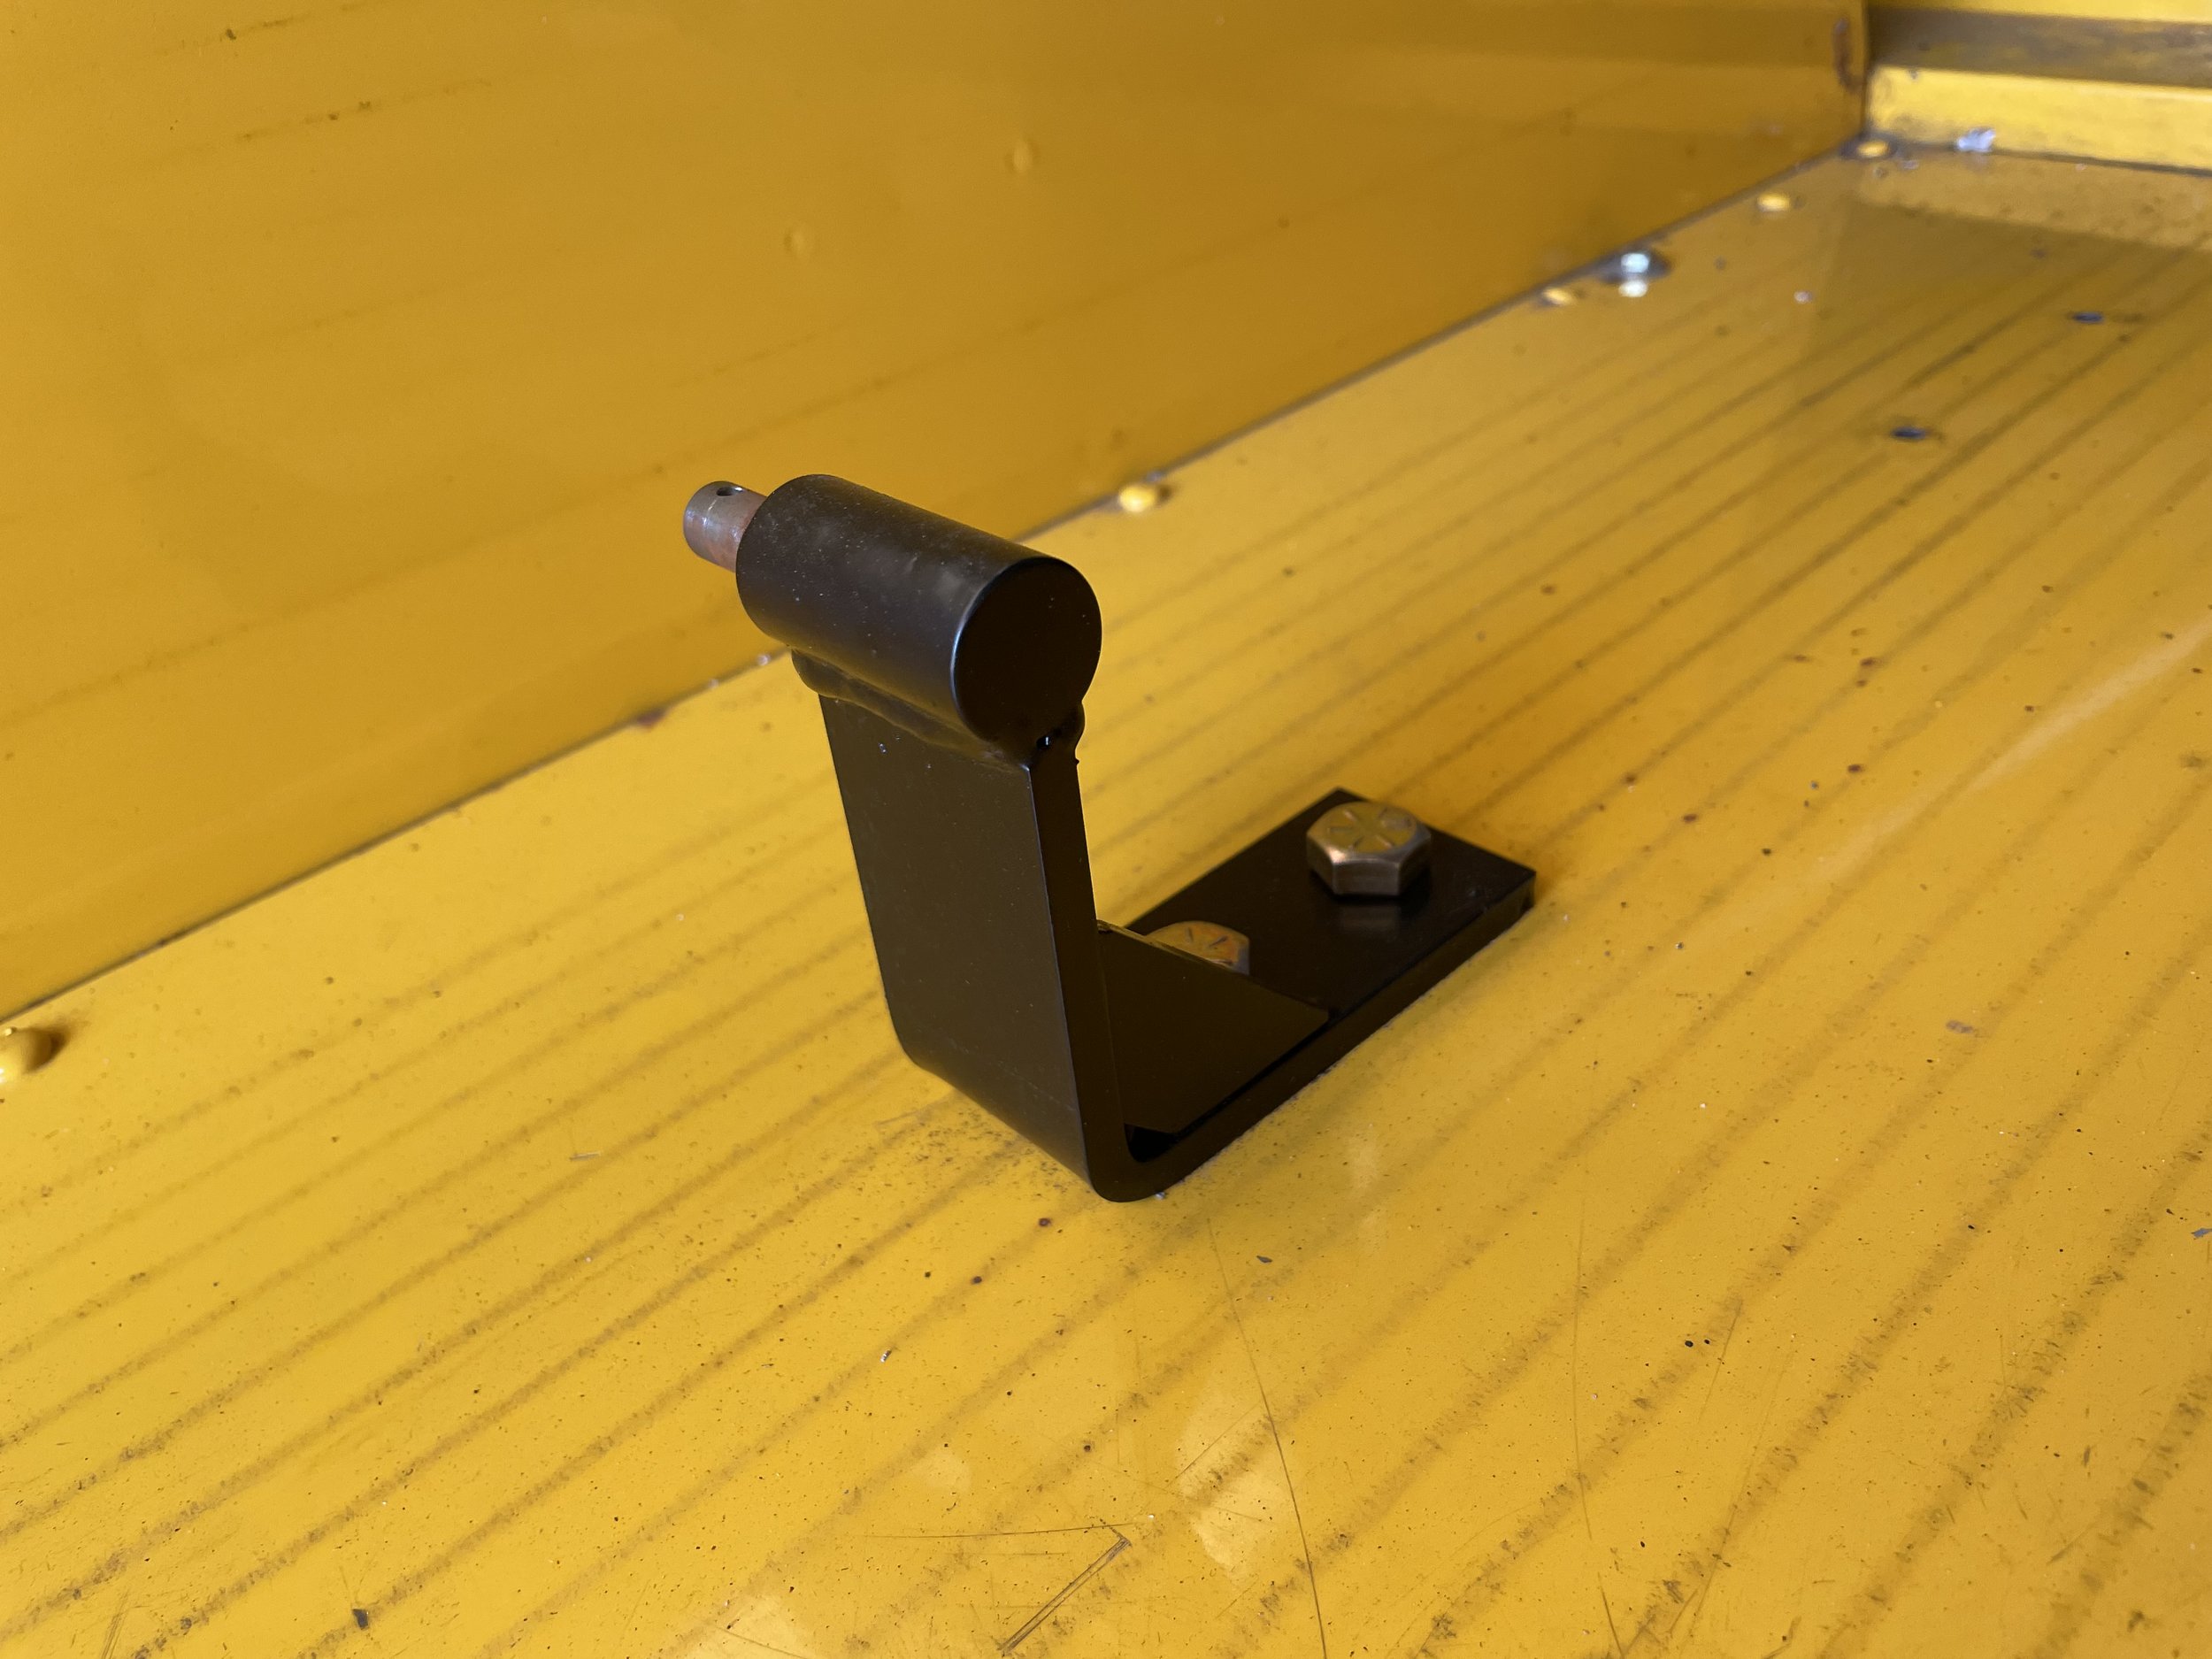
Unfortunately my NAS truck has one unexplained oddity and that is the rear roll cage hoop. NAS Defenders originally were trucks which means the standard roll cage ended at the B pillar. That roll cage had some foam padding molded onto the metal bars. An option was to buy a safari roll cage which added the back half of the roll cage from the B pillar to the rear of the truck. That also had foam padding molded onto the bars. My truck has the original NAS padded roll cage to the B pillar along with the padded horizontal bars from the B pillar to the rear hoop, but the rear hoop itself is not padded. I have no record of why my truck does not have a padded rear hoop and what is even more perplexing is that the rear hoop fabrication looks factory. The seam, the mounts, the specs, the finish, everything looks too perfect to be a custom fabrication job. It looks factory yet is not since it does not have the padding and I don’t believe it ever had the padding. I have reached out to Safety Devices who is the manufacture of the roll cages and they said my rear hoop was not built by them (although I am not totally convinced as it looks like their work). Regardless, what this means is that my rear hoop did not have a seat belt mounting point for the shoulder strap so I had to get a mount fabricated.

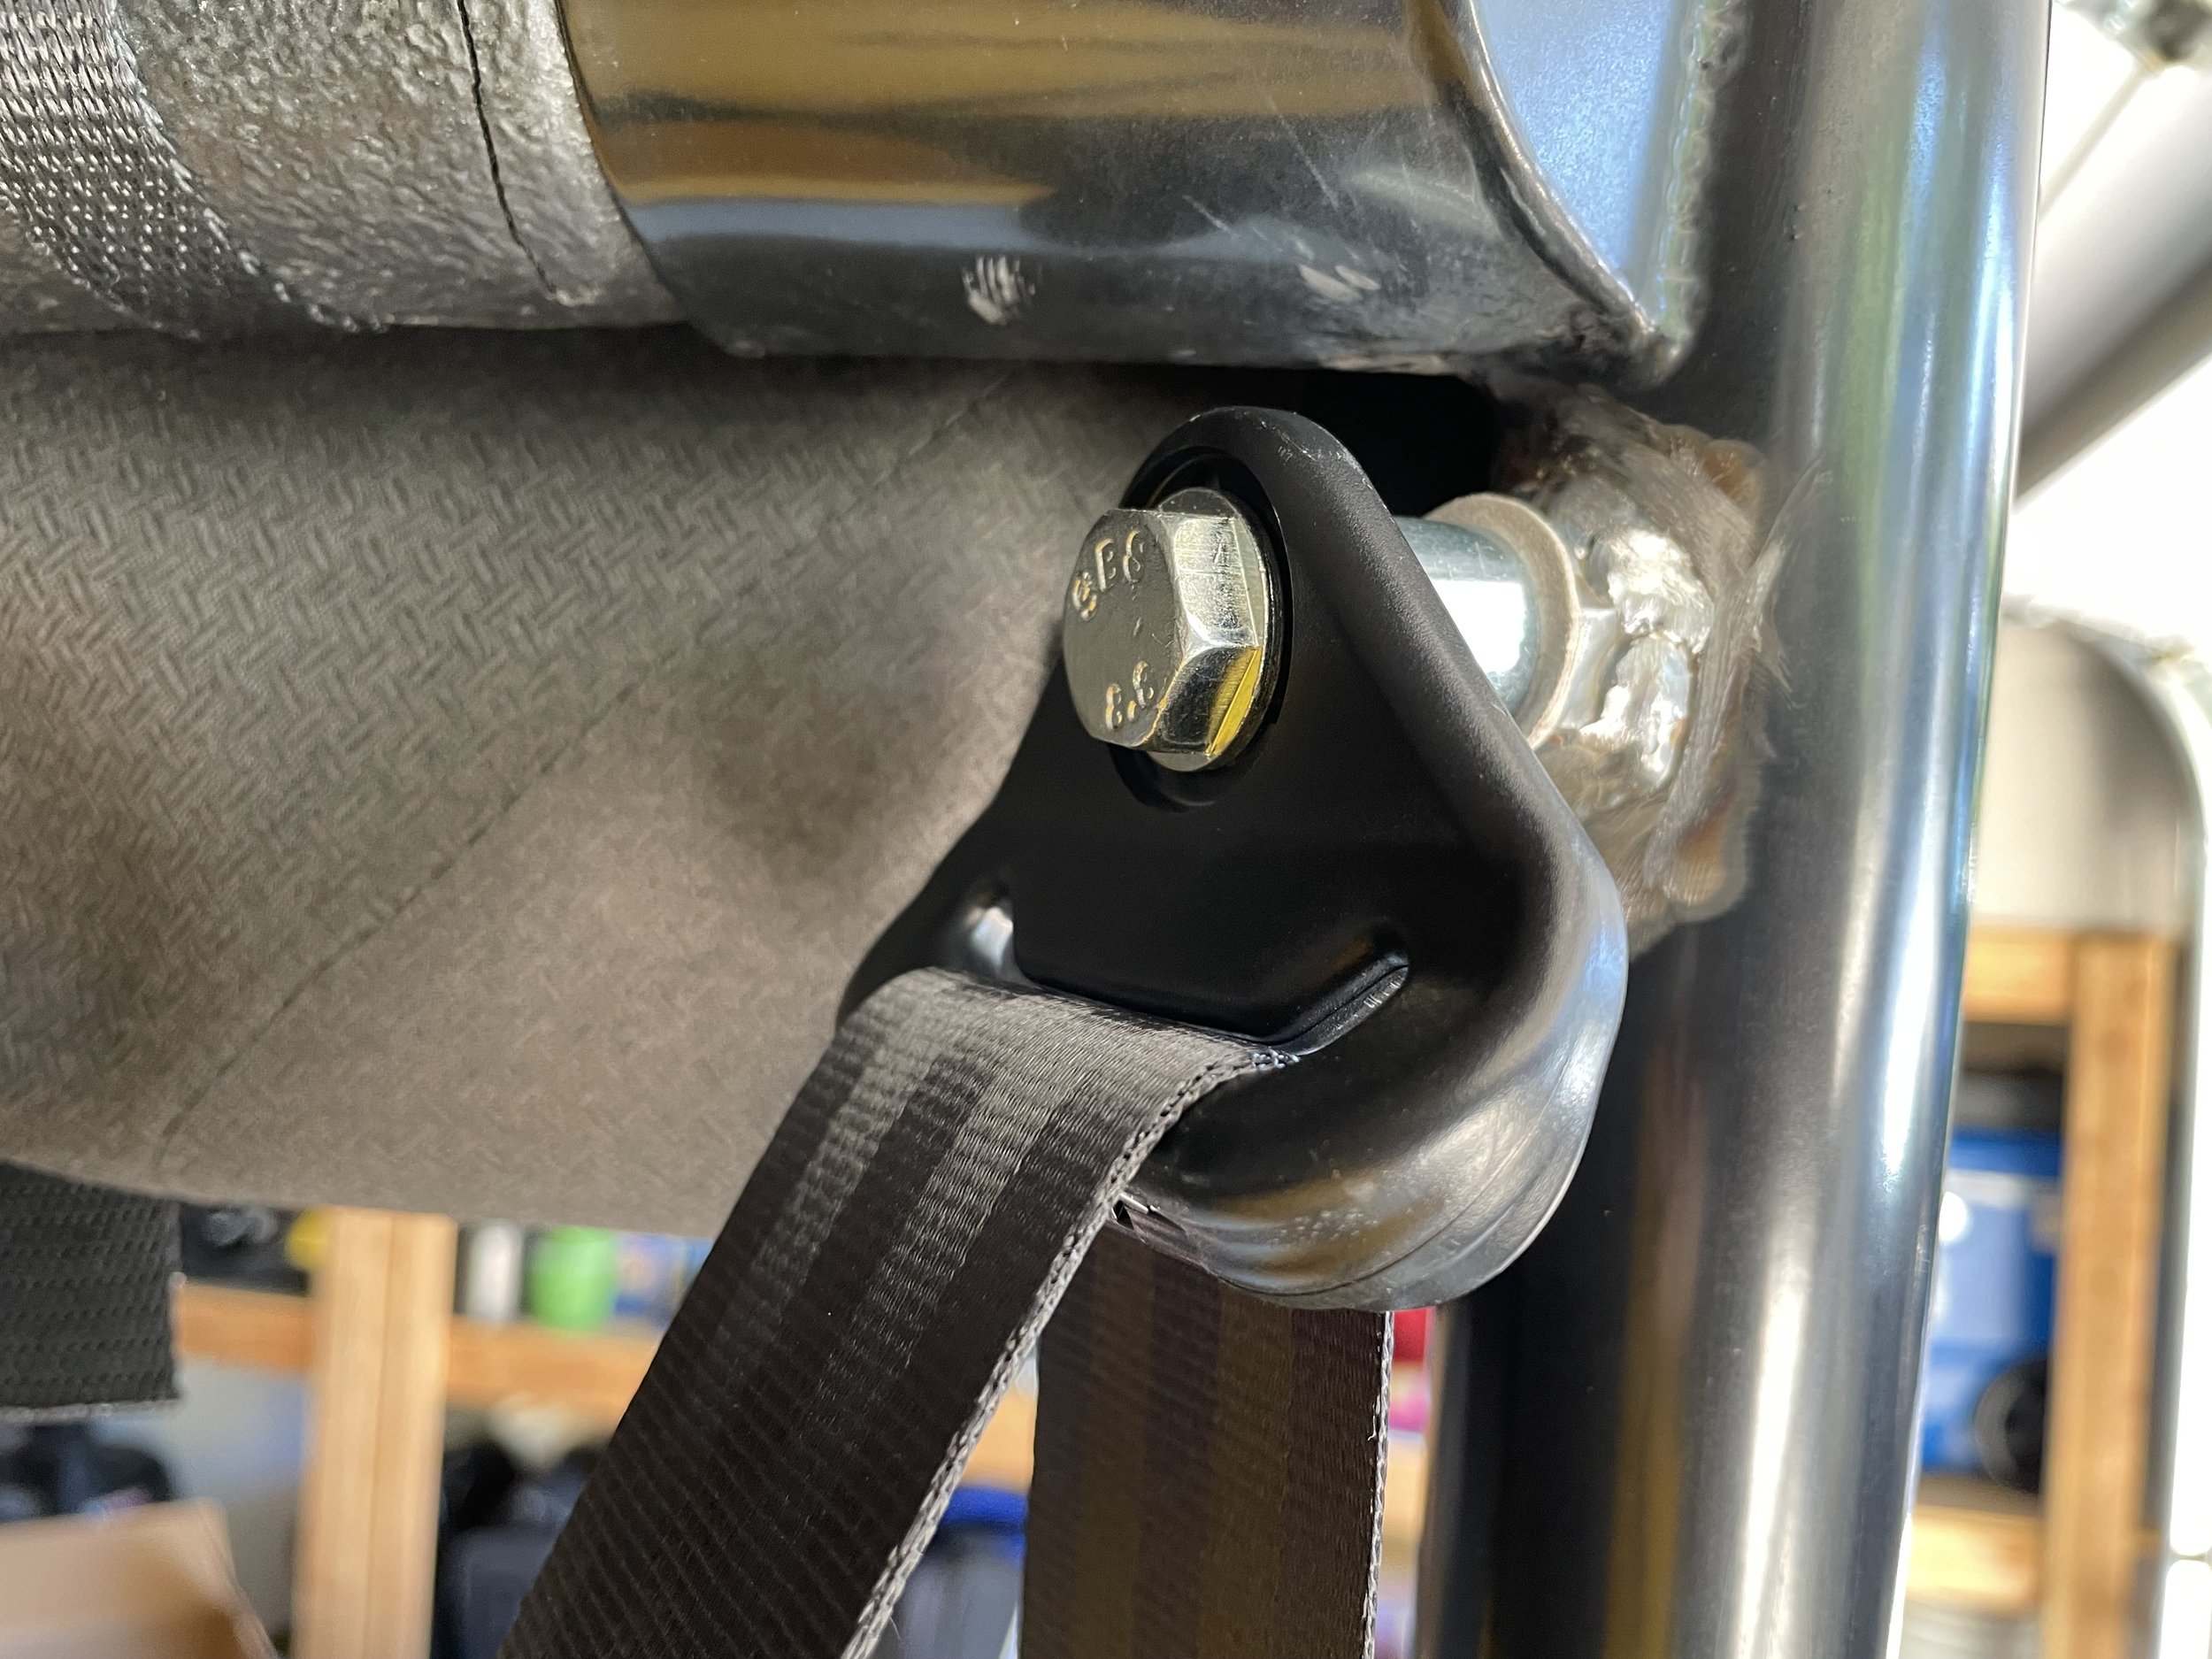
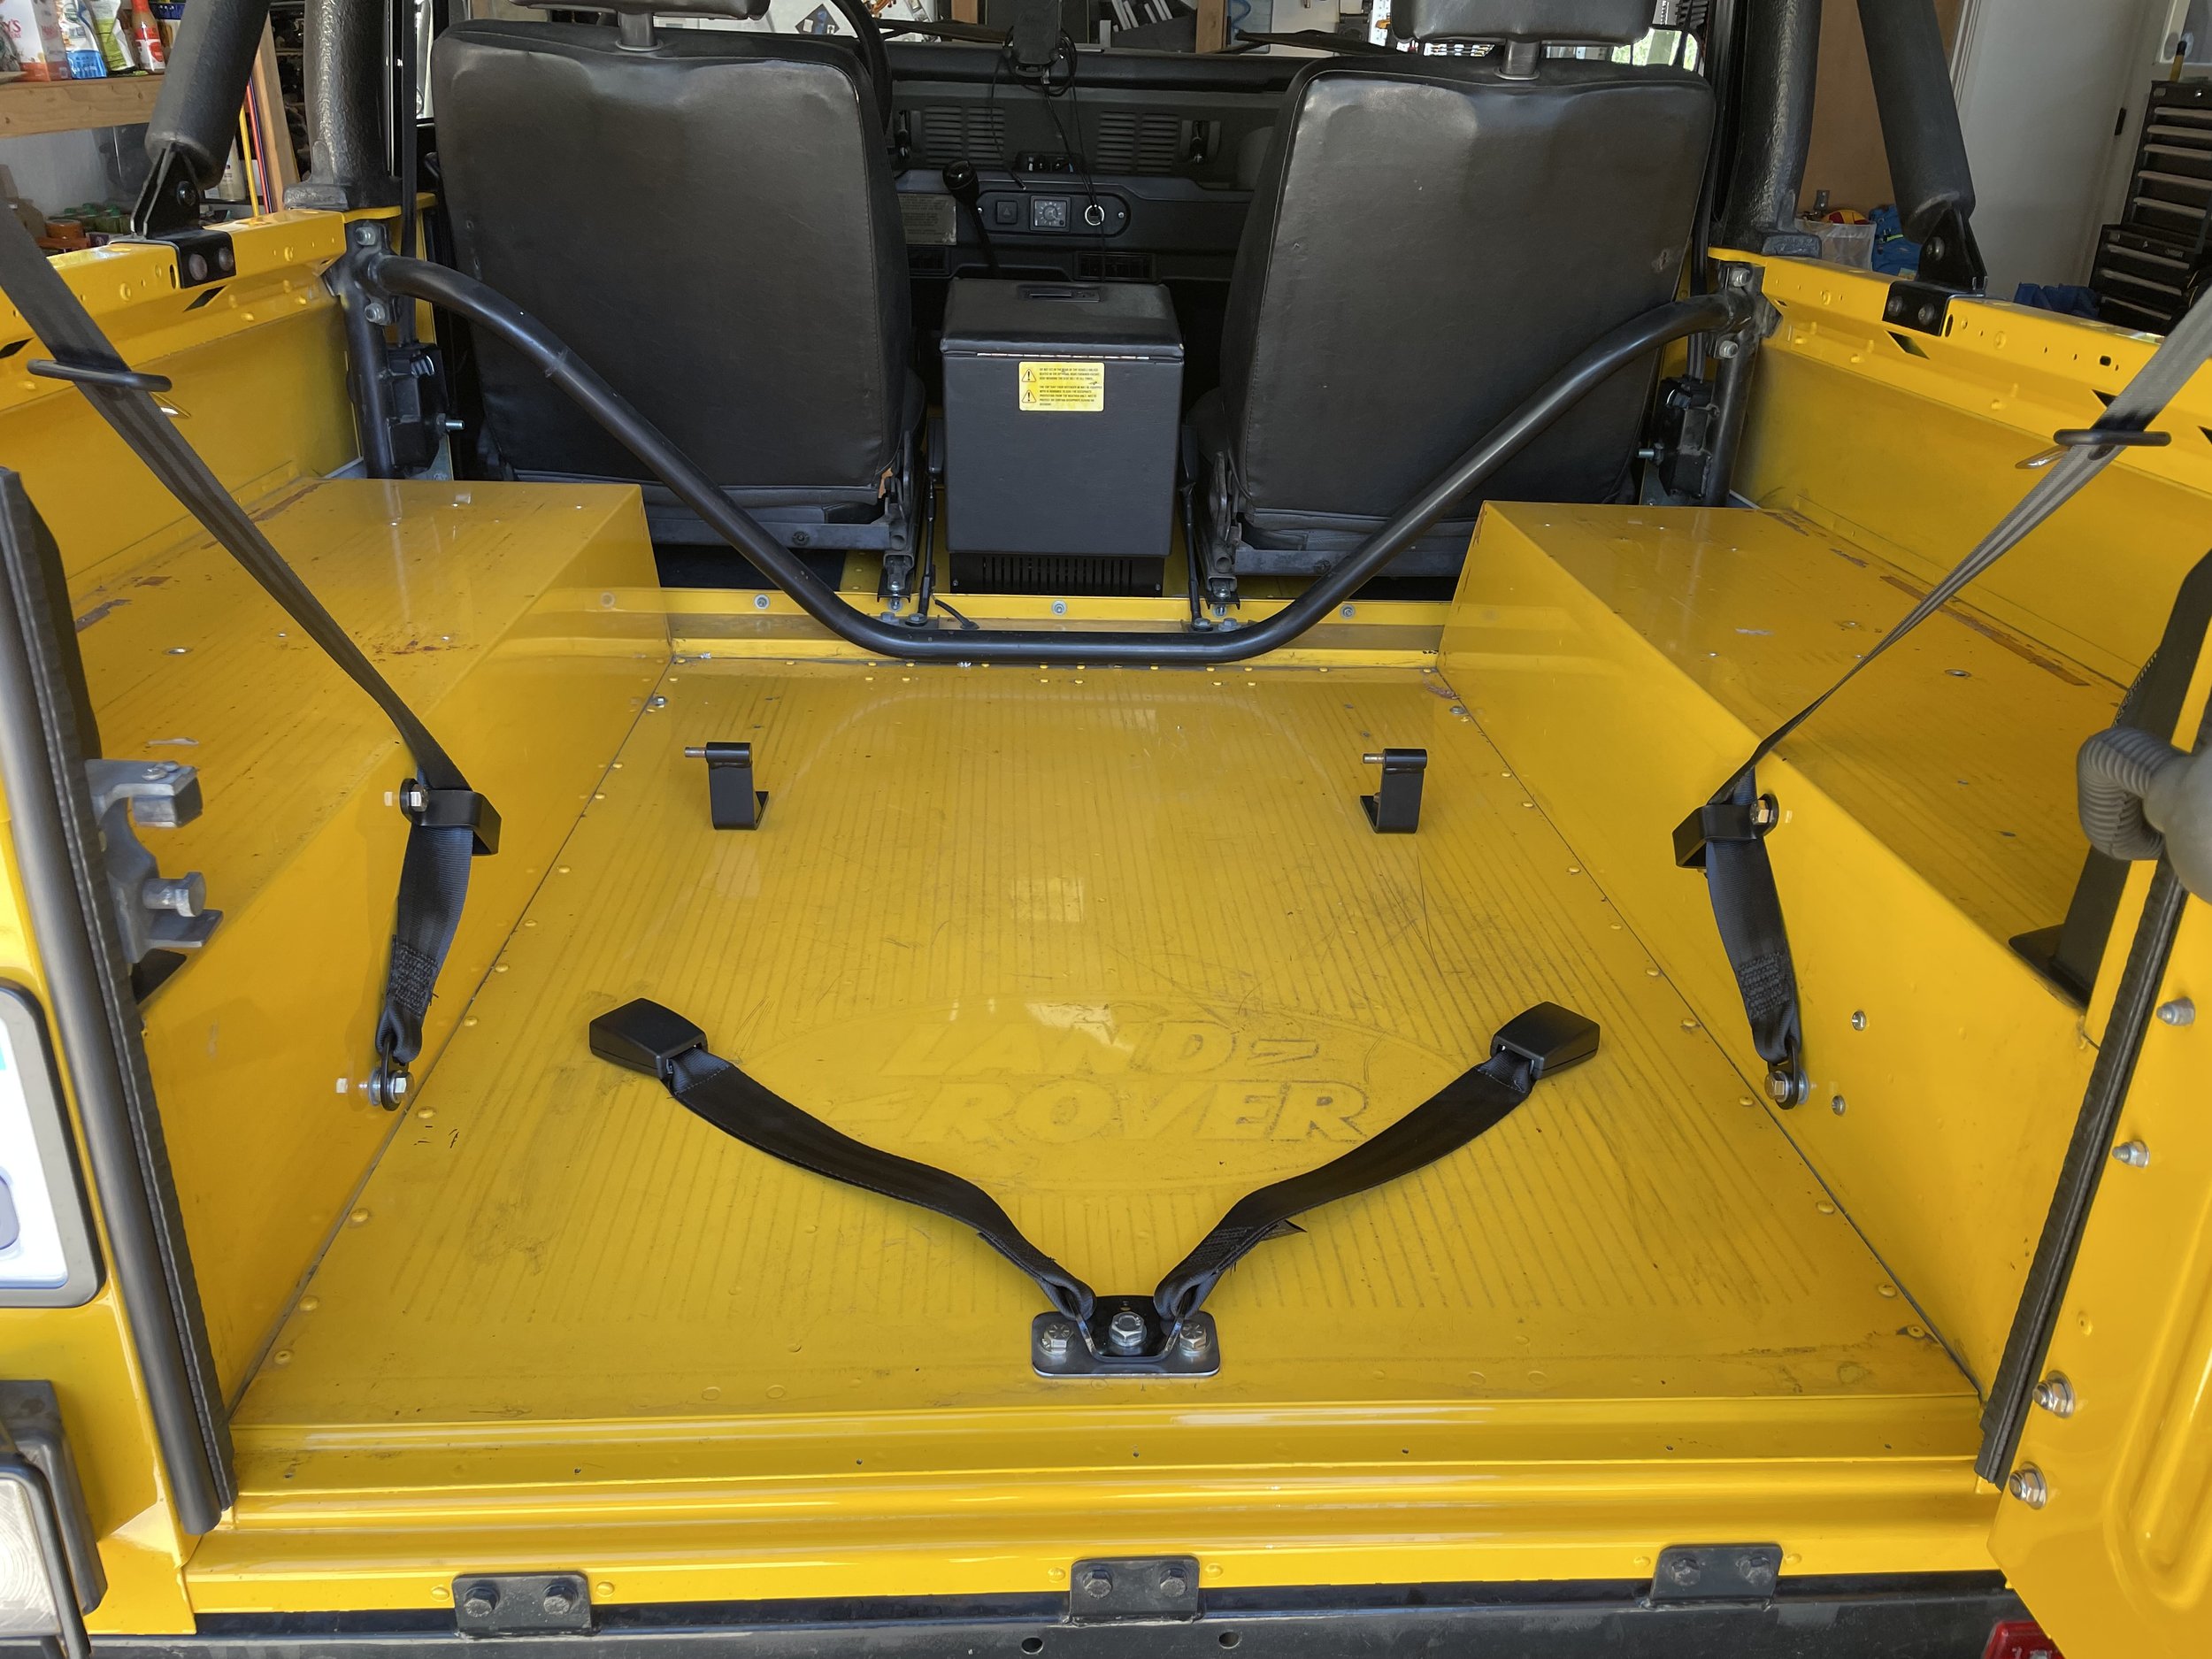
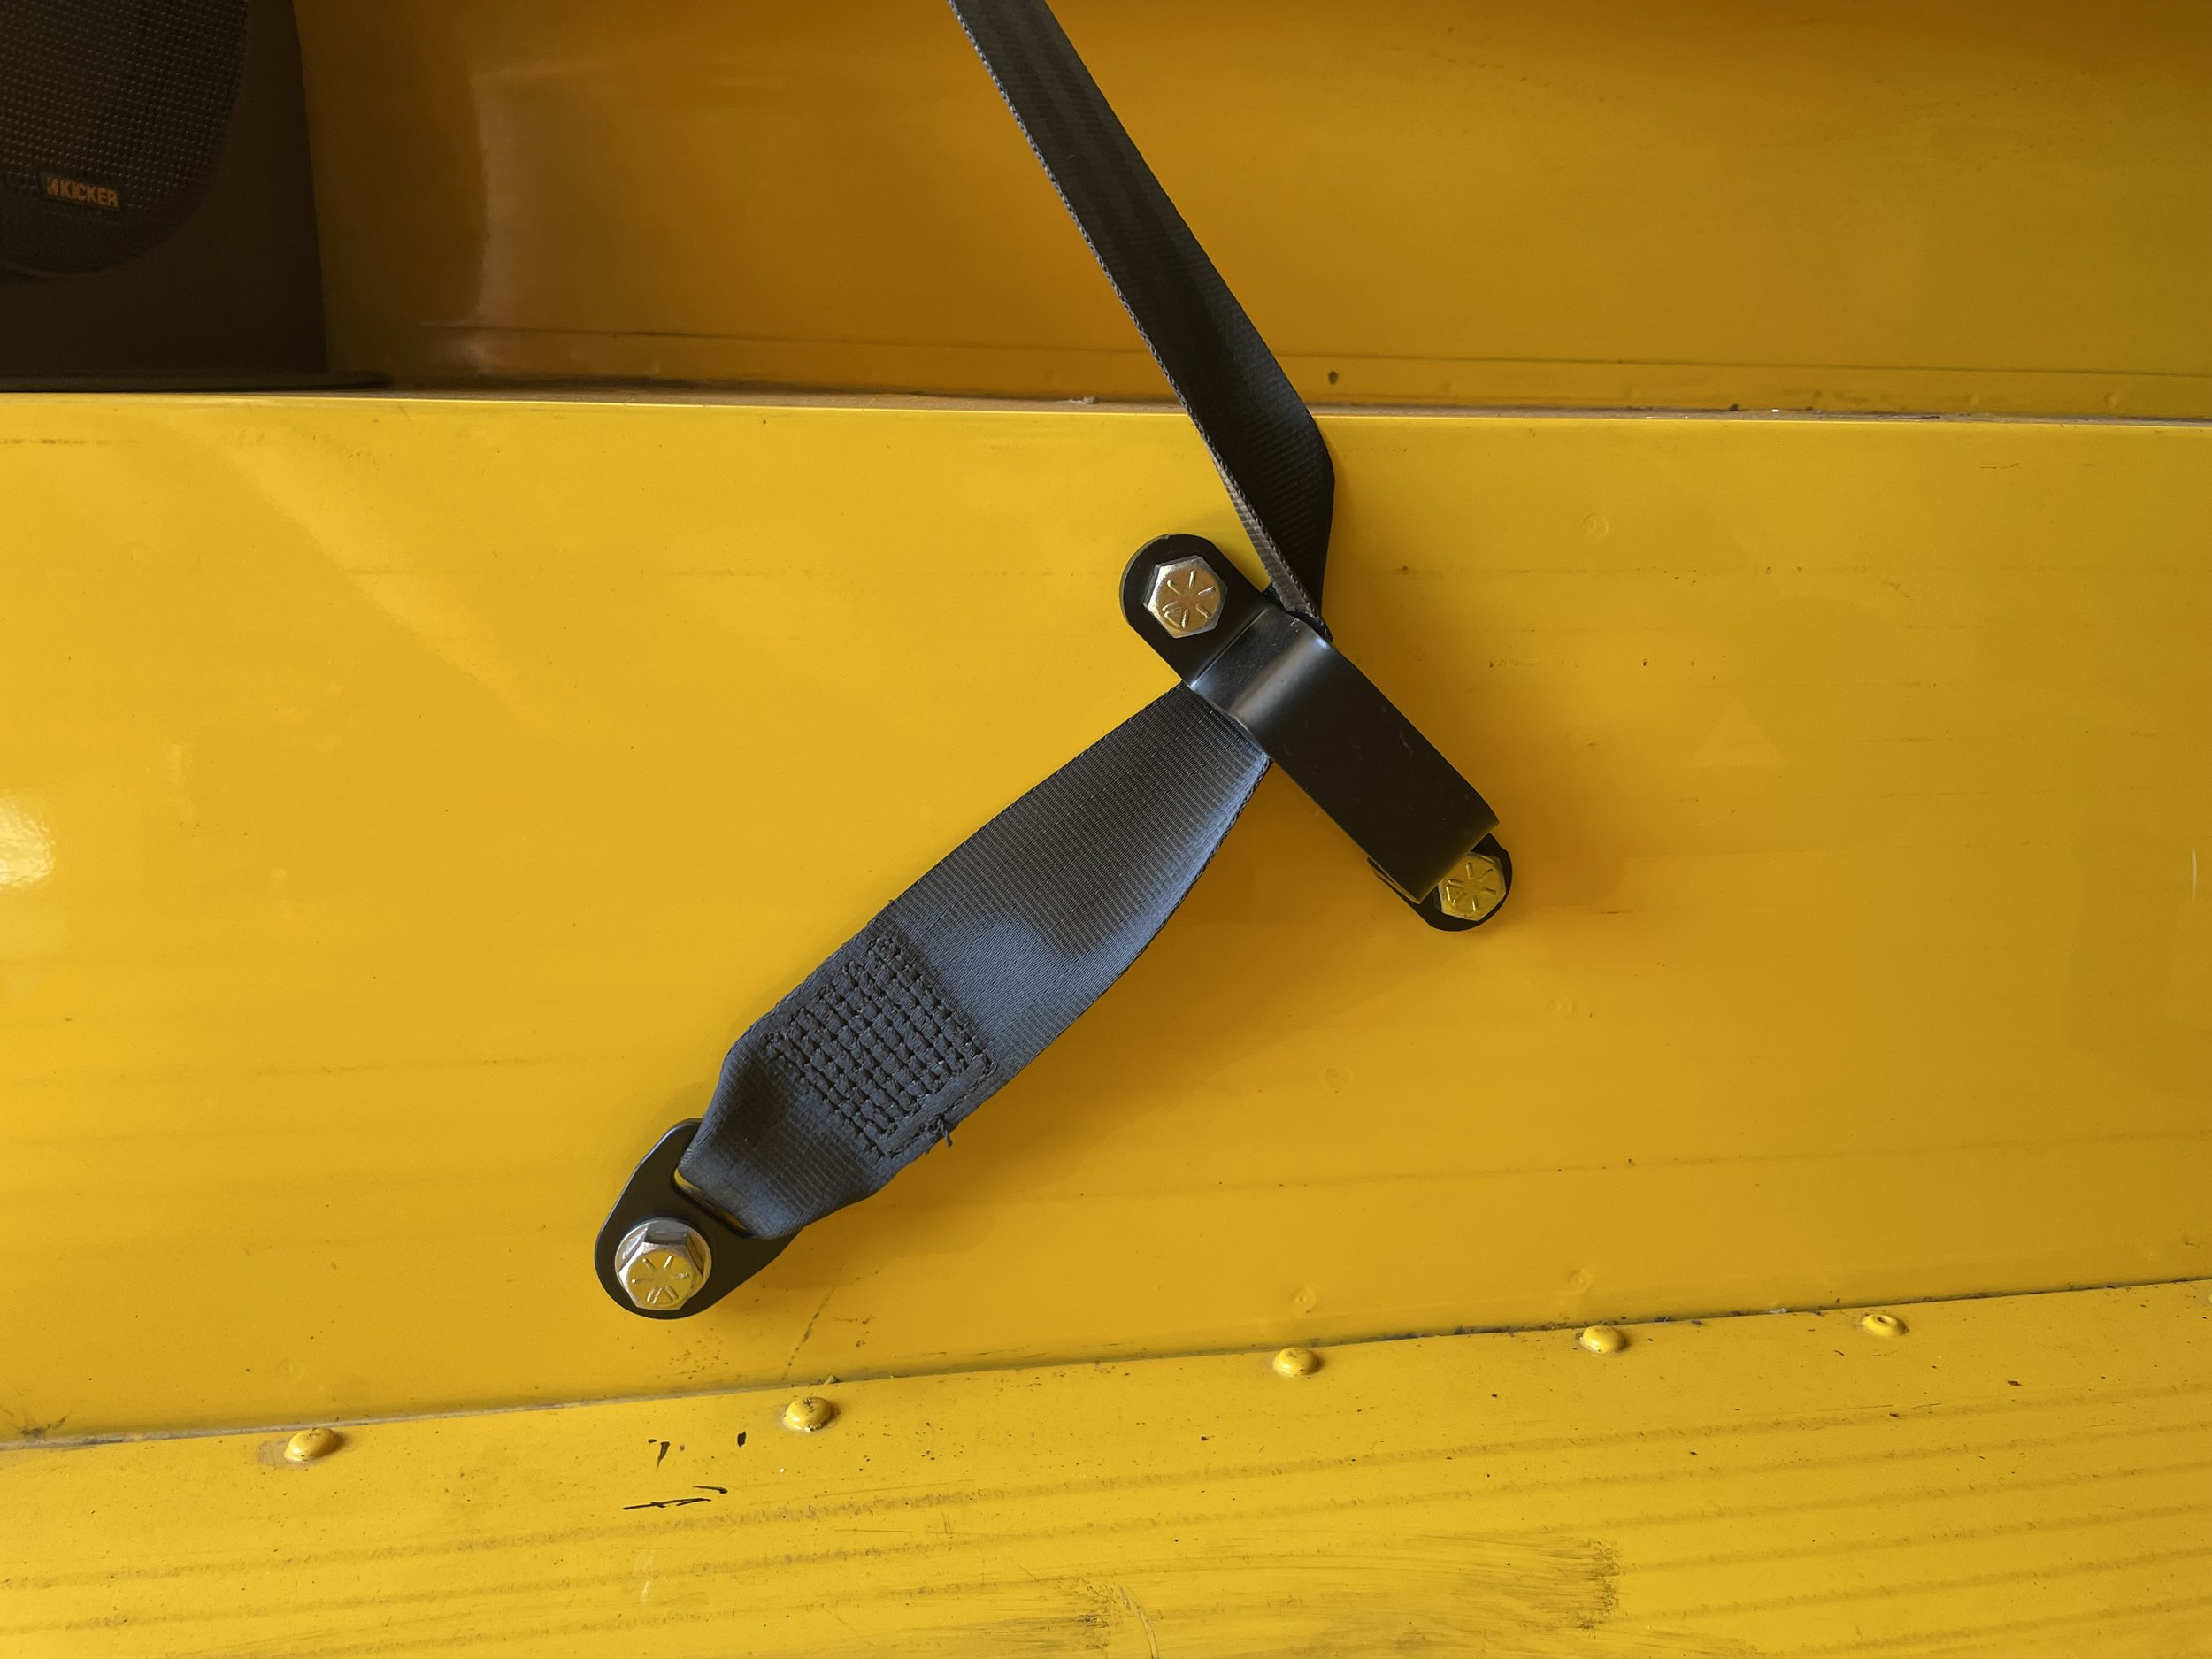
I had a metal fabricator weld on bolt mounts to the rear roll cage (similar to the factory) as well as mount the seat belt mounts and bench mounts to the floor. I picked a metal fabricator that builds race cars and is certified as a roll cage builder to ensure the work was safe and adhered to standards. I then took apart the bench in order to refurbish some parts and re-weld some components. I then had an upholstery shop install the upholstery kit.
The end result is a truck with OEM seating that is period correct. My kids have a safer seating option in the rear and the front seats are much more comfortable. As with all projects like this it ended up being much more expensive than I anticipated due to all of the custom fabricated work needed for the rear bench. If you are looking for a quick, easy, and cheap option don’t do what I did. But if you are looking for a period correct, factory spec, stick to the spirit of the design, but have some safety for your passengers then my project hits the mark.